Friday, December 28, 2012

Crafty Fridays: How to make a Crib Sheet


Several weeks ago, I posted how to make a crib skirt, but I kind of left you hanging on the rest of the crib.

Honestly, when I first thought I might try tackling making things for the nursery, the crib sheet was not on the list. I mean, it involved adding elastic after all. No way I wanted to go there.

But then... I couldn't find anything to match my fabric except white -- and yawn, how boring. After searching through a few tutorials, I begin to realize that maybe, just maybe making my own sheets wouldn't be quite as hard as I thought.

And you know what? So right. This is actually one of the easiest projects for the nursery yet. Don't worry - you don't have to actually attach the elastic to the fabric, only to itself. Which isn't only super easy, but ends up looking better in the end.

Things You'll Need

2 yards fabric (washed and dried)
90" elastic, 1/4"-3/8" width
Spool of thread in matching color
Scissors
Tape measure


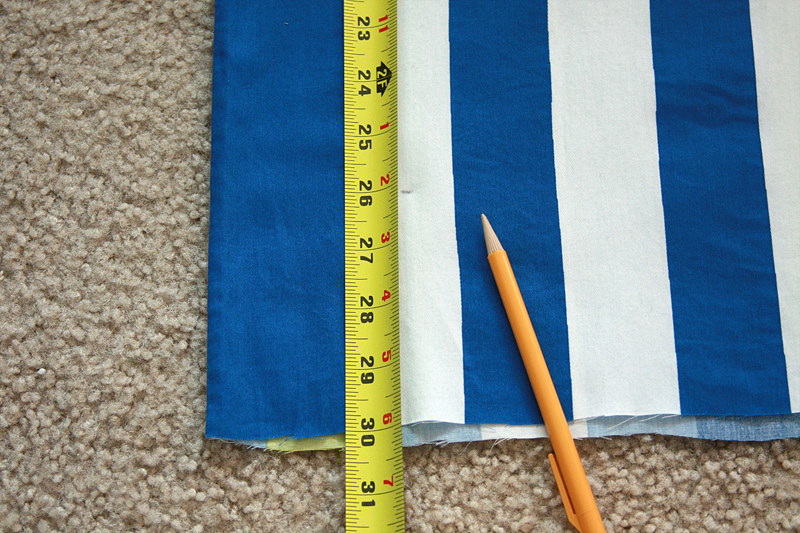
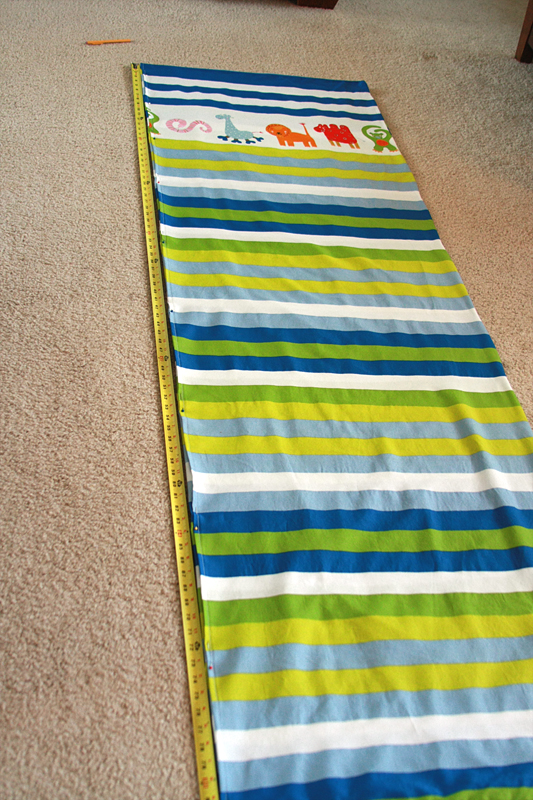
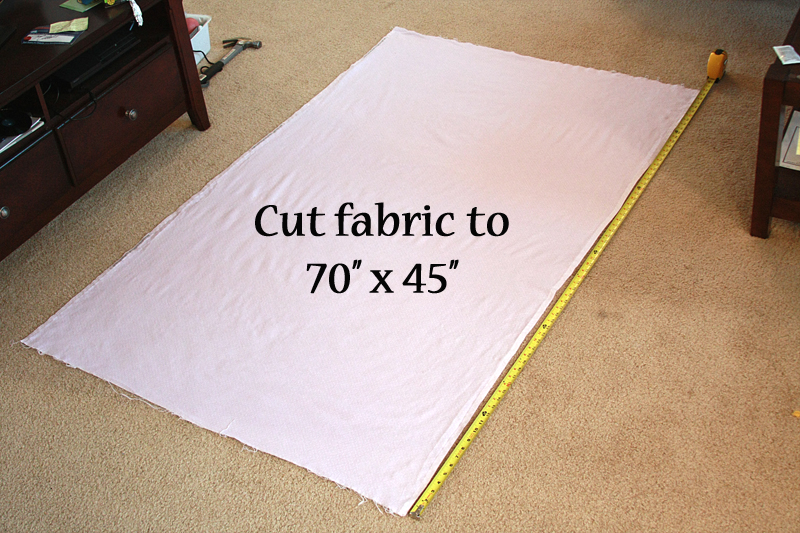
Start by laying out your fabric and cutting it down to 70" x 45". (If your fabric is only 44" wide, that works too.)


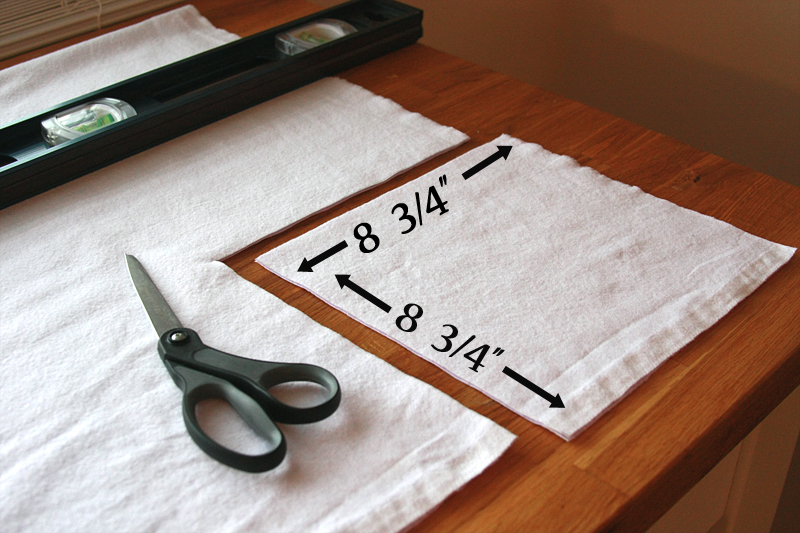
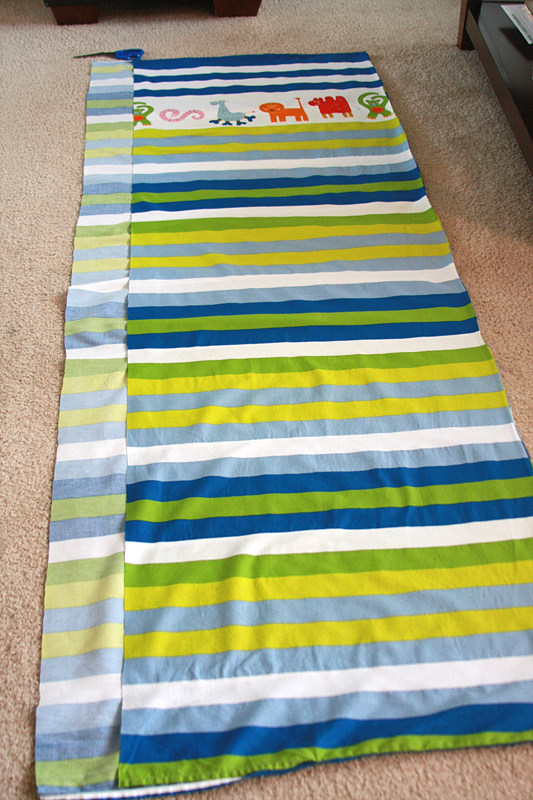
Fold your fabric lengthwise with right sides facing each other. Measure and cut out 8 3/4" x 8 3/4" squares from each corner.


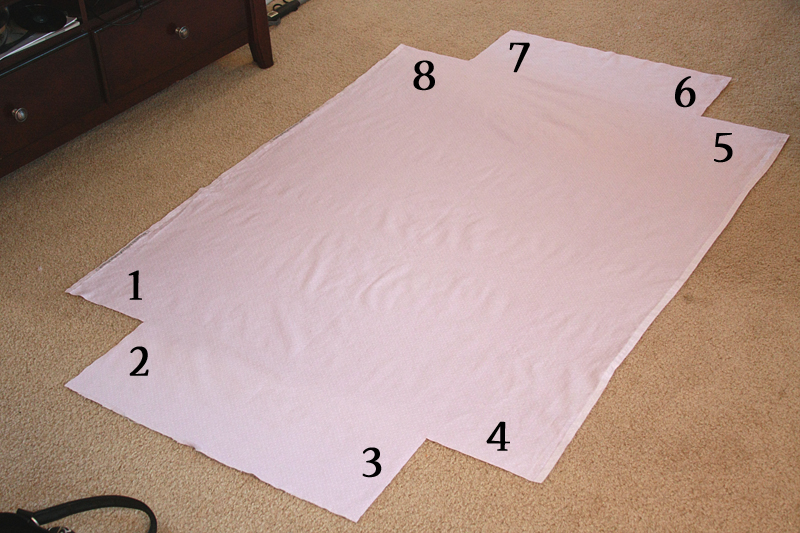
If you open your fabric back out, it should look like this:


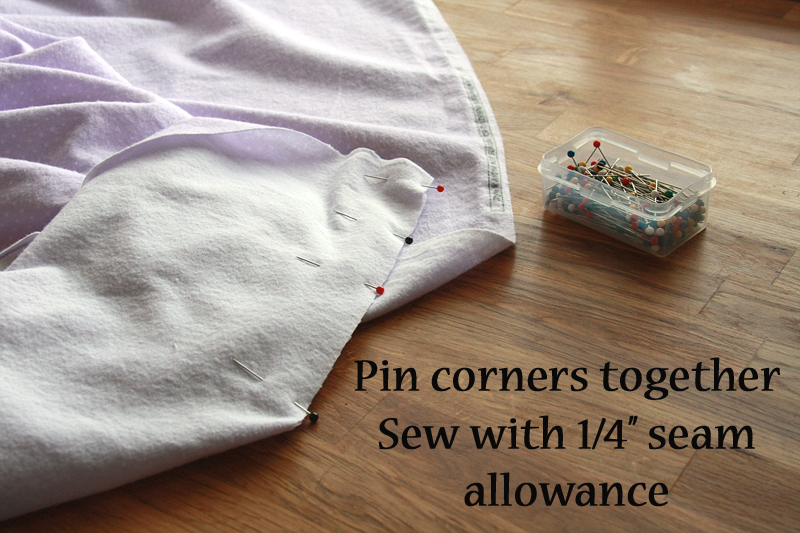
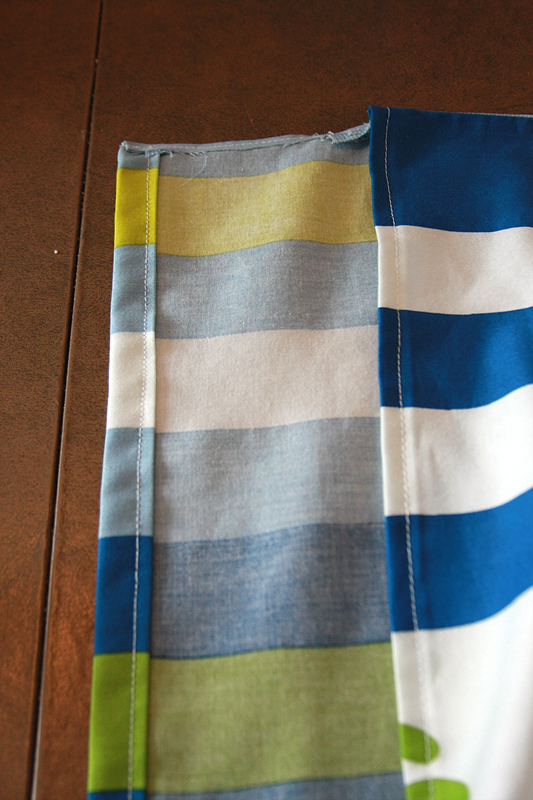
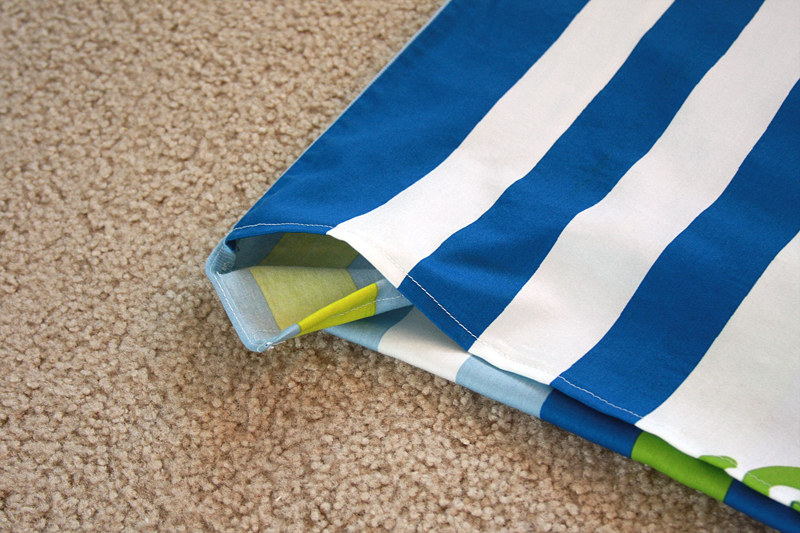
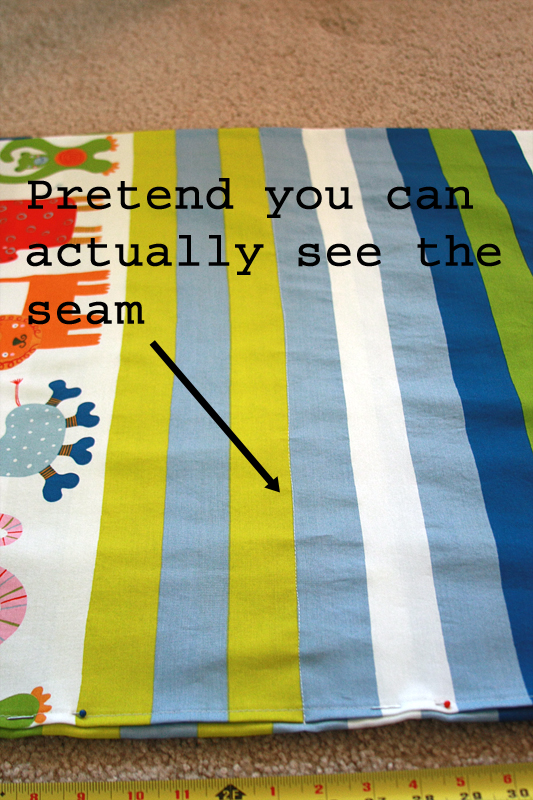
Pin your corners together, right sides facing each other. (i.e. 1 & 2, 3 & 4, etc.) Sew together with a 1/4" seam allowance.


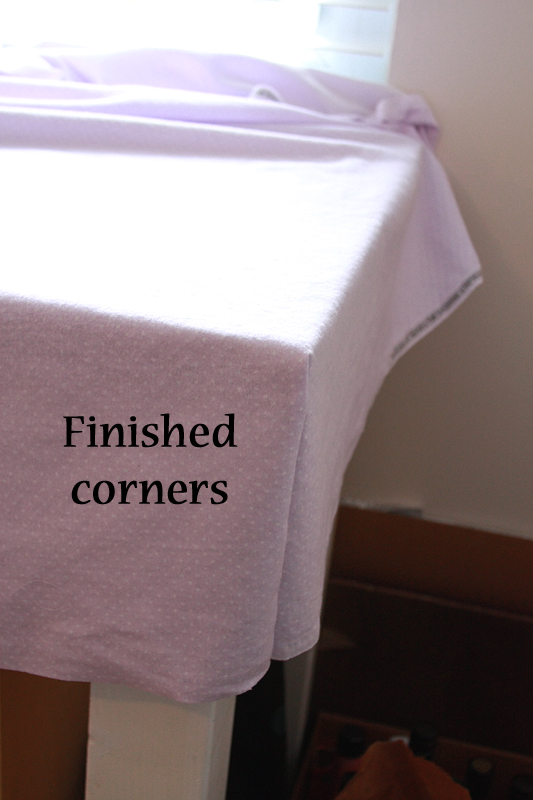
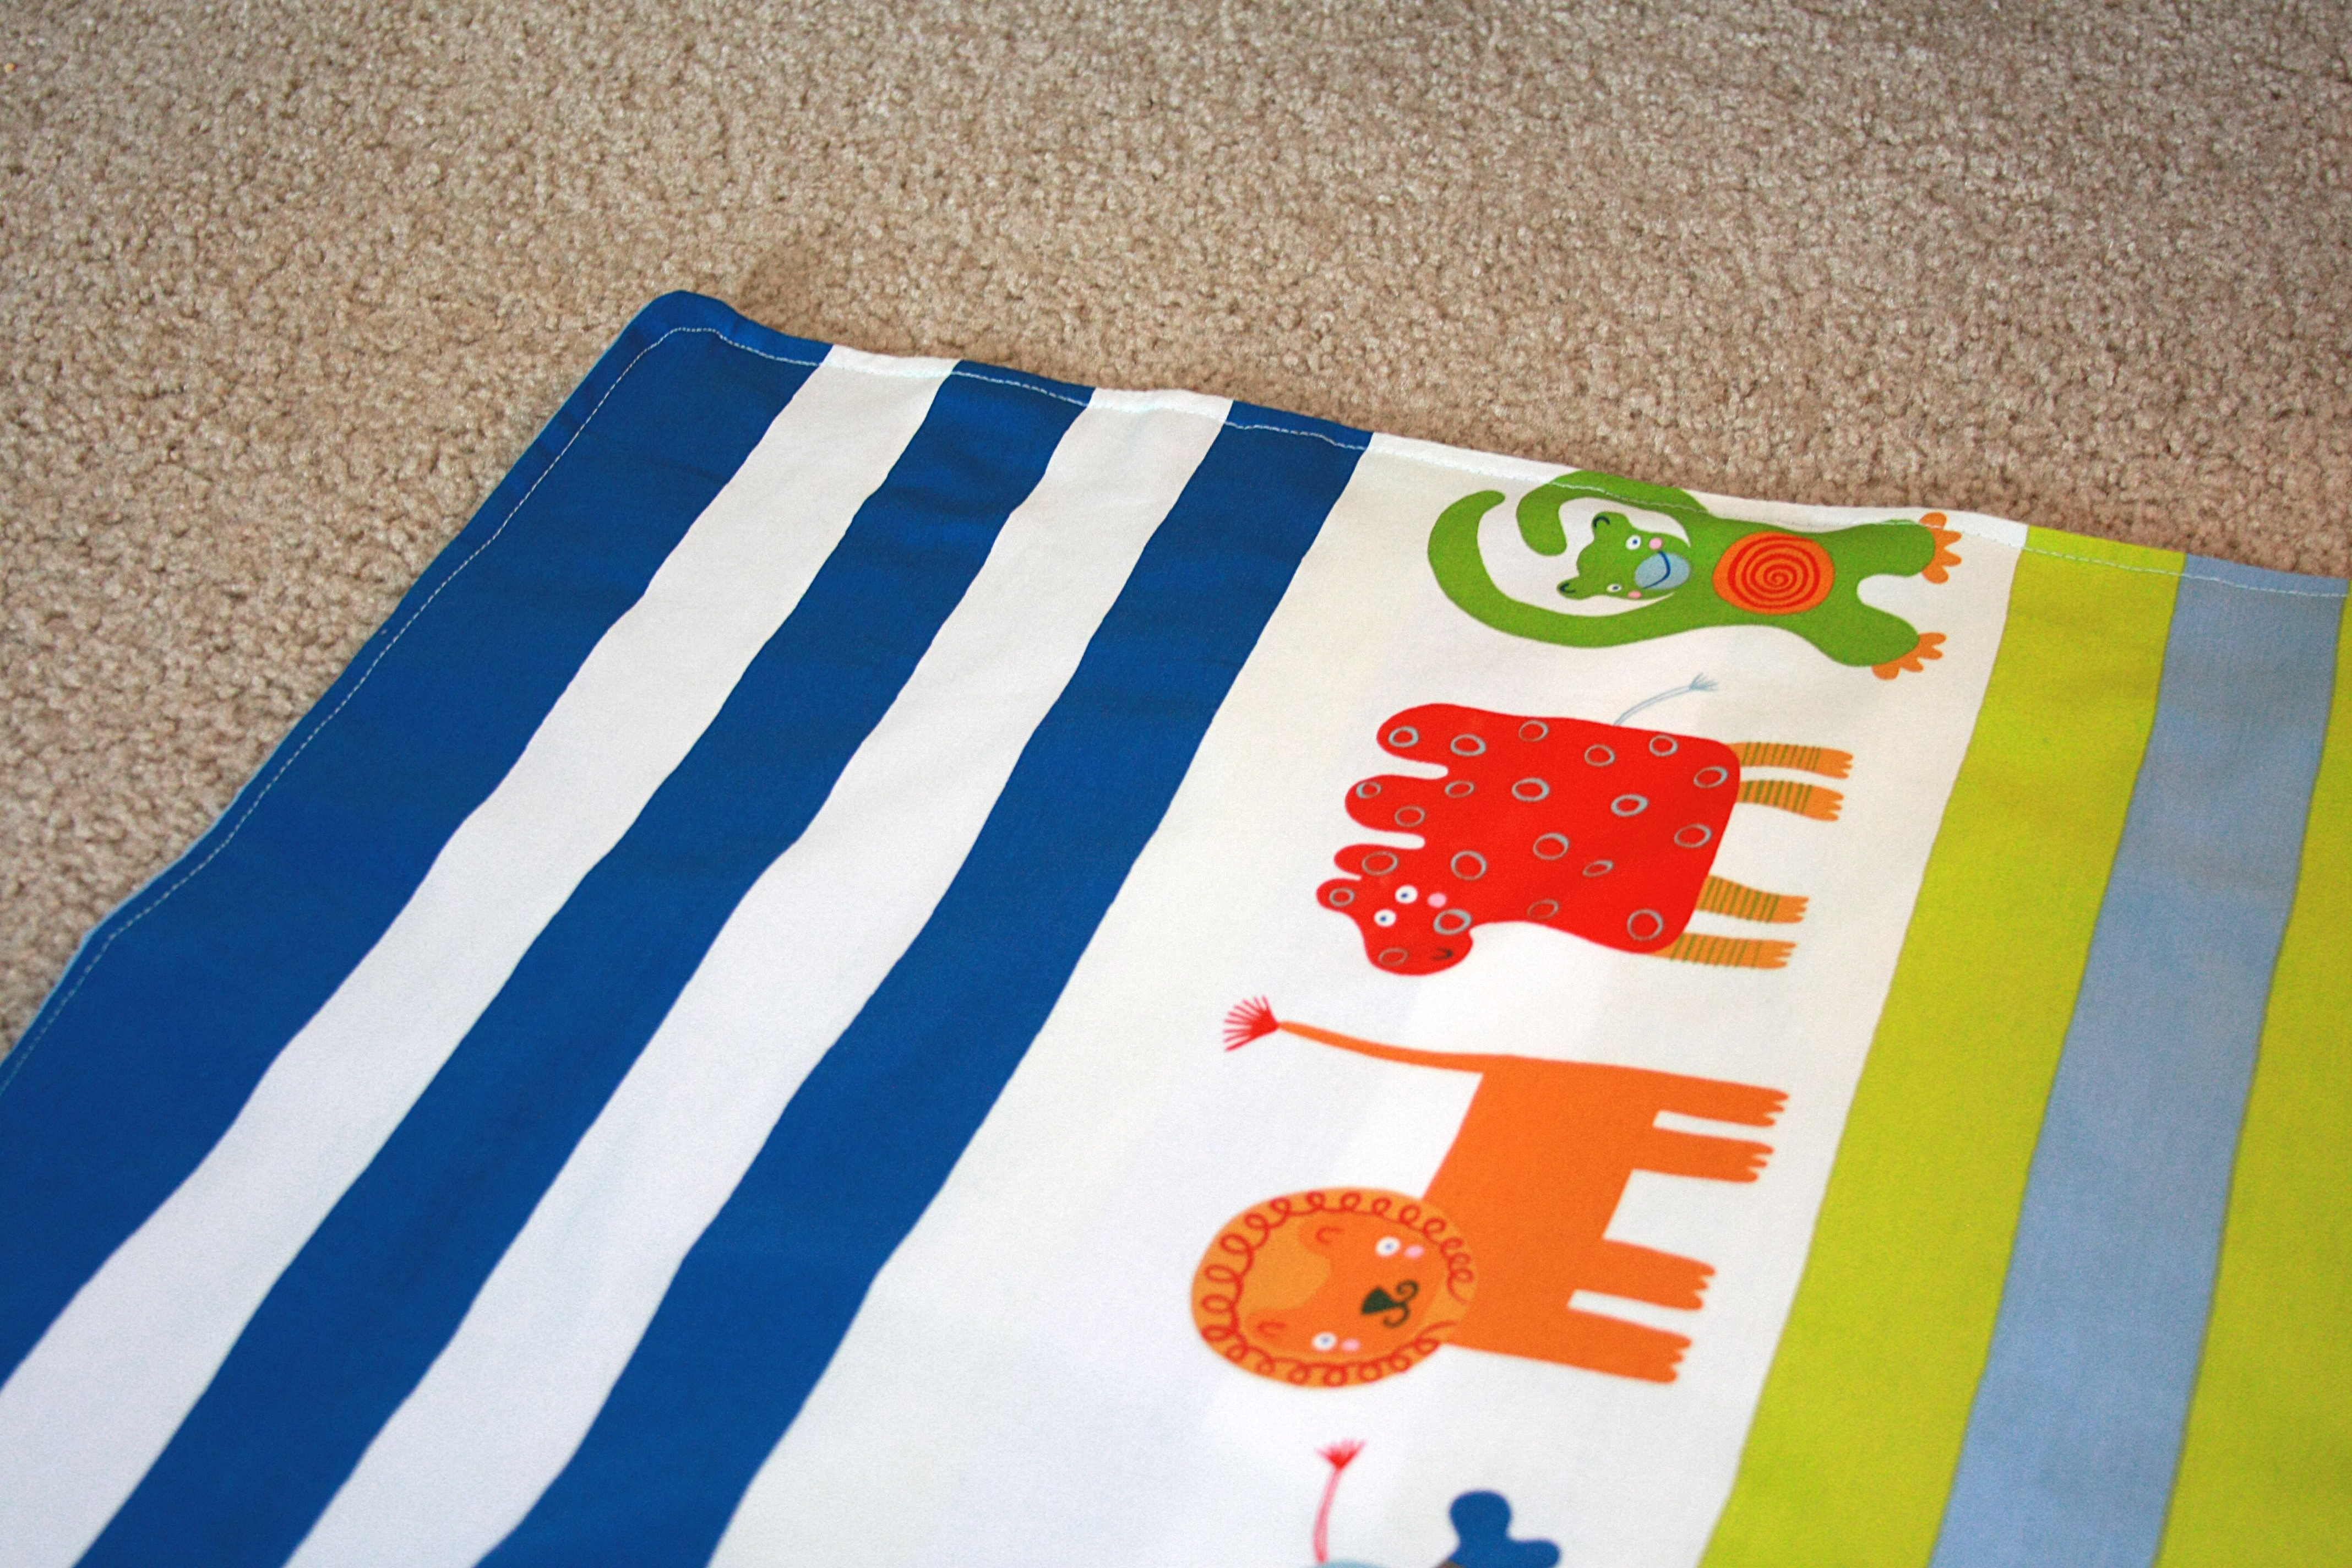
Once flipped right-side out, they should look like this:


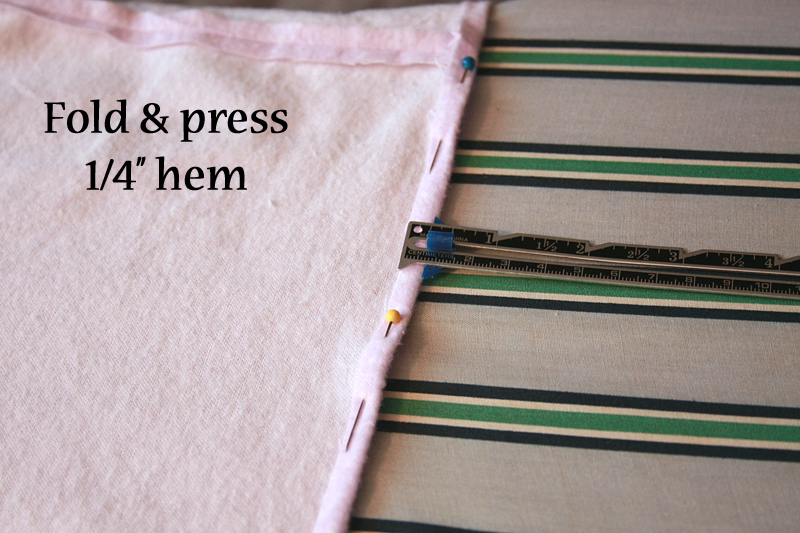
Fold over the edges 1/4" and press. (Note: I like to press all of the corner seams down going the same way - this makes threading the elastic through much easier later on.) Sew fold down, making sure to back tack both at the start and end.


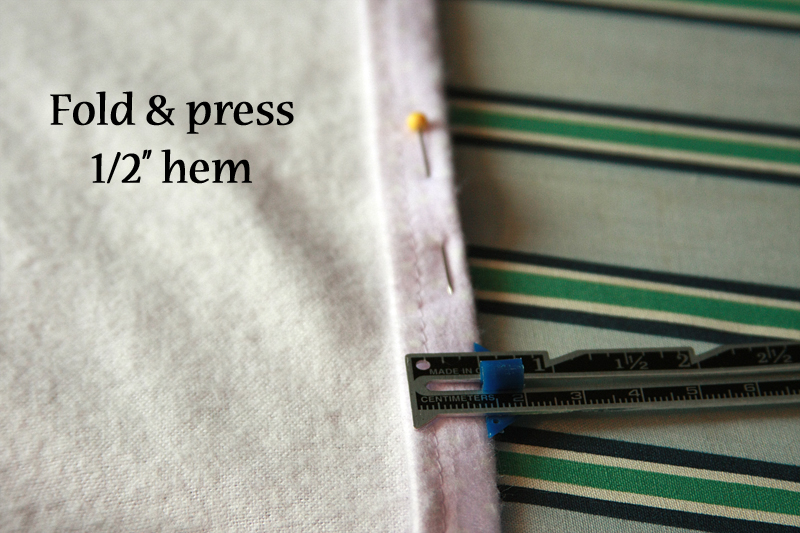
Fold hem over 1/2" and press. Stitch hem down, staying close to the outside edge. Leave a 2-3" gap between the start and end of your hem so you can thread the elastic through.


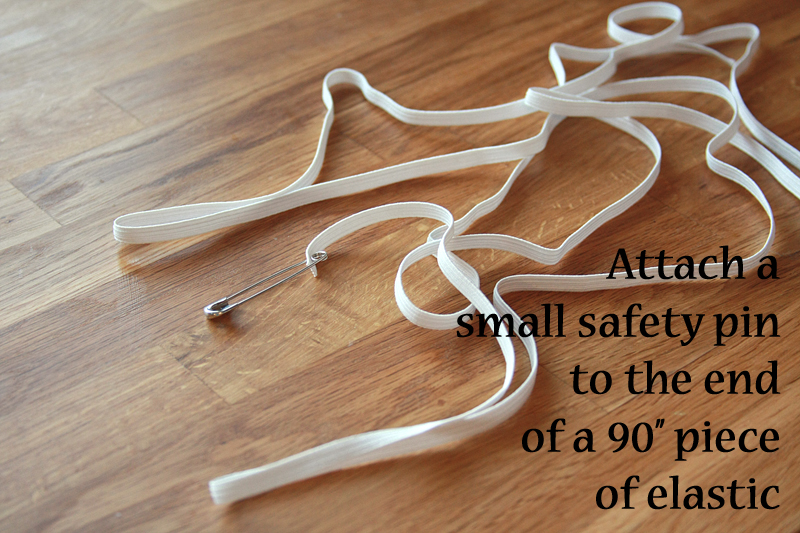
Attach a small safety pin to the end of your 90" elastic.


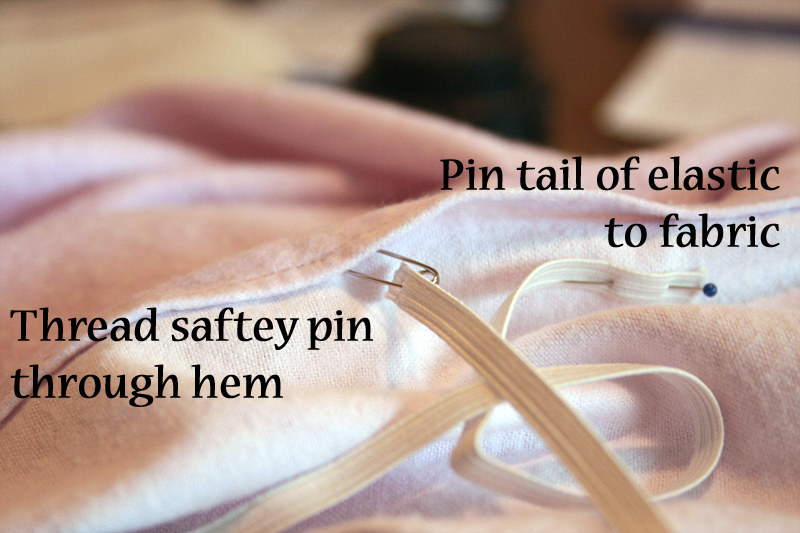
Then attach the far end of the elastic to the fabric with a pin. Thread the safety pin through your 1/2" hem, pulling the elastic the entire way around the sheet until the pin comes out the other side. (Remember pressing down those corner hems all in the same direction? Thread through in the same direction so your safety pin doesn't get stuck as you go around the corners.)


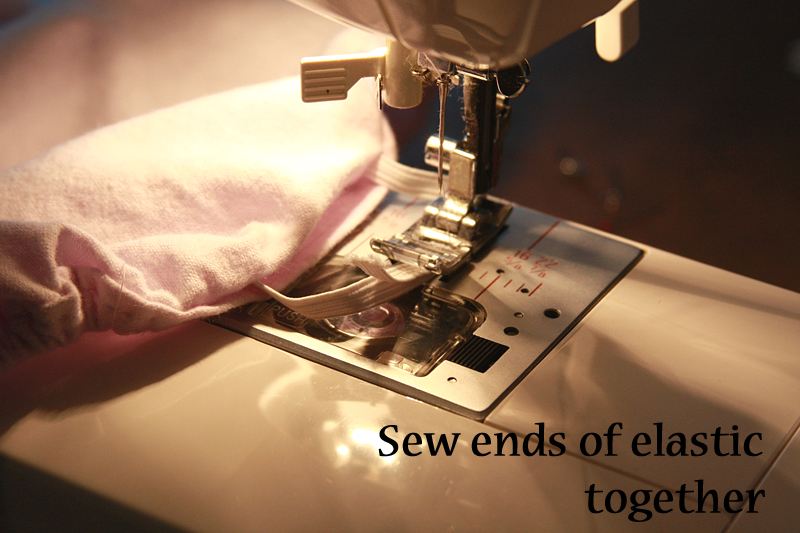
Once you've made it back around, overlap the ends of your elastic about 1". Sew together. You can either use your machine or stitch by hand. Tuck elastic up into the hem like the rest of the elastic, and sew your hem shut (careful not to sew over the elastic).


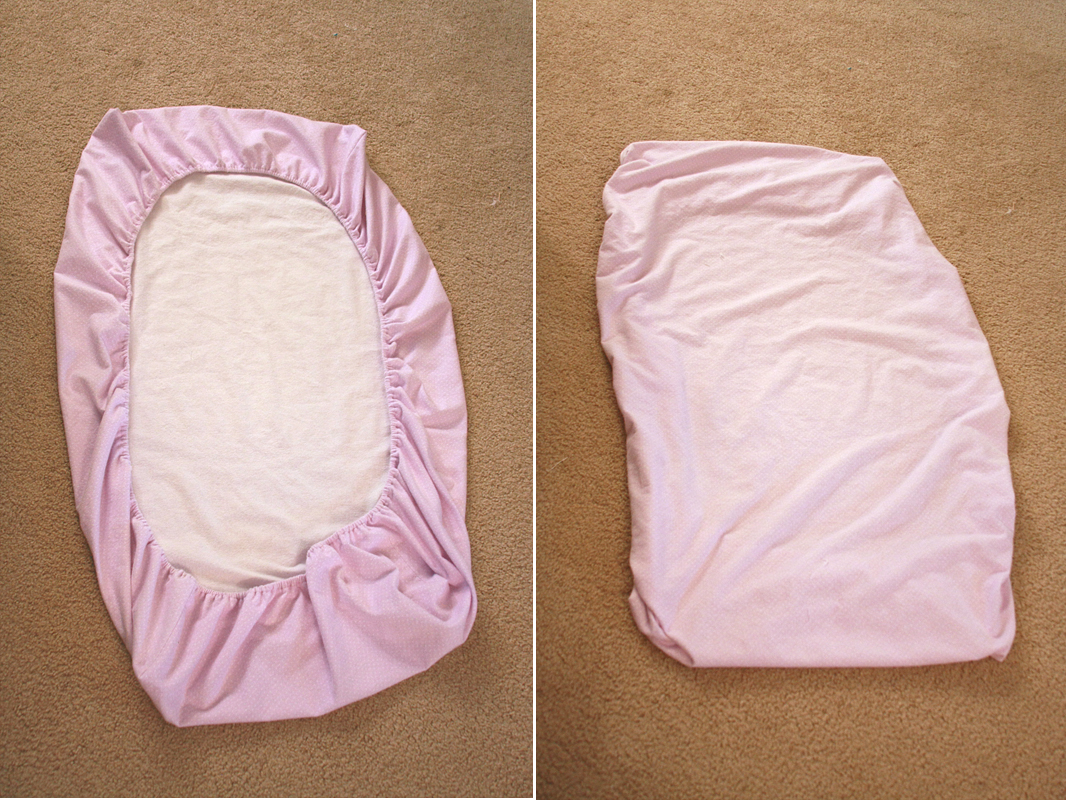
And what do you know? That's it. Done. Finished. Told you it was easy.


Without taking pictures, this takes roughly 2-3 hours to do. If you don't press your hems (or even just eyeball them) you could cut even more time off. The longest part of the whole thing is pulling the elastic through the hem. Nothing that can't be done while watching your favorite TV show. :)

Final price to be able to choose your own sheet?

2 yards fabric @ $3.49/yd = $6.98
1 spool of thread @ $2.99/spool = $2.99
1/3 package 1/4" wide elastic @ $1.98 = $0.66

Final Price = $10.63


So it may not quite be as cheap as what you could find at somewhere like Walmart (unless you find an awesome sale at the fabric store), but it is roughly on par with what you can find at Babies R Us. And it has the plus that you can pick out the exact fabric you want instead of settling.

Friday, December 14, 2012

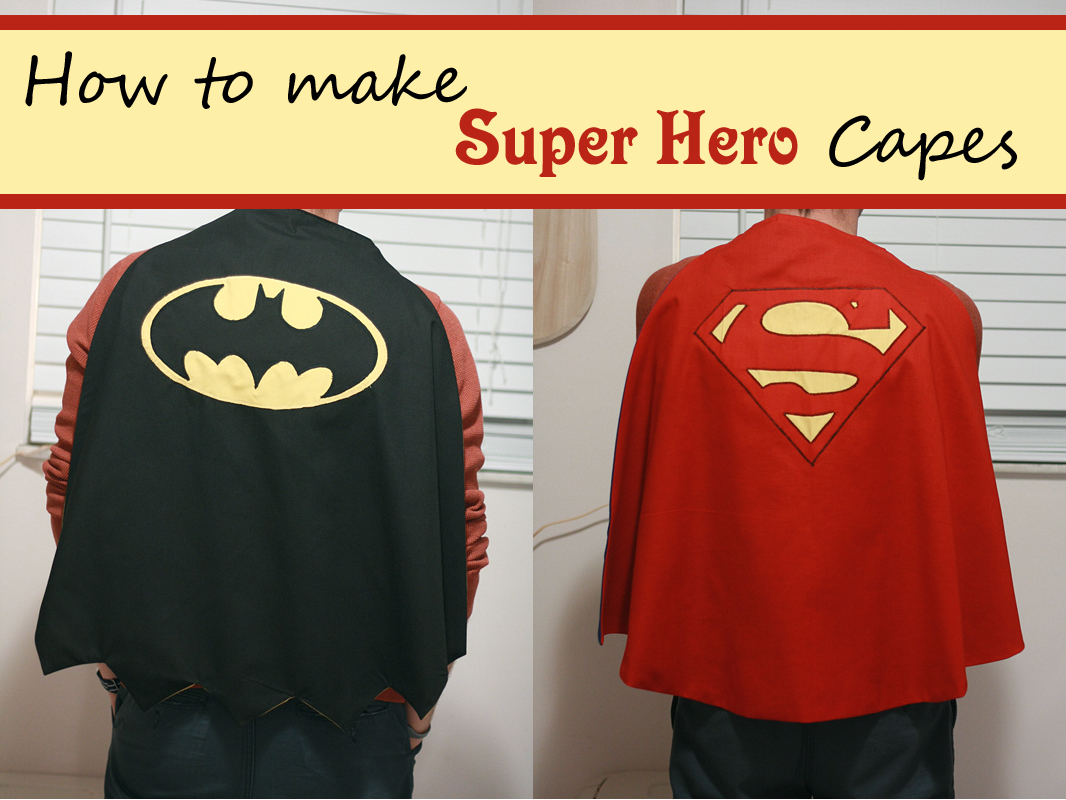
Crafty Fridays: Super Hero Capes


Okay, so I know I said I wasn't going to buy the nephews and nieces any toys for Christmas -- does this really count? It's not some shiny light up plastic thing after all. Oh well, I suppose I'm allowed to break my own rules.

The oldest nephew right now is enamored with super heroes. Loves them. Ran around the house at Thanksgiving assigning everyone a super hero. So when I ran across these on Pinterest, I knew I had a winner for a Christmas gift.

Surprisingly, these are fairly easy -- the longest part is appliqueing the emblem on the back. And choosing what you want to go on the back in the first place.

Things You'll Need

3/4 yard fabric for each side of the cape (1 1/2 yards total)
1/8-1/4 yard fabric for each emblem piece/layer
Spools of thread in matching colors
Iron-on, Sewable, Heat & Bond interfacing
Scissors
Tape measure


Let's start by cutting out the body of our cape. I went with two different colors (one for the front and one for the back) for each cape I made, but you could easily just use the same color for both.

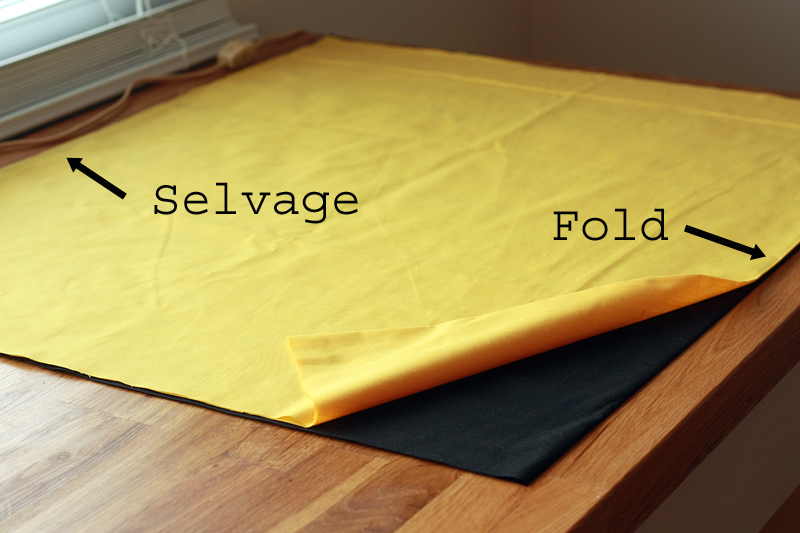
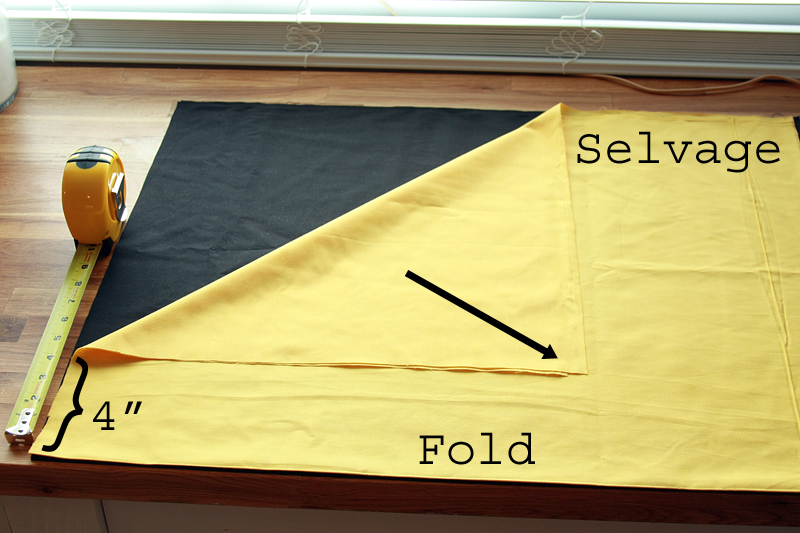
Lay out both 3/4 yard pieces of fabric (if using one color, cut your 1 1/2 yard piece in two), one on top of the other with the folds and selvages lined up.


Grab the top left corner (between top of fabric and selvage) of the top fabric and pull downwards towards the fold. Stop when there is 4" left along the top between the fold and the fabric you are pulling. This is going to be the neckline.


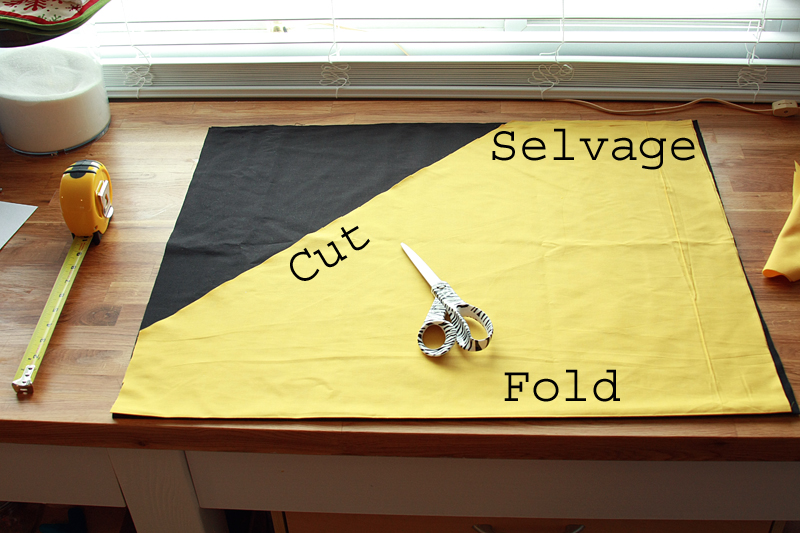
Cut along the crease you just formed. This is going to be the sides of the cape.


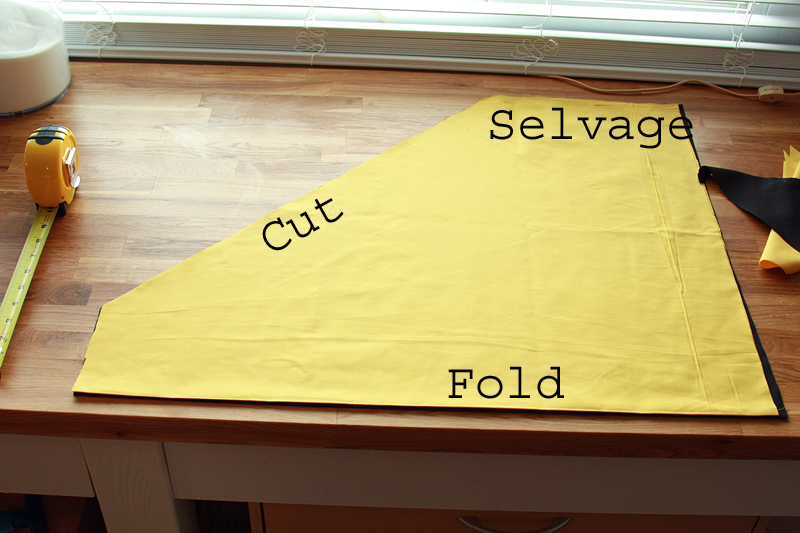
Cut the bottom layer along this line.


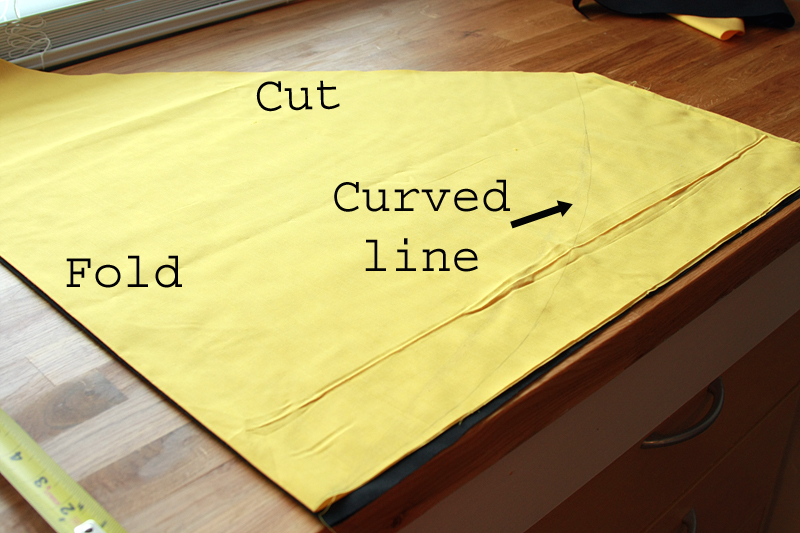
Now we run into Tricky Part #1. You're going to have to free-hand draw a little here. In order to give the bottom of the cape a nice curve, you need to draw a line from the bottom corner (fold side) to the corner you just made. Don't worry, you can do it. It took me a few tries to get it how I wanted it, but I found that starting straight for a little bit along the bottom of the cape worked better than trying to curve from the get-go.


Cut through both fabrics along your drawn line.


Open up of of the layers of fabric and check out how your cape looks. Pretty nifty, huh? (Note: if you're making multiple capes, I seriously recommend using of the layers of your first cape as a pattern to cut around. It makes cutting the remaining capes lickity-split fast, not to mention you don't have to free-hand draw the bottom again.)

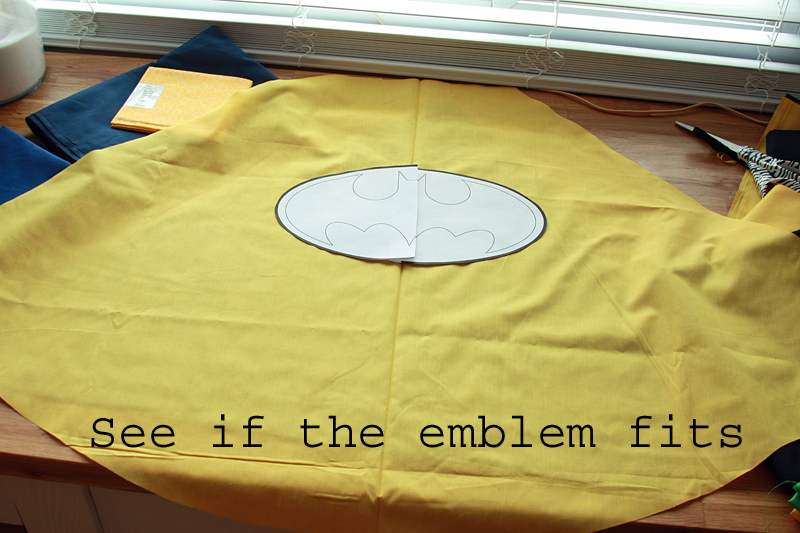
Now it's time to decide on the what and where and size of the emblem. For the Batman logo (and Superman), I found that 12" across worked really well. I just found a logo online that was very simplistic, printed it out, then pieced it together with some tape.


Okay, so we're ready to begin the applique process. Basically, we're just outlining around cut-out shapes with a zig-zag stitch so they don't fray (since we can't really use a hem for this purpose here).

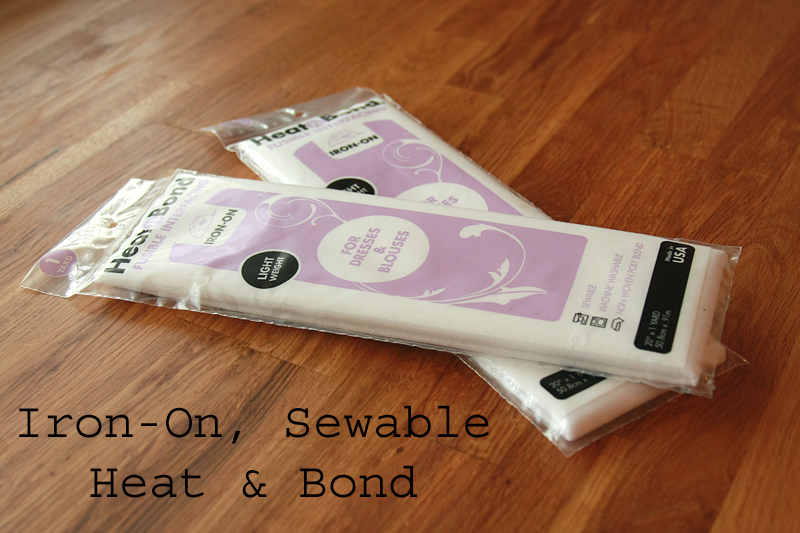
For this project, I went with Iron-On, Sewable, Heat & Bond. There are lots of options out there to use for interfacing, some of which let you remove the backing and stick the shape to the fabric like a sticker (which I wish I had gotten). The key things to look for, however, is that it can be ironed-on (to prevent it from sliding around when you're ready to start sewing), and sewable.


The first logo I made, I cut everything out prior to fusing the interfacing which made everything about 100x harder. So, learn from my errors, and the Superman logo instead.

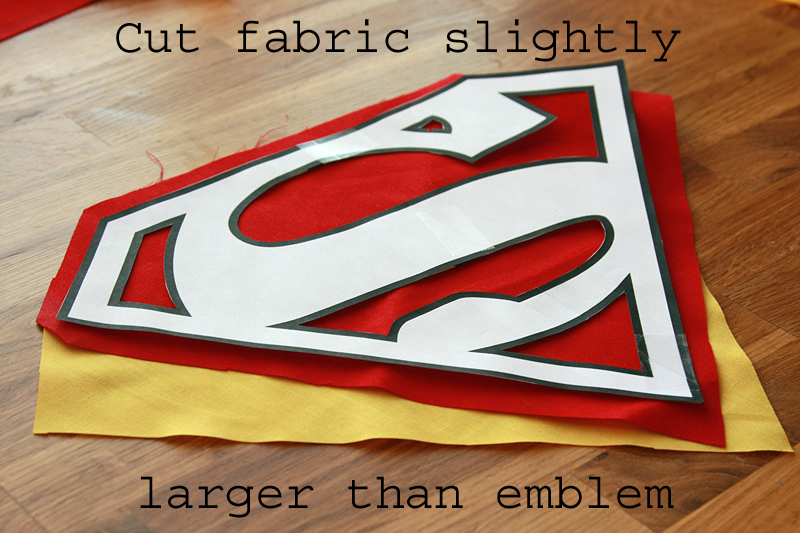
Lay your emblem right side down on the wrong side of the fabric (if you have one). Cut around each piece with a 1/4" allowance or more. (I cheated here since for this portion my logo worked either way.)


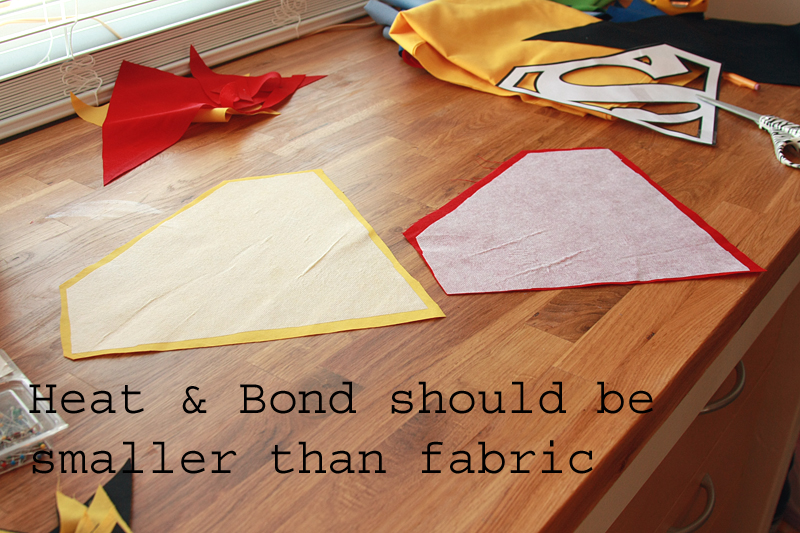
Repeat with the interfacing, but this should be cut just a bit smaller than your fabric. (This helps to prevent it from sticking when you iron it to the fabric.) The interfacing should have the rough side (or which ever will be ironed to the back of the fabric) facing down.

Follow the directions on the back of the package of interfacing to adhere the interfacing to the wrong side of the fabric.


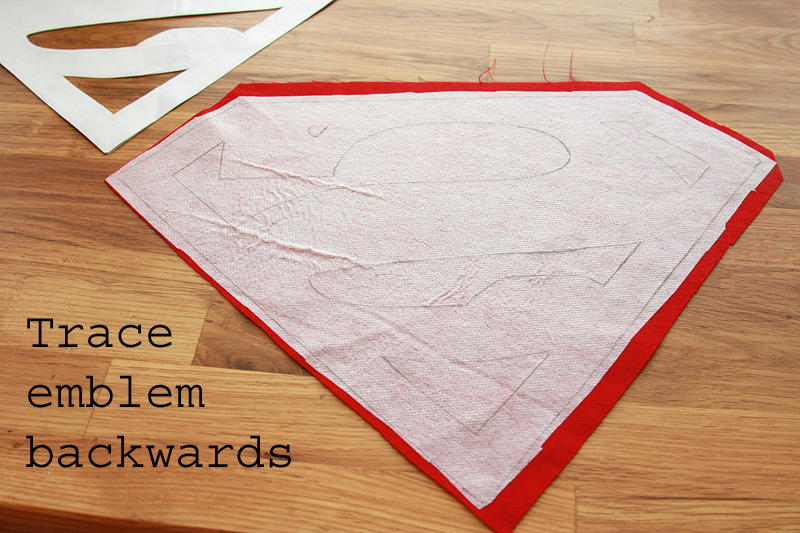
Place your emblem on top of the interfacing, right side down, and trace around it. Cut out the pieces.


Once everything is cut out, lay out your pieces to see if everything matches up.


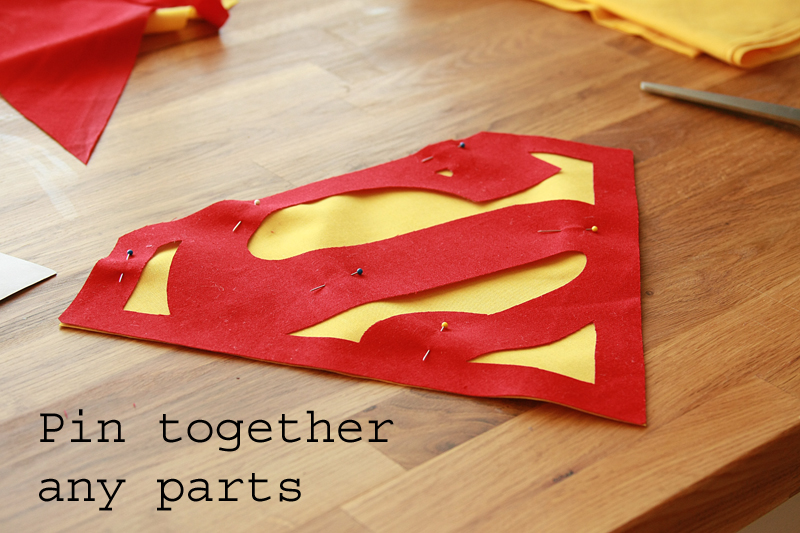
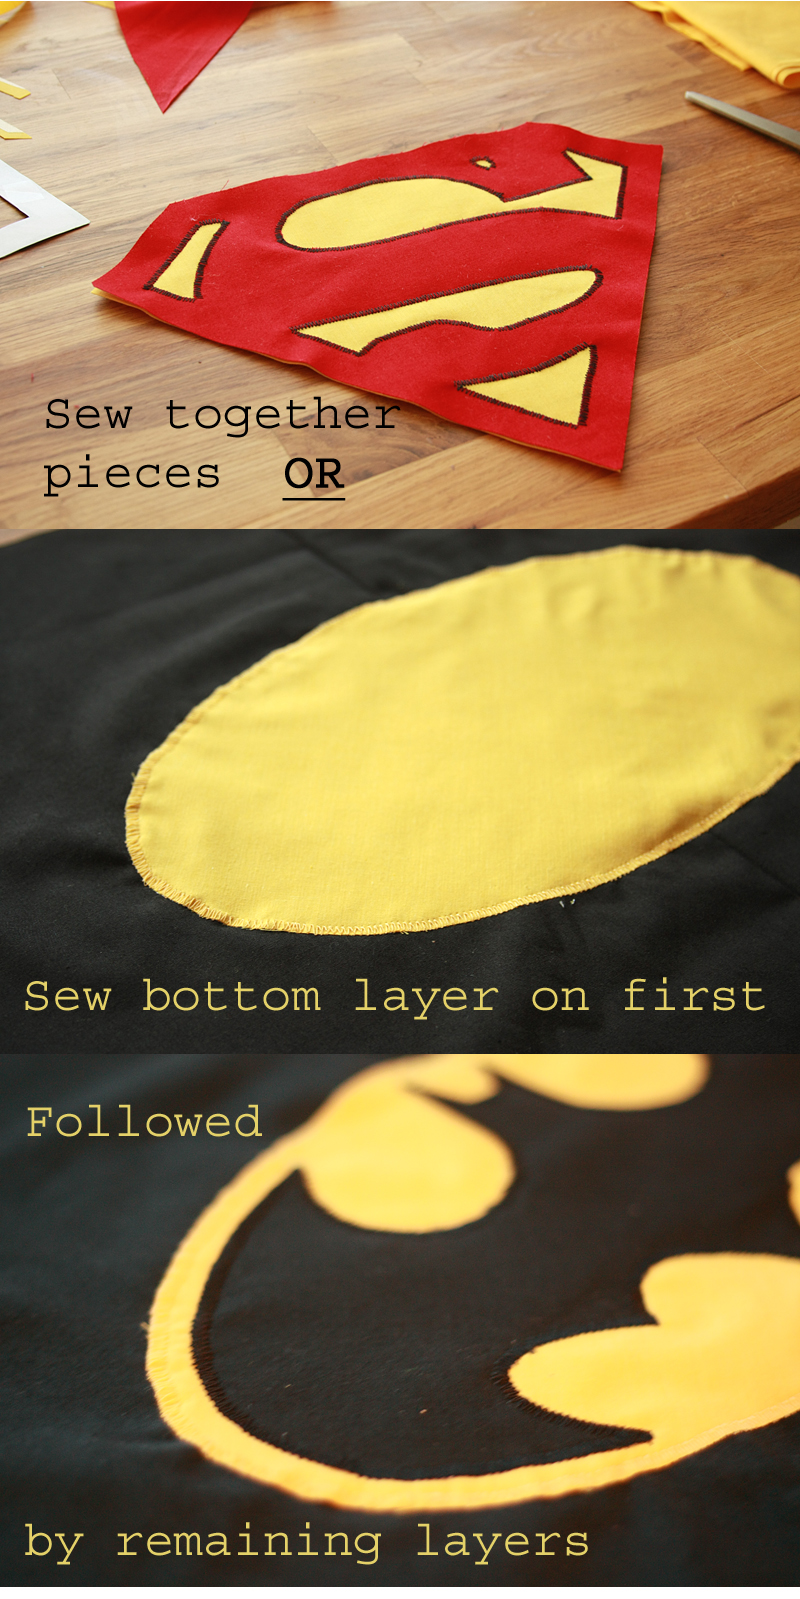
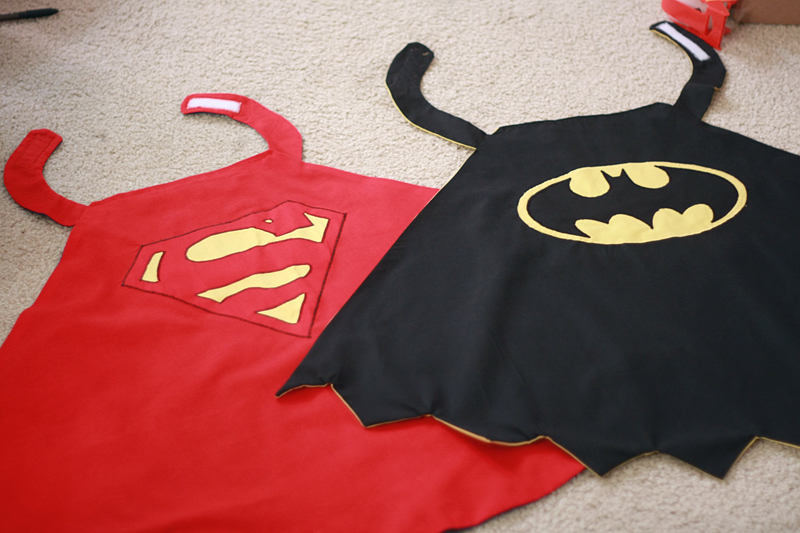
Now, you can attach the pieces in a couple different ways. With the Batman logo, I stitched the bottom layer (the yellow oval) to the fabric, then stitched on the bat. With the Superman logo, I was a little more leery of the fabric shifting as I sewed the top piece, so I stitched together the inside edging first, then attached the emblem as a whole to the red layer of fabric. Either way works.

I set my machine on a zig-zag stitch with a middle-of-the-road width (I just put it under the little needle symbol, which happens to be in the middle). I used a very short stitch length (1, which was equivalent to my buttonhole stitch-length). I didn't back tack my stitching at all, but instead used a regular sewing needle to pull the loose threads on top through to the other side and then just tied them with their bottom counterpart. (You can find an awesome applique tutorial here.)


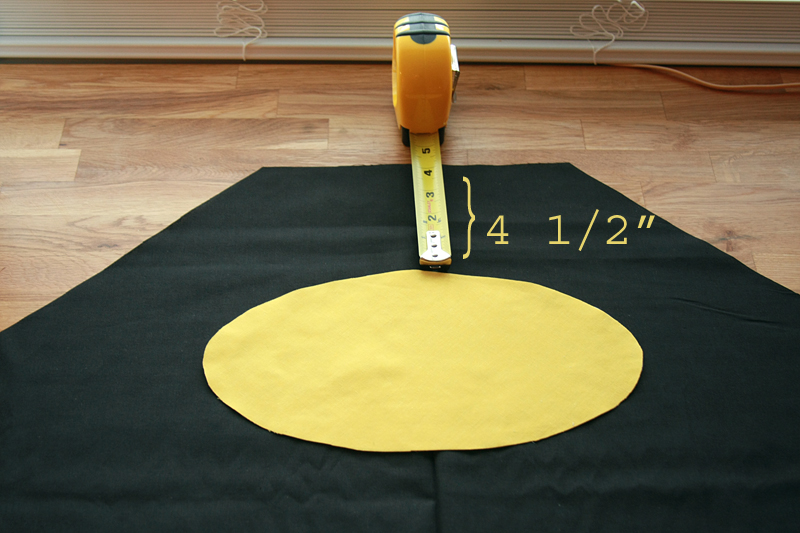
Line up the top of your emblem 4 1/2" from the neckline (this includes the 1/2" seam allowance we'll need for the neckline later) and attach it using the zig-zag stitch.


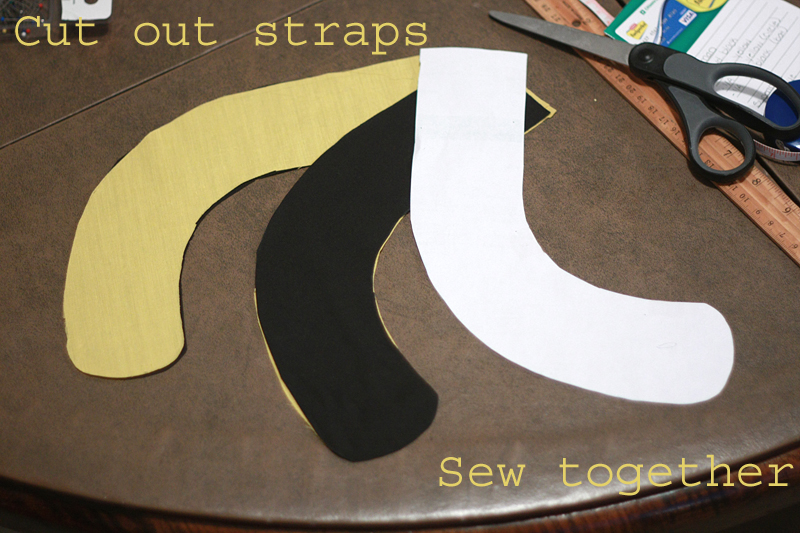
Here comes Tricky Part #2: the straps. Unfortunately, you're going to have to free-hand these, too. I started off with 9" straps on the Batman cape before deciding 7" ones worked much better. I went with a rough "J" shape for my straps, making them 2 1/2" wide to leave room for wide velcro after sewing together with 1/4" seam allowance.

I went with about a 3" piece of 3/4"-wide velcro on each strap, but it may differ for you based on how you cut them. I simply attached the velcro using the same stitch as for the applique, making sure to match the correct color thread for the top thread and bobbin.

* You can also make long skinny straps you have to tie, but I figured a 2 and a 4 year-old weren't that quite up to par with their tying skills yet.


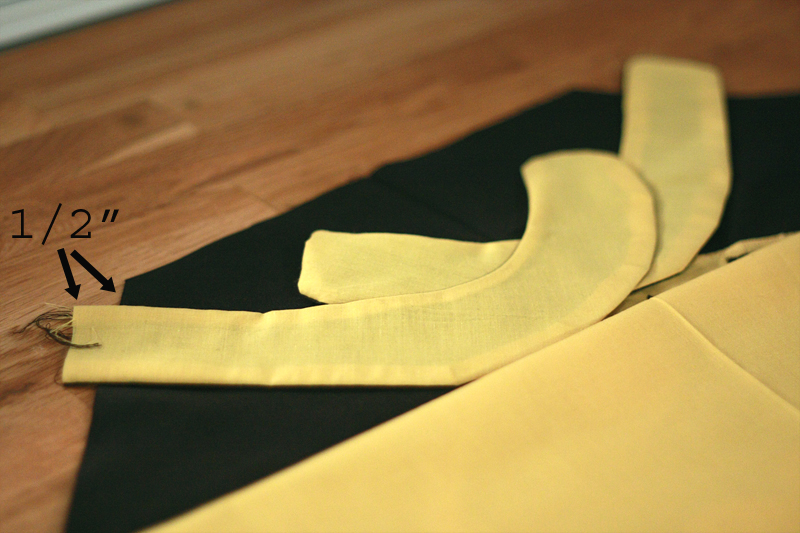
Once you have your straps sewn and they are pressed flat, place them 1/2" from the top of the cape with about 1/2" overlapping the side. Pin straps into place (being careful that you don't place pins where you're going to be sewing).

Lay the fabric for your cape with right sides facing each other. Pin together.


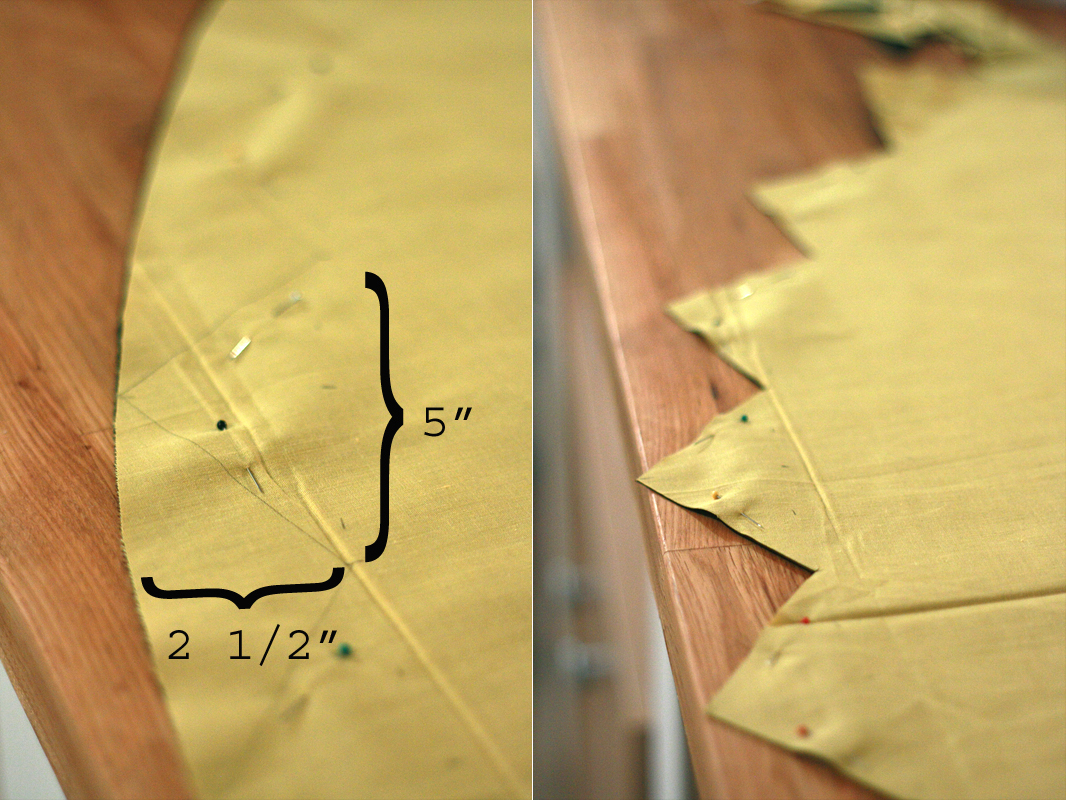
If you're wanting to make the bottom of the cape jagged, simply measure up from the bottom 2 1/2", and make each spike 5" wide.


Stitch around the outside of your cape with a 1/2" seam allowance, leaving a large gap along the neckline so you can turn it right-side out. Once the cape is right-side out, fold the raw edges along the neckline down 1/2" (the fold should come just to the edge of the strap) and sew the opening shut with a 1/4" seam allowance.

Press the cape, making sure to get all the edges, and you're done!


1 yard fabric in 2 colors @ $1.99/yd = $3.98
2 spools of thread @ $2.99/spool = $5.98
1 package Heat & Bond @ $3.49 = $3.49
3/4"-wide velcro = $3.99

Final Price = $17.44


This may seem a little on the steep side for one cape, however, I purchased enough fabric for 4 capes (2 for each boy) and my total came to just over $30. Which is somewhere around $7.50 per cape. Now that isn't too shabby.

Especially compared with what you would get at say a Halloween store or the dress-up aisle at Walmart. We won't even get into comparing the quality between these and those cheap thin polyester ones.
Thursday, December 13, 2012

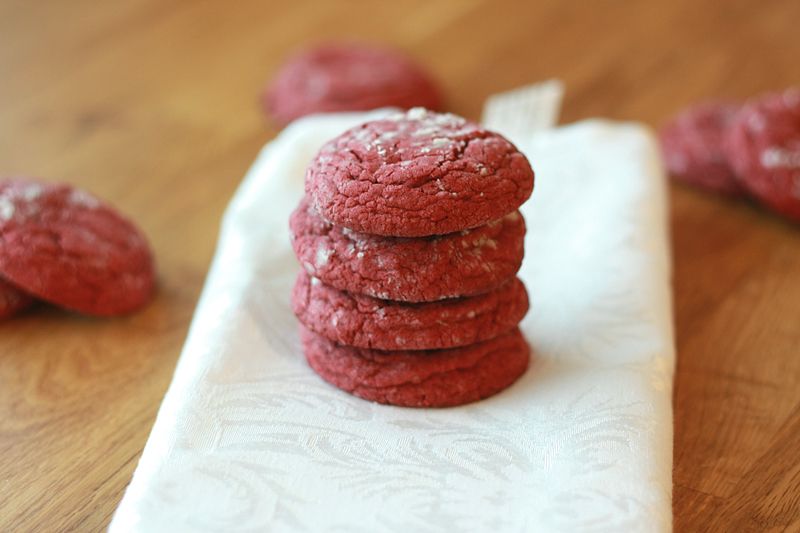
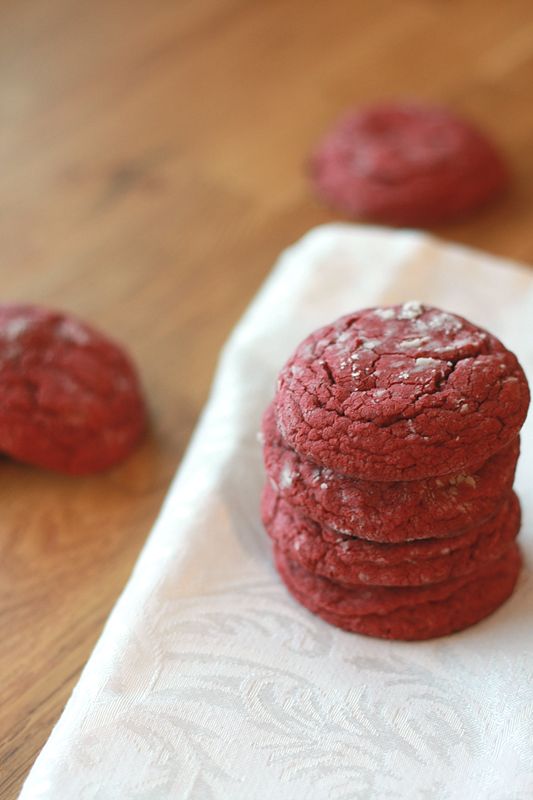
Red Velvet Crinkle Cookies


This past week and a half has just been a fabulous time for me in the kitchen. Not just one, but two failed recipes. And I'm getting to the point where I really only have energy to make one thing at a time. Which means we're kind of screwed when dinner comes around.

I keep telling myself that I'm going to go back and fix at least one of those failed attempts (the other, I have no idea how to fix that mess). But alas, I have Christmas gift shopped my way into a state of exhaustion almost every day this week by 3 pm. And I am sorely running out of time to play in the kitchen instead of getting down to business and start my prepping for when Adam's family comes to visit next week.

So, what is a person to do when they're exhausted from shopping all morning and have a Christmas party to attend later that night (for which a dessert is requested)? Go simple. Sweet, simple, and festive. Then call it a night.

Red Velvet Crinkle Cookies
Adapted from: Two Peas and Their Pod

1 (18.75 ounce) box red velvet cake mix
2 tablespoons all-purpose flour
2 eggs
1/2 cup vegetable oil
1 teaspoon vanilla extract
1/4 cup powdered sugar

Preheat oven to 350 degrees F. Line two baking sheets with parchment paper or a baking mat; set aside.

In the large work bowl of a mixer, beat together all of the ingredients except for the powdered sugar until no more lumps remain and all ingredients are well incorporated.

Place the powdered sugar in a small, wide bowl. Roll 1 tablespoon of cookie dough into a ball, then roll through the powdered sugar until completely coated. Place ball on a prepared baking sheet, then repeat until sheet is full. Bake for 10 minutes, or until edges are set and the cookies begin to crack.

Allow cookies to rest on baking sheet for 2 minutes, then remove to a wire rack to fishing cooling. If the majority of powdered sugar has melted into the cookie, feel free to top with additional powdered sugar.


Makes: 33 cookies


While these definitely fit the bill of simple, festive, and sweet, I almost felt like there was something missing. It wasn't that these were bad by any means, oh no. Maybe it's because I'm so used to having cream cheese as red velvet's companion that I'm kind of missing it here? I'm not sure. I would still make these again, but I might play around with them a bit to see if I can make them go from "good", to "wow".


Nutrition Facts
Serving Size 24g
Amount per serving
Calories 106Calories from fat 47
% Daily Value
Total Fat 5.2g8%
Saturated Fat 1.3g6%
Cholesterol 10mg3%
Sodium 97mg4%
Total Carbs 13.6g5%
Sugars 8.0g
Protein 1.1g
Vitamin A 0%Vitamin C 0%
Calcium 3%Iron 4%

Friday, December 7, 2012

Crafty Fridays: DIY Pillow Mats


Some of the easiest people to shop for at Christmas are small children. Just get them a bright shiny toy and they're happy, right? Well, what if a toy is the last thing the children on your list need (because they already buckets upon buckets overflowing with them)?

So what do you get the kids who have everything? Clothes? Mom and Dad might appreciate it, but that's just going to be chucked over the shoulder and not given a second thought. After seeing a picture of my nephews watching tv while lounging on the floor (which looked mightily uncomfortable), I had my answer. Something that's not a toy, not books, not clothes, but definitely something that will get use and love from the kids -- Pillow Mats!

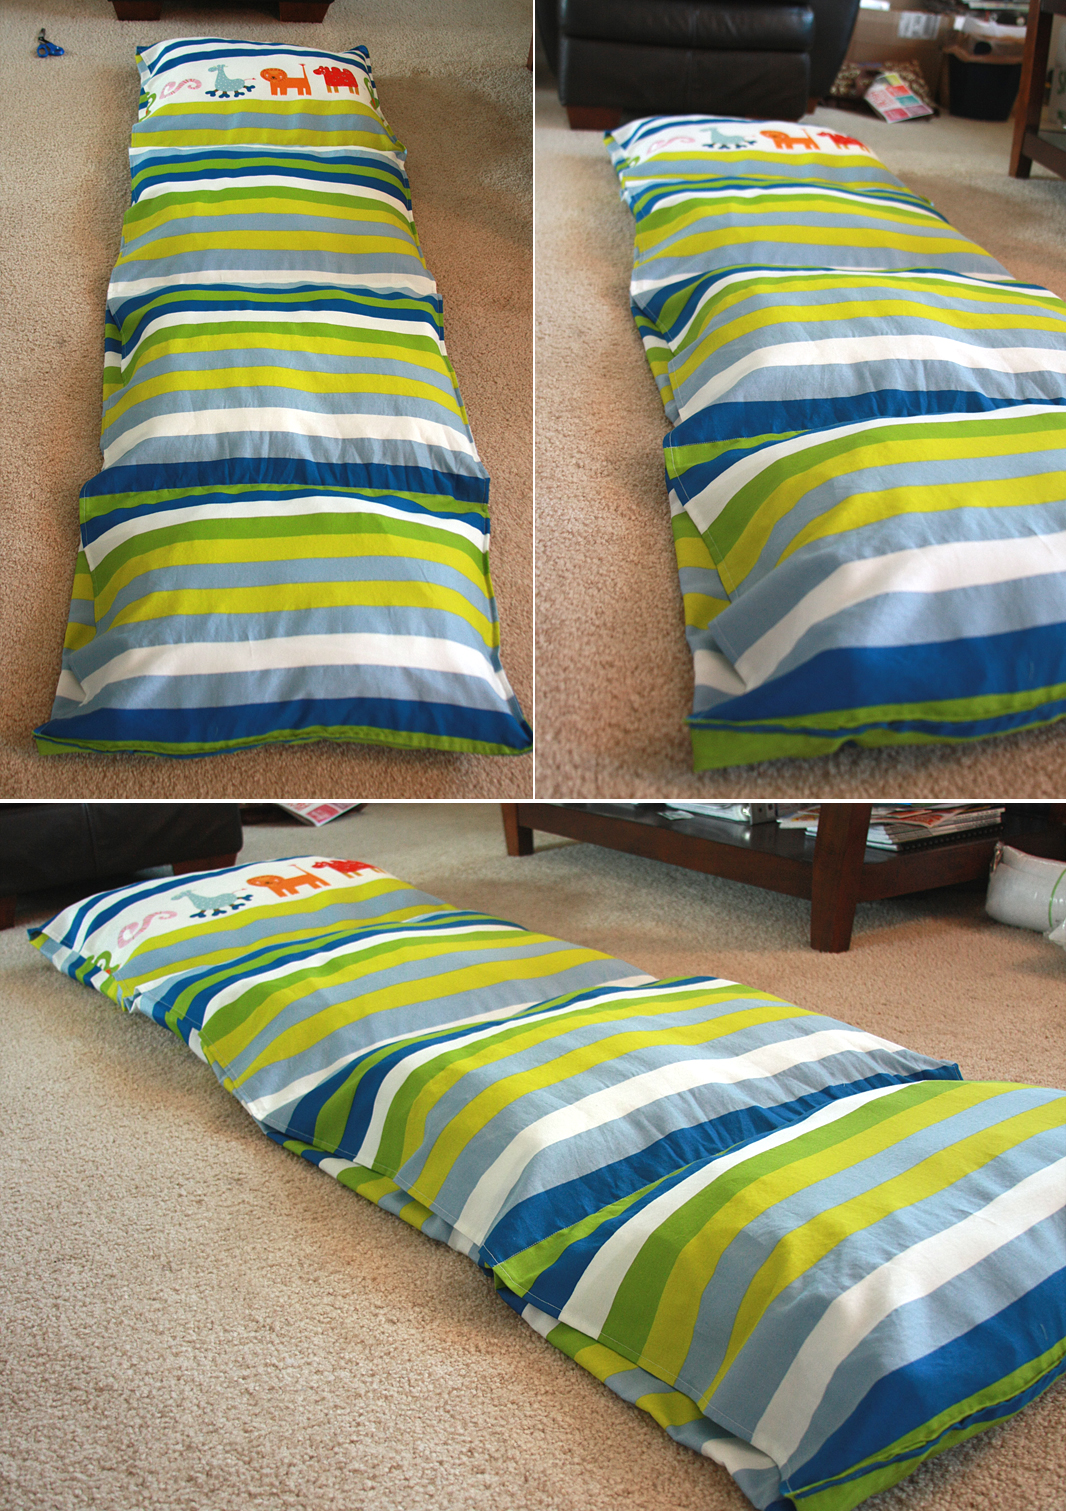
Not only are they functional, but they can be squished down for storage and are super easy to make. Two of these can easily be made in an afternoon.

Things You'll Need

1 twin-size duvet
4 standard-sized pillows (or 8 if you're making 2)
1 spool of thread in a coordinating color
Scissors
Tape measure


I found another tutorial for these over on Southern Disposition, and totally rolled with the idea to purchase a cheap twin-sized duvet rather than making the entire sleeve for the pillows. Not that that would be hard, but it's just less work for me.
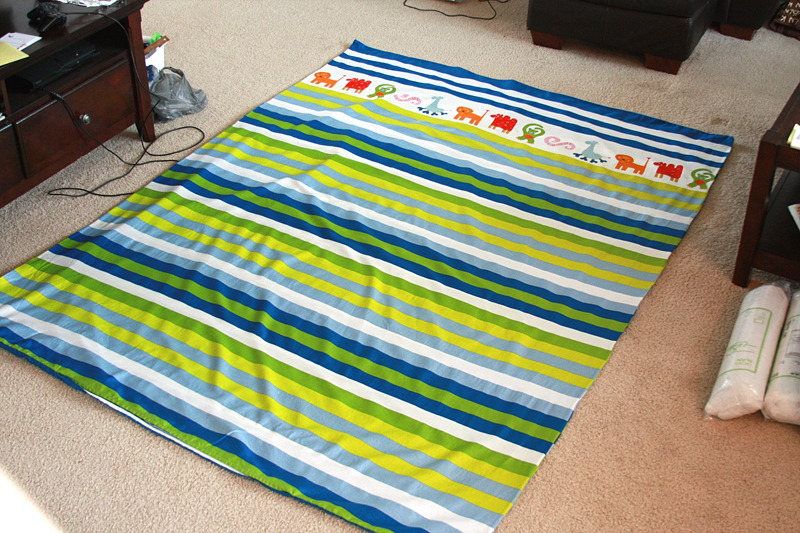
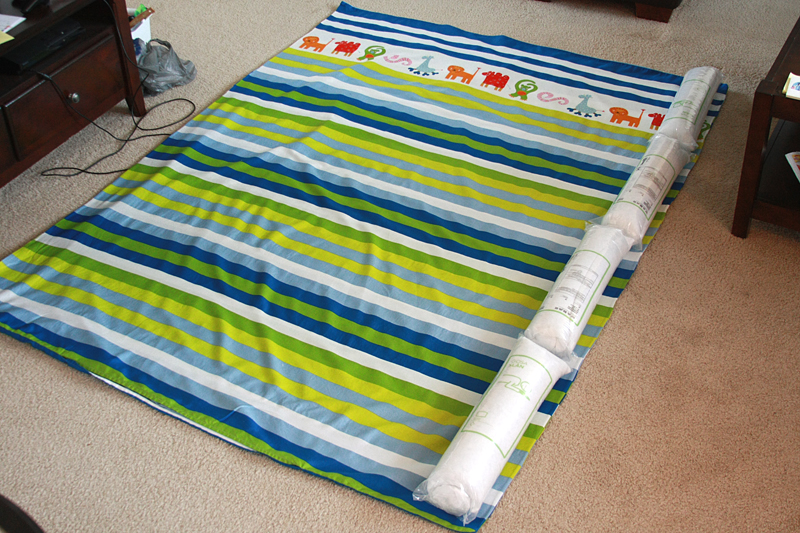
So, once you've made your purchase and are ready to begin, start by laying out your duvet. Mine was 64" x 86". This should be enough to make two pillow mats.


Standard pillows (which I purchased on the cheap at Ikea) typically come sized 20" x 26". But just to be on the safe side, let's check to make sure that 4 pillows (~80") really will fit inside the duvet.


Perfect.

Now the goal here is to make two of these, so fold the duvet in half length-wise. Place your pillows along the duvet to make sure you have plenty of space to make about a 3-4" flap past the end of the pillow (this flap will be tucked in and help prevent the pillows from sliding back out).


Lots of room going this way, too. Excellent.

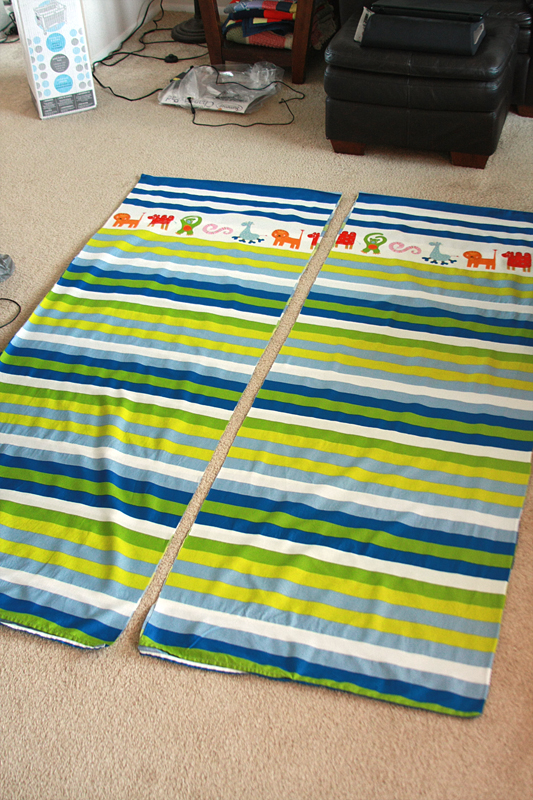
While the duvet is already folded, go ahead and cut it down the middle. No need to be absolutely precise. Set one of the pieces aside, we'll come back to that when we're done with round one.


Cutting the duvet in half leaves each side at roughly 30". The final width we're going for is 25-26". So place a mark at 26" from the finished side (so ~4" from the raw side) down the length of the fabric. Connect your marks to form a straight line.


Cut along drawn line only through the top layer. Thus, the bottom layer should stick out ~4".


Go ahead and hem up those raw edges. I pressed down a 1/2" fold, then turned it over and pressed down another 1/2" fold to form a finished edge before hemming the bottom layer. I followed suit with the top layer, only using 1/4" folds instead.


Now, fold over the longer bottom layer "flap" and slide it underneath the top layer. Make sure your folded bottom layer edge is even with your top layer edge, then pin to hold in place.


Next, make the individual pockets for each pillow. Measure out the length of your duvet, as it never really seems to be what the packaging states it is. Mine was about 82". Divide by 4. This gave me about 20 1/2" for each pocket. Since I had horizontal stripes, I decided that if it was close enough to the 20 1/2" mark, I would just use those as guides instead so the stitching would blend in more. Luckily, this worked out for me.

Mark off every 20 1/2", down the length of the fabric. If you don't have stripes, you may need to add additional marks going across width-wise as well -- be careful that you are able to erase them if necessary though!


Stitch width-wise across your fabric to form four pockets. Each seam should include the top and bottom layers, as well as the flap from the bottom layer in between.


Finally, stitch around the three edges of the duvet that are already sewed shut with a 1/4" allowance. I like to do this just to give a little extra finished look. And, if you're using a duvet from Ikea, there should be an open spot along where the bottom of the duvet used to be (to get the actual comforter inside), and this solves the problem of stitching that up. Simply fold in the edges around the opening 1/4-1/2" or until it lines up properly with the rest of the duvet. The finishing 1/4" stitching should close it.


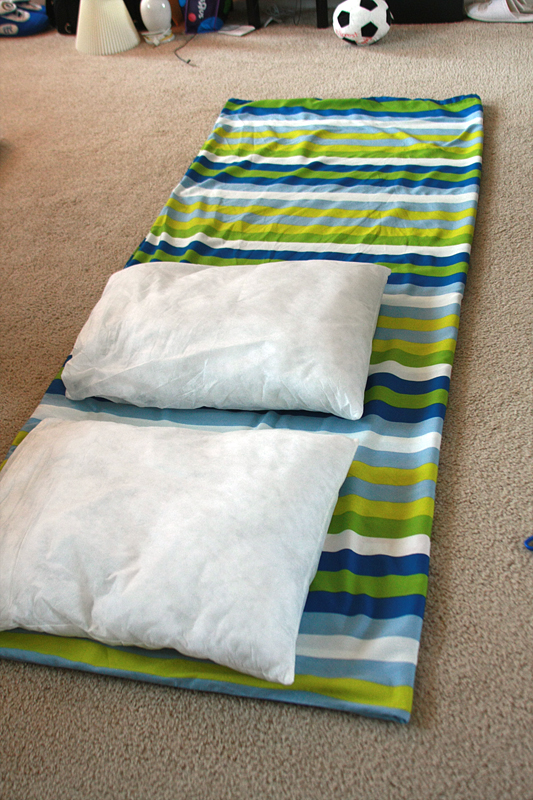
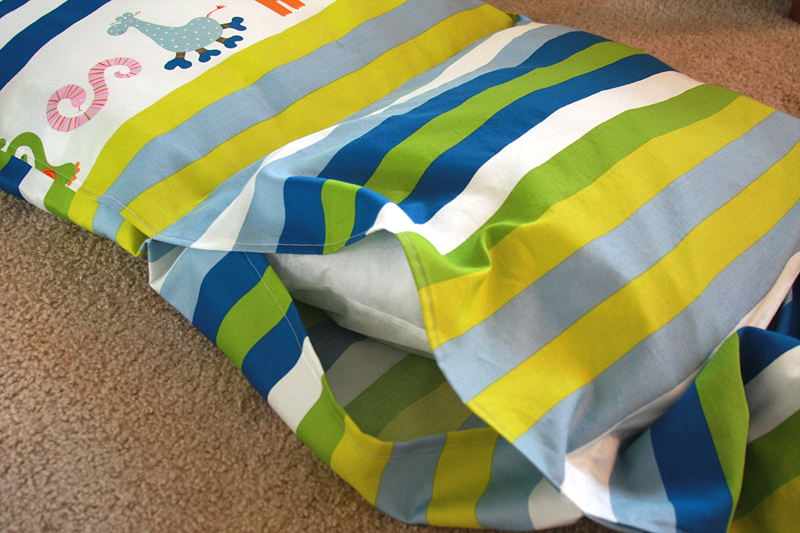
Stuff those pillows inside...


And you're done with the first one! Simply rinse and repeat with the remaining half of the duvet for the second.


So where does this smart non-toy gift idea rank up there price-wise?

1 twin-sized duvet = $24.99
8 pillows @ $1.49/pillow = $11.92
1 spool of thread @ $1.26/spool = $1.26

Final Price = $38.17, or $19.09 per mat


So much more awesome than a Bat Cave. Okay, maybe not more awesome for the kid, but I can guarantee you I know which one will hang around longer as the kid grows up!

One final note: These are completely machine washable, even the pillows -- another kid-friendly bonus!