Wednesday, November 30, 2011

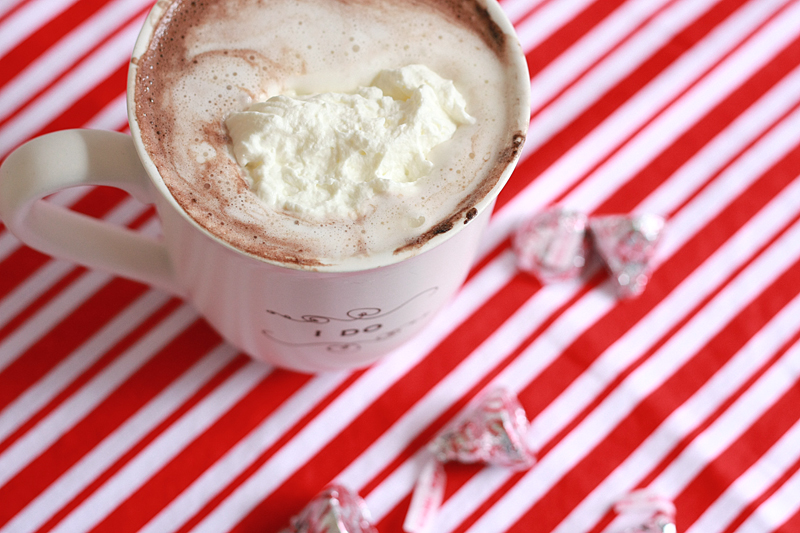
Peppermint Hot Chocolate


I'm not going to lie. The first thing on my "to-do" list once we got home from our Thanksgiving vacation was to get out all the Christmas decorations. Well, right after I took care of mounds and mounds of laundry. And after I put away my measly little box of fall decor. But then it was time to bust out the stockings, and advent calendar, and oh yes, the tree.

In the process, I may have rearranged our living room in order for the tree to go in front of the window. Maybe. By myself. Joy.

Though trying to program the fancy pants timer while upside down to turn on at different times of day... well, I left that one for the hubby to figure out. And the ornaments. I was good this year and only put the lights on the tree until he got home.

I wrapped the few presents we already had and stuck them under the tree.

It was a busy Monday.

And I'm still itching to get the lights up outside. Too bad we won't be able to borrow a ladder for another couple days.

Don't hate. I like to enjoy my Christmas decorations for more than a week before packing them all away for another year.

If you can't tell, I'm a huge fan of the Christmas season. Especially Christmas baked goods. In my book, there can never be too many goodies on the cookie plate. Which, of course, is absolutely required. No ifs, ands, or buts.

Although hot chocolate might not go on the cookie plate, it sure is tasty while you're busy making all those cookies. Or sitting in front of the tree enjoying your handy work. Or after going outside and having a snowball fight. I mean really, it's pretty much a winter staple. But adding that extra little bit of peppermint flavor totally swings it into the holiday season. Yum.
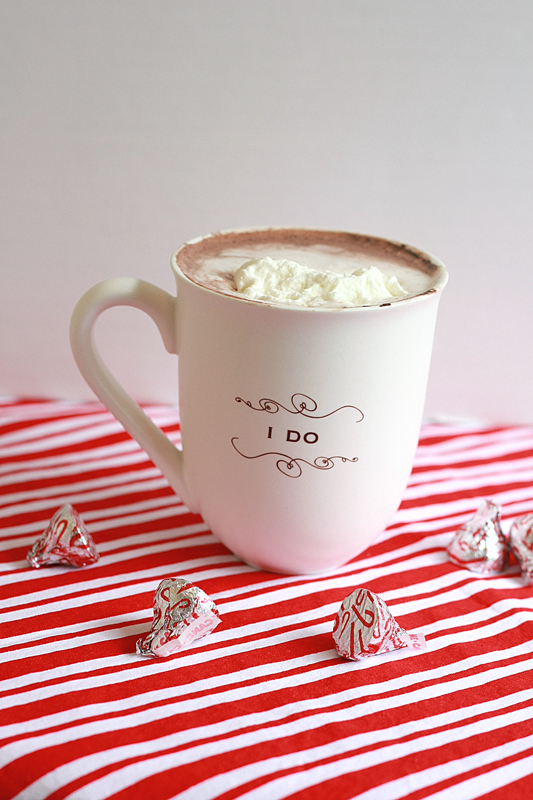
Peppermint Hot Chocolate
Adapted from: Brown Eyed Baker

9 ounces Hershey's Candy Cane Kisses
3 cups nonfat dry milk powder
2 cups powdered sugar
1 1/2 cups Hershey's Special Dark cocoa powder
1/4 teaspoon salt

Unwrap the candy cane kisses; place in a quart-sized ziploc bag. Place bag in the freezer for at least 30 minutes.

Meanwhile, pour the powdered milk into the bowl of a food processor. Pulse until any lumps are gone, and milk is ground very fine. Pour into a gallon-sized ziploc bag. Add the powdered sugar and cocoa to the same food processor bowl (no need to clean). Pulse until sugar and cocoa are mixed thoroughly. Transfer mix to the gallon-sized bag. Add the frozen candy cane kisses to the food processor. Grind kisses until a powder forms; pour into the gallon-sized bag. Seal bag and shake well until all the ingredients are thoroughly combined. Store in an airtight container.

To make hot chocolate: combine 1/3 cup of the cocoa mixture with 1 cup of hot milk in a coffee mug. Serve topped with whipped cream or marshmallows.


Makes: 1 3/4 pound (about 16 servings)
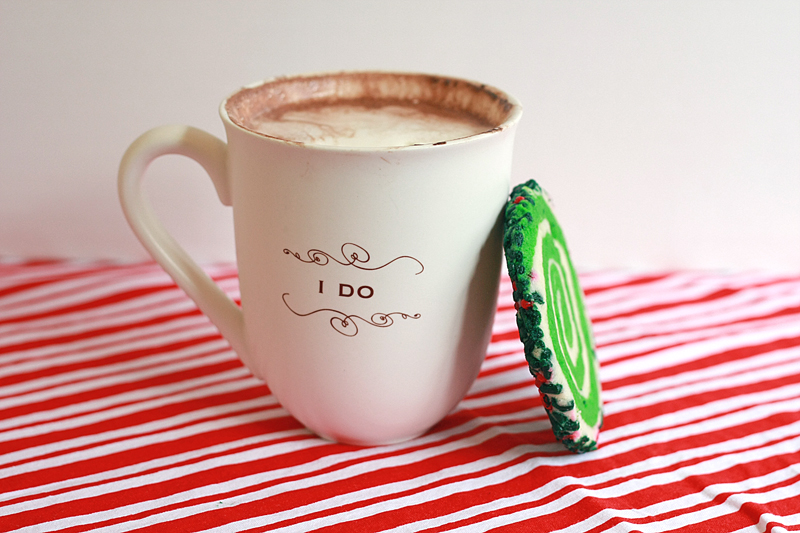

Even though you're adding almost an entire bag of candy cane kisses to the batch, the peppermint flavor, while definitely present, isn't overwhelming. And chocolate and peppermint? Such a perfect chilly day combo. Now I just need to work on making some homemade marshmallows to go with them...


Nutrition Facts - Mix only
Serving Size 61g
Amount per serving
Calories 234Calories from fat 51
% Daily Value
Total Fat 5.7g9%
Saturated Fat 2.9g14%
Cholesterol 6mg2%
Sodium 275mg11%
Total Carbs 41.4g14%
Fiber 3.0g12%
Sugars 34.7g
Protein 10.8g
Vitamin A 0%Vitamin C 3%
Calcium 32%Iron 15%

Tuesday, November 29, 2011

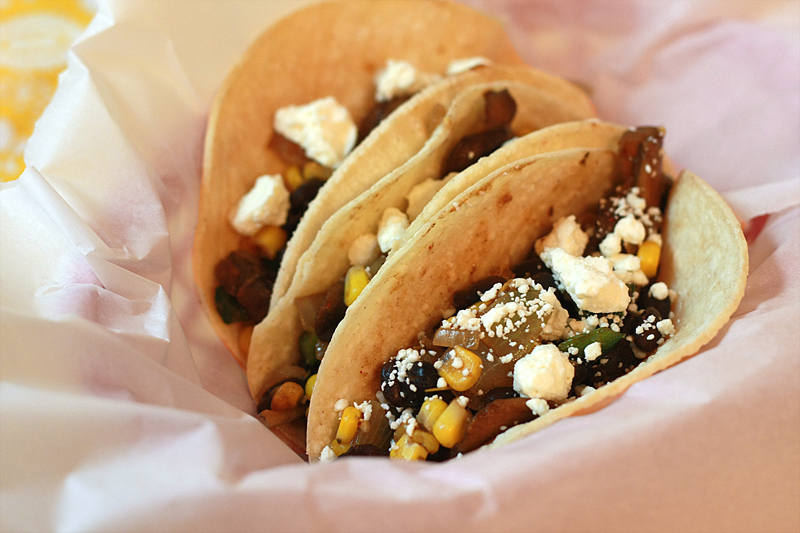
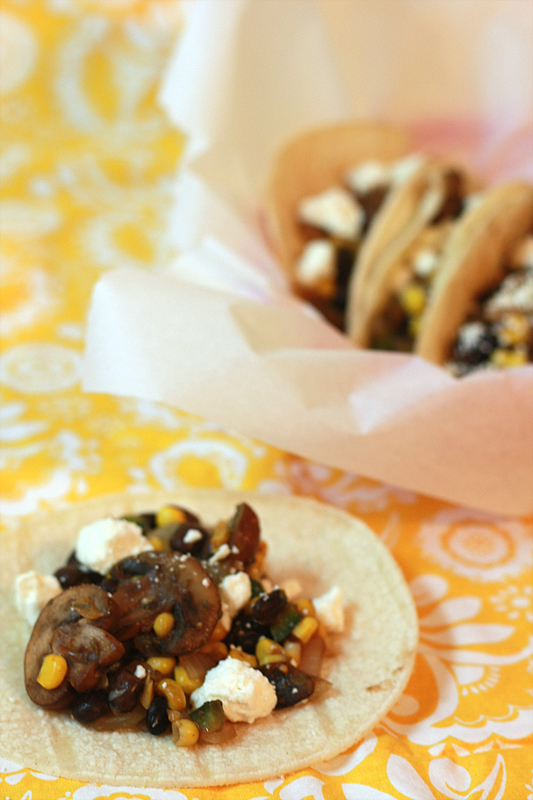
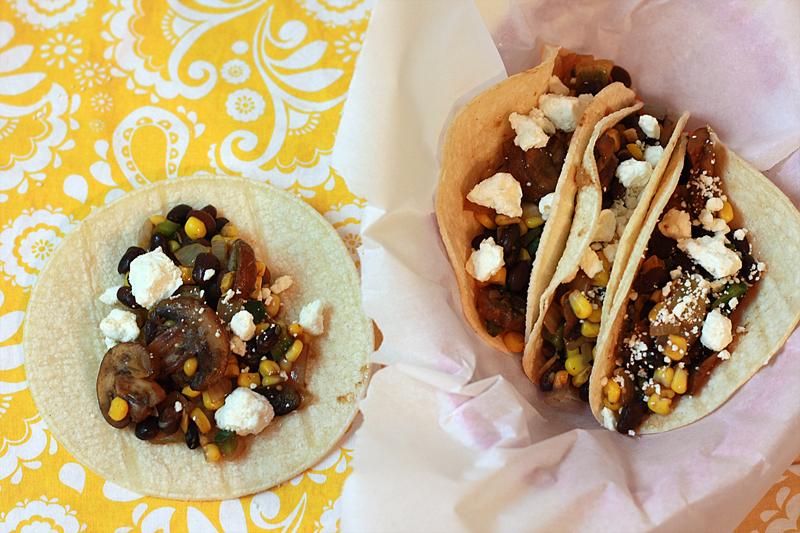
Mushroom, Corn, & Poblano Tacos


30+ hours in a car, 2 turkeys, a 5k run, and lots of in-law family time. That pretty much sums up my 10-day Thanksgiving vacation. This year, Adam and I trekked out to Kansas City for the turkey holiday, and thank goodness we timed our holiday out there this year right. Not only was the usual family present, but also a couple cousins from Cincinnati, as well as a long lost uncle from Texas. Needless to say, there were quite a few of us. 21 to be exact.

Of course we ate a ridiculous amount, longed for stretchy pants, saw the Plaza lighting ceremony, then came back and ate some more.


Although I didn't get to go Black Friday shopping, I did see this a few days later at Lowe's


and came this.close to buying it. Except it was $68, and I was there for some cheap lights. Boo. I need to watch that movie again.

Now that Thanksgiving is over (whew) I can focus my full attention on Christmas baking (yay!). Because let's face it, it's just not Christmas season without a cookie plate floating around.

In the meantime, I'm going to try my hardest not to eat cookies with a side of pie for dinner. It'll be tough, I know. But with these vegetarian tacos, it's not so bad. Quite tasty actually. And definitely a good switch from your everyday ground beef, cheese, and lettucetomatoessourcream tacos.

Mushroom, Corn, and Poblano Tacos
Adapted from: Cooking Light, November 2011

2 tablespoons olive oil, divided
8 ounces sliced mushrooms
1 cup onion, diced
1 teaspoon dried oregano
1 teaspoon garlic, minced
3/4 teaspoon chili powder
3/4 teaspoon ground cumin
1 poblano chile, chopped
1 1/2 cups frozen corn
1 (14.5 ounce) can black beans, rinsed and drained
1/4 cup salsa verde
1 tablespoon lime juice
1 teaspoon hot sauce
1/2 teaspoon kosher salt
8 (6-inch) corn tortillas
3/4 cup crumbled feta (or queso fresco)
1/4 cup cilantro, chopped

Heat 1 tablespoon oil in a large non-stick skillet over medium-high heat. Add mushrooms; cook 4 minutes, stirring occasionally. Add 1 tablespoon oil to pan, followed by onions, oregano, garlic, chili powder, cumin, and poblano. Cook 4 minutes, or until onions have started to soften, stirring occasionally. Add corn and beans. Cook for another 4 minutes. Remove pan from heat. Stir in salsa, lime juice, hot sauce and salt.

Meanwhile, warm tortillas according to package instructions. Divide mushroom mixture evenly between the 8 tortillas. Top each with 1 1/2 tablespoons feta and 1 1/2 teaspoons cilantro.


Serves: 4


I have to admit, I was a little surprised that between the poblano, hot sauce, and chili powder, the tacos weren't as spicy as I was expecting. So don't worry if you're a bit afraid of some heat, these won't scare you away. If you're a huge lover of spicy things -- add some more hot sauce.

Both of us thought these were nice and filling, despite being vegetarian. Those mushrooms make a great filler. So glad I decided to like them.


Nutrition Facts
Serving Size 353g
Amount per serving
Calories 674Calories from fat 151
% Daily Value
Total Fat 16.7g26%
Saturated Fat 5.9g30%
Cholesterol 25mg8%
Sodium 769mg32%
Total Carbs 104.3g35%
Fiber 21.8g87%
Sugars 8.3g
Protein 33.4g
Vitamin A 12%Vitamin C 21%
Calcium 33%Iron 41%

Wednesday, November 23, 2011

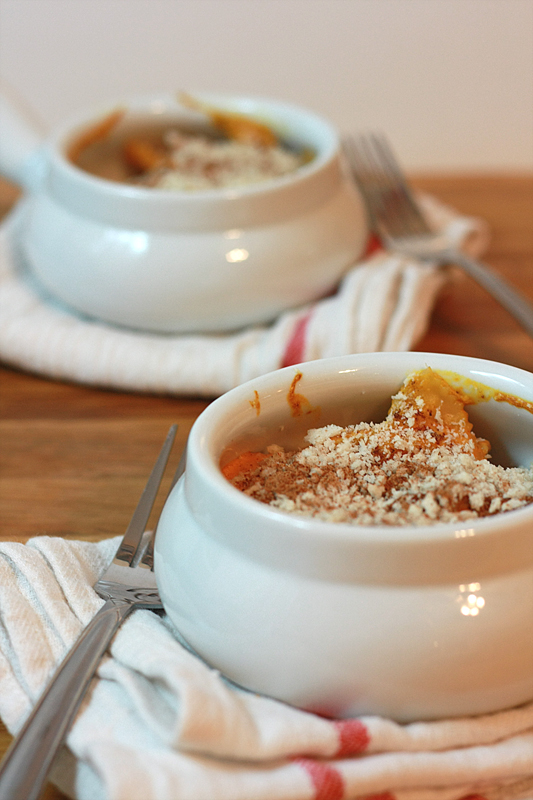
Baked Pumpkin Macaroni & Cheese


What? I'm giving you a pumpkin-non-Thanksgiving dish the day before Thanksgiving? Absolutely.

Consider it a warm-up, a pre-game, to the pumpkin pie.

Only this one you can actually eat for dinner and not feel guilty about. You know what I'm talking about. This might actually deter you from quickly shutting the fridge door and hiding the fork behind your back anytime someone comes in the kitchen. Though let's be honest, I think the family's going to pick up on it when you only show up with half a pie.

So instead of fixating on the pie in the fridge, why don't we pour that pumpkin goodness over some creamy cheesy noodles instead? And call it dinner. Well, at least it might distract us from the real thing for 5.3 seconds.


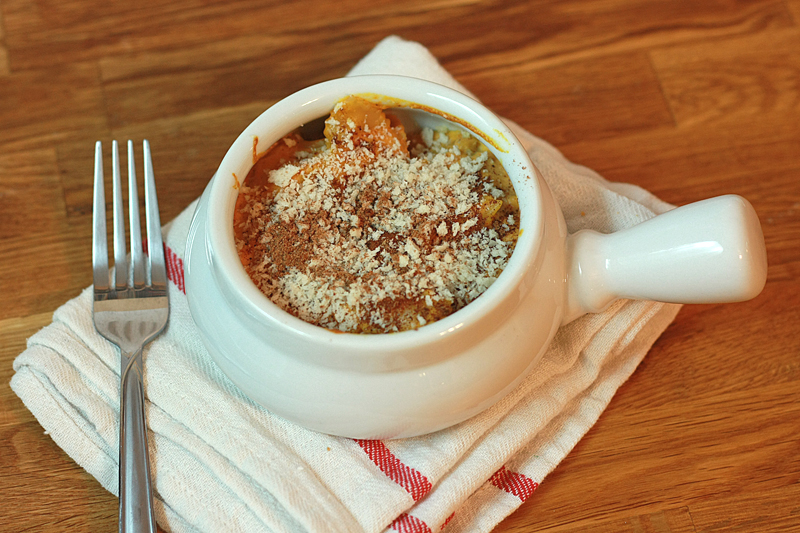
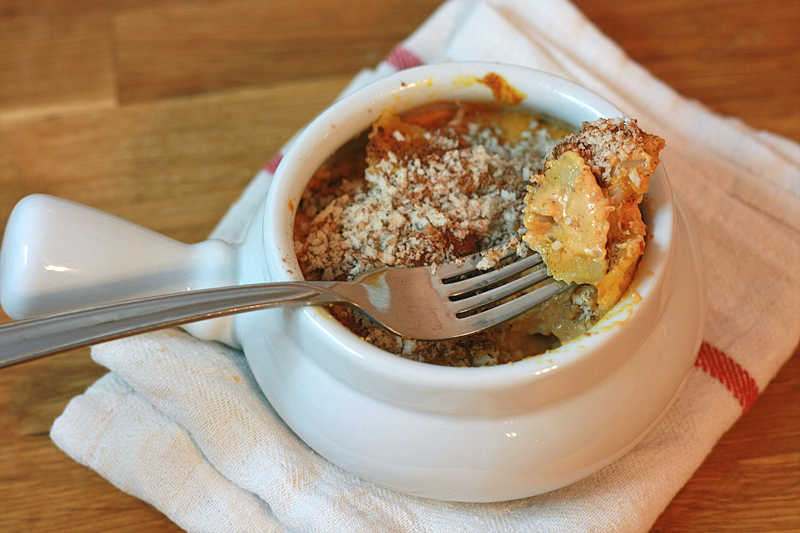
Baked Pumpkin Macaroni and Cheese
Adapted from: The Realistic Nutritionist

8 ounces medium-shaped pasta
3/4 teaspoon ground cinnamon
3/8 teaspoon ground ginger
heaping 1/8 teaspoon ground cloves
heaping 1/8 teaspoon ground nutmeg
1 cup pumpkin puree
1 cup whipping cream
2 ounces reduced-fat cream cheese
1 cup shredded sharp cheddar cheese
1/2 cup shredded Swiss cheese
1/4 teaspoon ground cayenne pepper
1/2 teaspoon kosher salt
1/4 teaspoon ground black pepper
1/3 cup panko
1/4 cup grated Parmesan cheese

Bring a large pot filled with water to a boil. Add pasta and cook according to package directions. Drain; set aside.

Preheat oven to 400 degrees F. Coat 4 16-ounce ramekins (or one 2 quart baking dish) with cooking spray. In a small bowl, combine the cinnamon, ginger, ground cloves, and nutmeg; set aside.

In a medium saucepan over medium heat, add the pumpkin and cream. Stir frequently, until mixture has thickened, about 5-7 minutes. Reduce heat to low. Stir in cheddar and Swiss cheeses until melted and mixture is smooth. Add half the spice mix, cayenne, salt, and pepper. Toss in pasta until completely coated in sauce. Divide pasta evenly between the four ramekins.

Top each ramekin with remaining spice mix, panko, and Parmesan cheese. Bake for 8-10 minutes, or until panko is golden brown.


Serves: 4


This absolutely, most definitely tastes like someone dropped a piece of pumpkin pie into some mac n cheese, said, oops, oh well, and served it anyways. Which, trust me, isn't exactly a bad thing. If you're in the mood for pumpkin pie for dinner, I can almost guarantee you that this will curb that craving. And it's still cheesy and gooey on top of it. Sigh, best of both worlds.


Nutrition Facts
Serving Size 221g
Amount per serving
Calories 575Calories from fat 258
% Daily Value
Total Fat 28.6g44%
Saturated Fat 17.6g88%
Cholesterol 91mg30%
Sodium 728mg30%
Total Carbs 56.4g19%
Fiber 4.6g18%
Sugars 4.4g
Protein 24.5g
Vitamin A 209%Vitamin C 5%
Calcium 46%Iron 23%

Monday, November 21, 2011

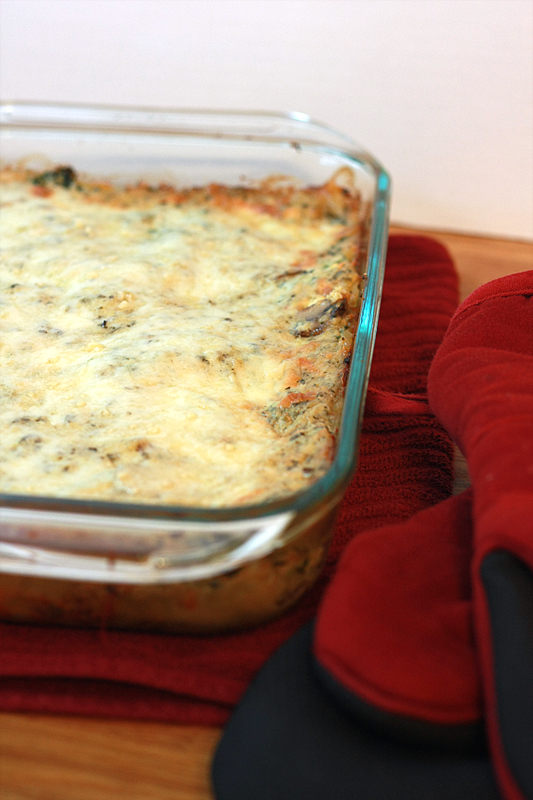
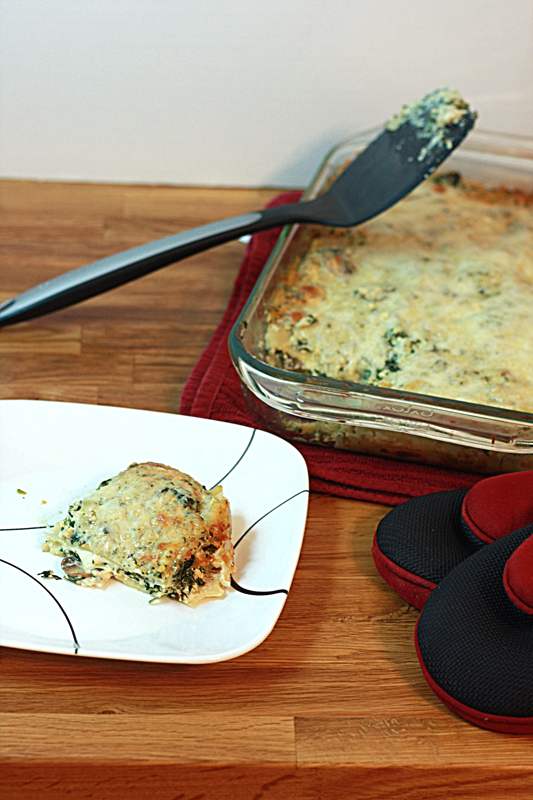
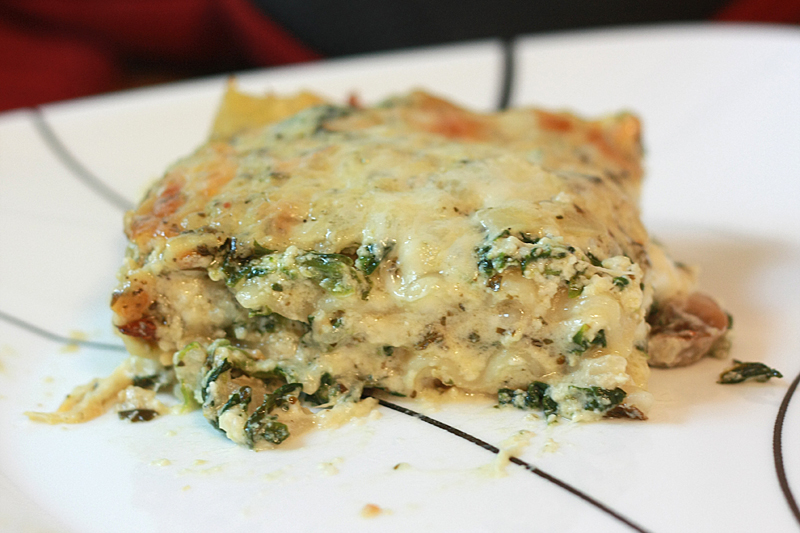
Spinach, Mushroom, & Pesto Lasagna


Stretchy pants. Nap time. Food coma.

Three things that are either necessary, or going to happen on Thanksgiving. While stretchy pants and naps do happen to be awesome, the whole food coma due to a crazy amount of food intake... that I can pass on.

How about some comfort food that doesn't require those three things? Okay, well, stretchy pants are always optional. Always.

Don't worry. You won't notice that all those calories are missing. In fact, you'll think this cheesy creamy lasagna is full of them. Good thing it's not true.

And shhh... don't tell. It's vegetarian. Not to mention hubby approved. True story.

Spinach, Mushroom, & Pesto Lasagna
Adapted from: Hungry Harps

9 lasagna noodles
10 ounces frozen spinach, thawed and drained
1 3/4 cup ricotta cheese
1 egg
1/2 teaspoon garlic powder
1/2 teaspoon salt
1/4 teaspoon ground black pepper
1 tablespoon olive oil
1 tablespoon butter
2 cups onion, diced
1/4 teaspoon crushed red pepper flakes
8 ounces sliced mushrooms
3 cloves garlic, minced
2 tablespoons flour
1 1/2 cups 1 % milk
1 1/2 cups half & half
3/4 cup plus 2 tablespoons basil pesto
3 cups shredded mozzarella cheese
1/4 cup Parmesan cheese, grated

Preheat oven to 350 degrees F. Coat a 9x13 baking dish with cooking spray.

In a medium bowl, stir together spinach, ricotta, egg, garlic powder, salt, and pepper. Set aside.

Heat butter and oil in a large saucepan over medium-high heat. Cook onions and red pepper flakes until onions soften, about 5 minutes. Add mushrooms and garlic, cooking until mushrooms release their moisture and most of it cooks off, 5-7 minutes. Whisk in flour, coating vegetables. Cook 1-2 minutes. Pour in milk and half & half. Bring mixture to a boil, stirring frequently to prevent milk from burning. Reduce heat and simmer until sauce has thickened, about 5 minutes, stirring frequently. Remove from heat and stir in 3/4 cup pesto.

In the prepared baking dish, spread the remaining pesto across the bottom. Place 3 lasagna noodles across the pesto, topping with 1/3 of the ricotta mixture. Add 1/3 of the pesto sauce followed by 1 cup of mozzarella cheese. Repeat twice more for a total of three layers. Sprinkle the top of the final layer with Parmesan.

Cover with aluminum foil and bake for 25 minutes. Remove foil and bake for an additional 25-30 minutes, or until top is bubbly and golden brown. Cool for 15 minutes before serving.


Serves: 12


We are so used to regular lasagna, that the pesto cream sauce really added a great different dimension to the dish. I might have suggested adding in sausage or chicken to this dish, and we both agreed it would actually take away rather than enhance the dish. Let's just say that the leftovers weren't left sitting in the fridge for over a week only to make it into the trash. Nope, pretty sure the entire casserole dish was gone much much faster than that. Which is saying something for only 2 people.


Nutrition Facts
Serving Size 244g
Amount per serving
Calories 372Calories from fat 147
% Daily Value
Total Fat 16.3g25%
Saturated Fat 8.8g44%
Cholesterol 78mg26%
Sodium 389mg16%
Total Carbs 35.0g12%
Fiber 1.2g5%
Sugars 4.2g
Protein 21.7g
Vitamin A 57%Vitamin C 15%
Calcium 44%Iron 7%

Friday, November 18, 2011

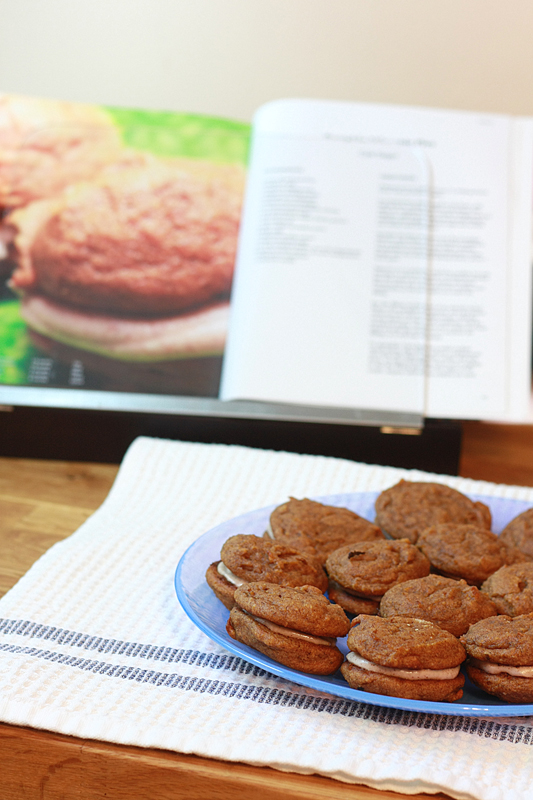
Gluten-Free Sugar-Free Pumpkin Whoopie Pies


Um, okay, since when in the world do I do gluten-free and sugar-free? I don't. When it's all about me anyways (which, let's not lie, it usually is).

BUT, Thanksgiving is just around the corner, and I'm going to have to concede, it's not about me. Dang it.

This year, we'll be celebrating this food-centric holiday with Adam's family. Which means smoked turkey, multiple kinds of stuffing, and... sugar-free pies. Of course a regular pumpkin pie will make an appearance, but those sugar-free pies honestly just make me sad. Because I know they just don't taste the same.

While Adam and I were simply asked to bring a bottle of wine as we're going to have to travel, I knew right away I wanted to make something as well. Something that everyone could enjoy, not just those who don't have to worry about their blood sugar.

BUT - my #1 rule: It has to taste as good as the original. I couldn't bring something that screamed gluten free and sugar free. I wanted something that you couldn't tell the difference. However, I wasn't going to try for one of the main hitters. No stepping on toes here. Instead, I opted to give some pumpkin whoopie pies a chance.

Seeing as I've never baked gluten free or sugar free, I did something unprecedented. I did a trial run. I searched the web high and low looking for the right combination of ingredients. Who knew there were so many different sweeteners? Or flours?

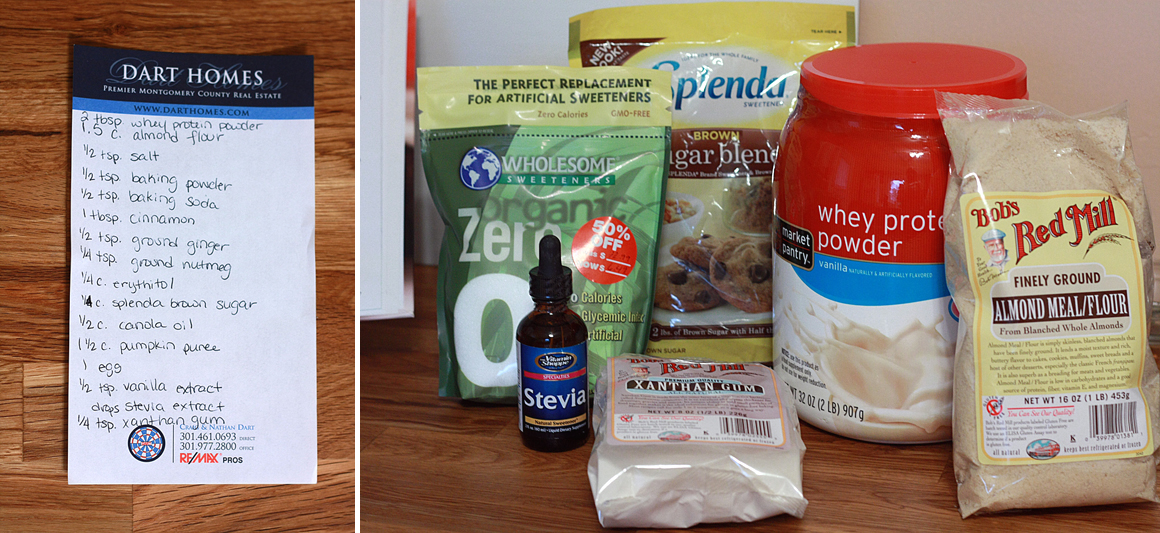
I finally settled on a mix of almond flour, xanthan gum, and whey protein for my flour replacement, and erythritol, stevia extract, and xylitol for my "sugars". This gluten free/sugar free business is some serious stuff. Trust me, my wallet believes me.

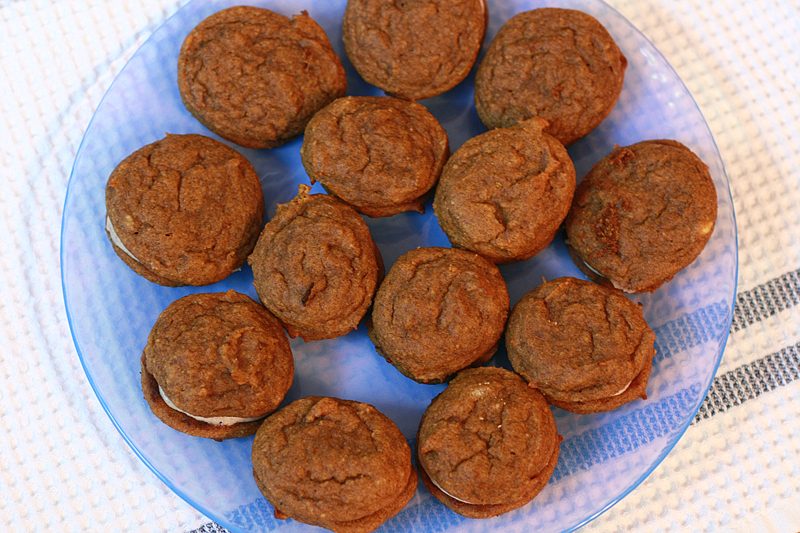
However, I think I've come very close to hitting the nail on the head with these. Adam would have never known if I hadn't told them they weren't the originals. The only little thing I have left to tweak is they're a bit on the overly moist side. Other than that, these babies are delicious, and everything I hoped they would be.


Gluten-Free Sugar-Free Pumpkin Whoopie Pies

Inspired by: Cast Sugar
2 1/2 cups almond flour
2 tablespoons vanilla-flavored whey protein powder
1/4 teaspoon xanthan gum
1/2 teaspoon salt
1/2 teaspoon baking powder
1/2 teaspoon baking soda
1 tablespoon cinnamon
1/2 teaspoon ground ginger
1/2 teaspoon ground nutmeg
1/4 cup erythritol
1/2 cup Ideal Brown (xylitol)
1/2 cup canola oil
1 1/2 cup pumpkin puree
1 egg
1/2 teaspoon vanilla extract
15 drops stevia extract

1/4 cup unsalted butter, at room temperature
4 ounces reduced-fat cream cheese, at room temperature
1 1/2 cups powdered erythritol
1/2 tablespoon ground cinnamon
1/2 teaspoon vanilla extract

Preheat oven to 350 degrees F. Line baking sheets with parchment paper.

In a medium bowl, stir together the almond flour (or meal), protein powder, xanthan gum, salt, baking powder, baking soda, 1 tablespoon cinnamon, ginger, and nutmeg. Set aside.

In a large bowl, whisk together the erythritol, Ideal Brown (xylitol), and canola oil. Add the pumpkin puree and whisk until fully combined. Whisk in the eggs, vanilla, and stevia extract. Add half the dry ingredient mixture to the large bowl, whisking until mostly combined. Add remaining dry ingredients, whisking until all ingredients are fully hydrated.

Using a small cookie scoop (about 1 heaping tablespoon), place dough on prepared baking sheets about 1 inch apart. Bake for 12-15 minutes, until cookies start to crack on top. Remove cookies from oven, and allow to cool on the pan. Transfer to a wire rack. In the large work bowl of a mixer, beat the butter until smooth. Add the cream cheese and beat until combined. Add the powdered erythritol, stirring by hand or on lowest setting until majority of erythritol is combined. Beat in the cinnamon and vanilla, continue mixing until mixture is smooth.

To assemble whoopie pies, flip half of pumpkin cookies upside down. Spread or pipe buttercream across the upside down half. Top with another cookie, right side up, and gently press down so filling reaches the edge of the cookies. Repeat with remaining cookies and filling. Store whoopie pies in the fridge until ready to serve.
Makes: 18


Even though I had pretty good success my first time out of the gate with gluten free and sugar free baking, I think I'm going to save it for a special occasion. It takes a lot of thinking and switching to figure out what you should be replacing what with, not to mention the cost. Good.Ness. While many of the ingredients came in large quantities that will last me a while, others, such as almond flour, are not only expensive, but they will get used up -- fast.

But in this case, I think it's worth the cost. Everybody needs to have a delicious treat to wrap up their Thanksgiving meal, right?

Now I just need to keep my fingers crossed that I can pull these off again on the day of, in a different kitchen, without my oven and baking equipment.

Nutrition Facts
Serving Size 59g
Amount per serving
Calories 207Calories from fat 171
% Daily Value
Total Fat 19.0g29%
Saturated Fat 4.2g21%
Cholesterol 27mg9%
Sodium 191mg8%
Total Carbs 7.3g2%
Fiber 3.8g15%
Sugars 1.5g
Protein 5.6g
Vitamin A 67%Vitamin C 1%
Calcium 6%Iron 6%
Each cookie has a total carb count of 7.3g, but after subtracting out the fiber they have a Net Carb amount of 3.5g!

Wednesday, November 16, 2011

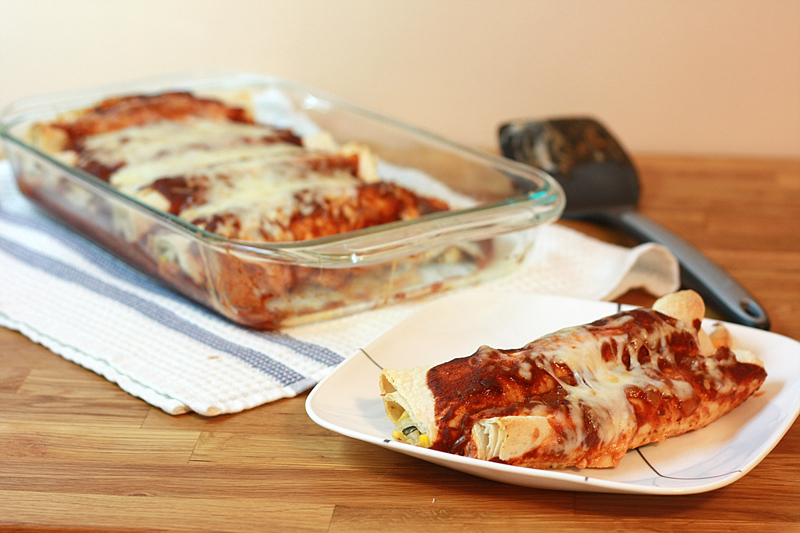
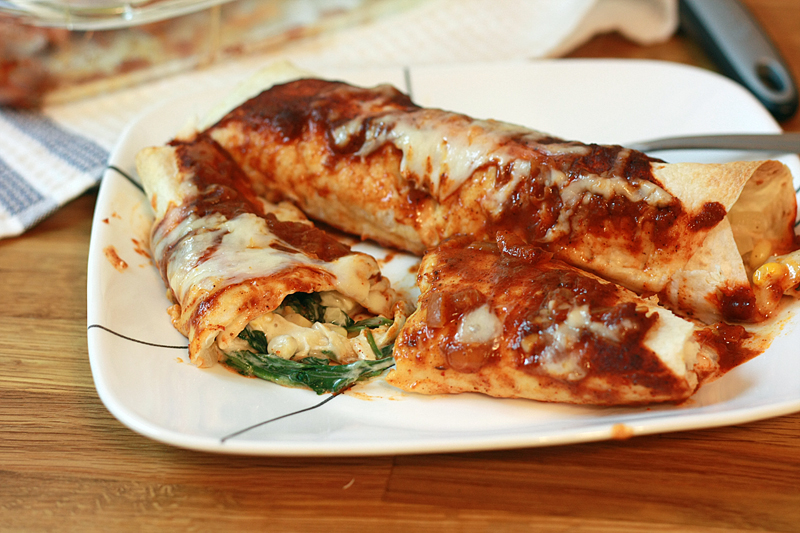
Chicken & Spinach Enchiladas


Adam and I have been going back and forth for years about the presence of "red sauce" on enchiladas. I'm not a fan. He is. I'll let you take a guess which way they're typically made.

(Er, well, actually they're not really made all that often if I'm being honest here.)

I can't quite put a finger on why exactly I'm not a fan of the red sauce. Too tomato-y? To liquid-y? Maybe because my mom never made them that way? All of the above?

When my friends started raving about a delicious enchilada dish they had just made, of course, I wanted the recipe. Completely forgetting that enchiladas usually come with a red sauce. Oops. Well, time to make a convert out of me.

I was skeptical at first, but after smelling the sauce simmering away on the stove I knew it was going to be fantastic. The depth of the flavor of the sauce is far more than I typically associate with red sauce -- it's definitely bolder and richer. And the filling? Just the right amount of creaminess mixed with just the right amount of crunch from the corn. And that spinach? What spinach? You don't notice it at all.

Chicken and Spinach Enchilada
Adapted from: Cuisine at Home

Enchilada Sauce:
1 tablespoon canola oil
3/4 cup onion, minced
1 tablespoon garlic, minced
1/4 cup chili powder
2 tablespoons tomato paste
1 tablespoon flour
1 teaspoon dried oregano
1 teaspoon ground cumin
1/2 teaspoon ground coriander
1/2 teaspoon sugar
1/2 teaspoon cayenne pepper
2 cups fat-free reduced-sodium chicken broth
1 (8 ounce) can tomato sauce

Filling:
2 tablespoons canola oil
3/4 cup onion, diced
1 tablespoon garlic, minced
1/2 teaspoon ground cumin
6 ounces fresh baby spinach, roughly chopped
2 (4 ounce) boneless, skinless chicken breasts, cooked and shredded
2 cups Monterey Jack cheese, shredded, divided
1 cup frozen corn
1/4 cup (2 ounces) reduced-fat cream cheese
1/2 teaspoon salt
1/4 teaspoon ground black pepper

8 (6-inch) flour tortillas

Heat 1 tablespoon canola oil in a medium saucepan over medium heat. Add 3/4 minced onion and 1 tablespoon minced garlic to the pan. Cook until onions are soft, 4-5 minutes. Add the next 8 ingredients (through cayenne) and cook for 1-2 minutes. Whisk in broth; bring to a boil. Reduce mixture to a simmer and cook for 10 minutes. Add tomato sauce and simmer for 5 minutes. Remove from heat and set aside until ready to use.

Meanwhile, preheat oven to 400 degrees F. Coat a 9x13 baking dish with cooking spray. Heat 2 tablespoon canola oil in a large non-stick skillet over medium heat. Add 3/4 cup diced onion, 1 tablespoon garlic, and 1/2 teaspoon cumin to the pan. Cook until onion are soft, 4-5 minutes. Add the spinach, a handful at a time, stirring until wilted, about 1 minute. Add the chicken, 1 cup Monterey Jack, corn, and cream cheese, stirring until combined. Simmer the mixture 4-5 minutes, then add the salt and pepper. Remove from heat.

Pour 1 cup of the enchilada sauce on the bottom of the prepared baking dish. Spread sauce across the dish so the bottom is entirely coated. Place about 1/3 cup of the filling on each tortilla. Roll each tortilla up then place in baking dish, seam side down. Pour the remaining 1 cup sauce over the enchiladas, leaving the edges dry. Sprinkle with remaining cheese. Bake for 15-20 minutes, or until the cheese melts and the tortillas lightly brown on the edges.


Serves: 8


Now I'm not going to tell you that this is a quick meal to throw together at the last minute. Hard? No. Just a little time consuming to prep the ingredients and pull everything together. Worth it? Absolutely. Yes, even the red sauce.


Nutrition Facts
Serving Size 245g
Amount per serving
Calories 323Calories from fat 160
% Daily Value
Total Fat 17.8g27%
Saturated Fat 6.7g33%
Cholesterol 50mg17%
Sodium 692mg29%
Total Carbs 24.1g8%
Fiber 5.0g20%
Sugars 4.5g
Protein 19.6g
Vitamin A 73%Vitamin C 25%
Calcium 29%Iron 17%

Monday, November 14, 2011

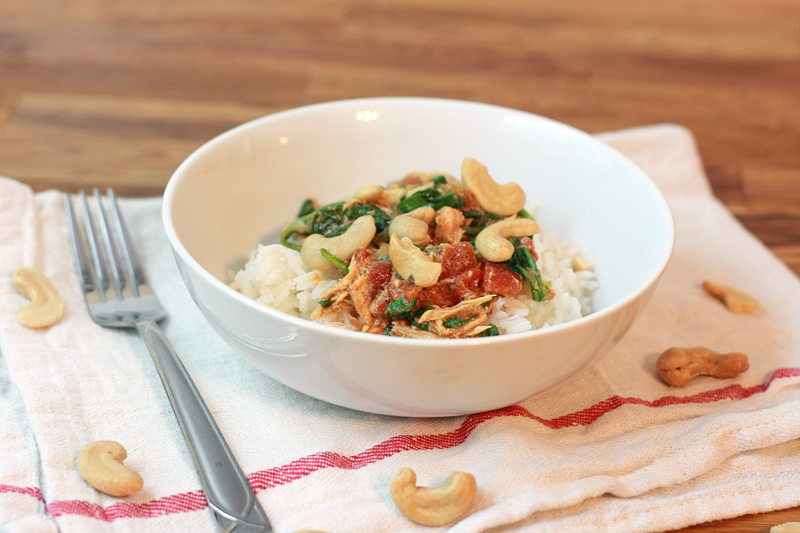
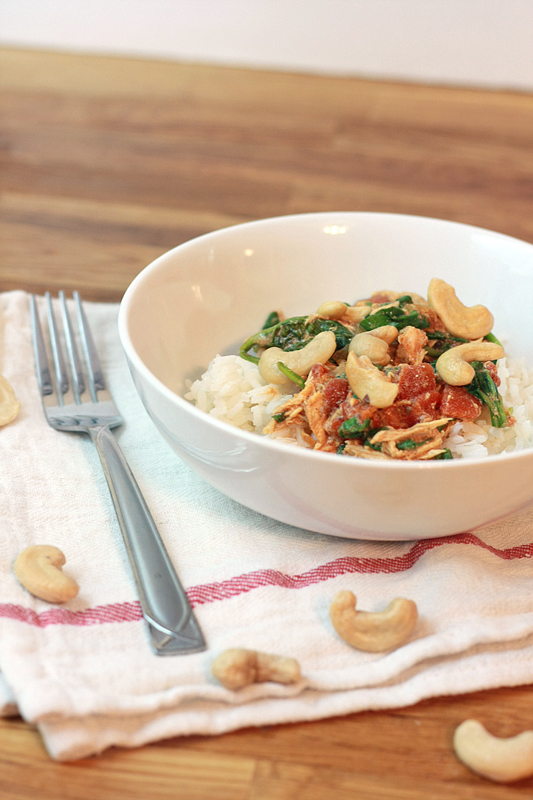
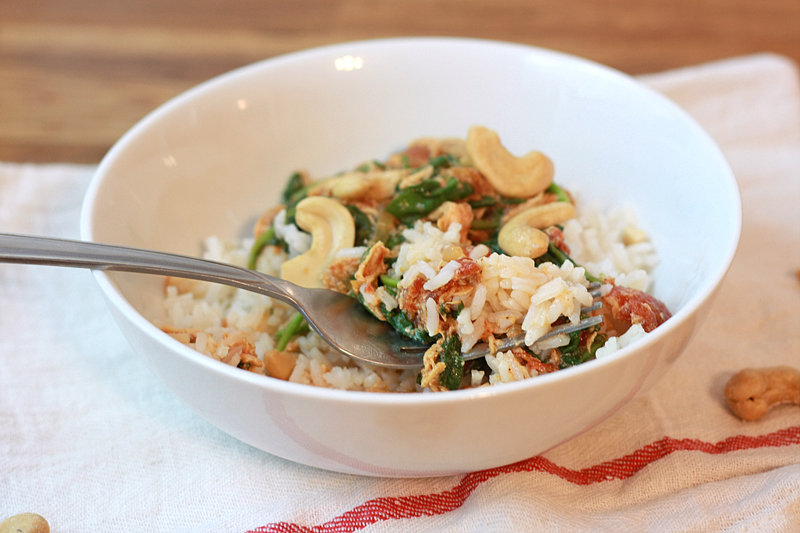
Slow Cooker Butter Chicken


Ha. I bet you thought with my last slow cooker recipe that I was done with this whole crockpot business. Nope. I have one more for you, then I promise, I'm done. For a while anyways.

The slow cooker really shines when it comes to cooking meats "low and slow". Unfortunately, it can make for some fairly repetitive meals. Pulled pork seasoned with this, shredded chicken sprinkled with that. Again. And again. My goal in the hunt for slow cooker recipes was to find ones that weren't your everyday recipes. Sure, I had a few of those too, but was far more interested in things such as the Slow Cooker Lasagna.

You may roll your eyes and point out the fact that um, yeah, this recipe is essentially just seasoned shredded chicken -- and I would agree with you on that. But, the flavors in this dish are not your everyday flavors. At least in our household. Indian rarely makes it to our table, and we really have to be in the mood to eat it. Not only do a lot of Indian dishes call for coconut (which is a no-go from both of us), but the curry presence can tend to be very strong and pronounced at times. It's not that we don't like it, we just like it in small doses. This dish definitely settles those Indian cravings, and is super easy to throw together.

Slow Cooker Butter Chicken
Adapted from: The Family Kitchen

1 onion, halved and thinly sliced
1 (28 ounce) can diced tomatoes
2-3 tablespoons tomato paste
4-5 cloves garlic, crushed
1 teaspoon ground ginger
2-3 teaspoons curry powder
1 teaspoon cumin
1/4 teaspoon ground cinnamon
3 (4 ounce) boneless, skinless chicken breasts, fresh or frozen
4 cups fresh baby spinach, roughly chopped
1 cup plain fat-free greek yogurt
2 tablespoons roughly chopped cashews

Cover a slow cooker with a liner. Combine first 8 ingredients (through chicken) in the slow cooker. Cook on low 6-8 hours. Using two forks, shred or cut the chicken into chunks. Stir in the yogurt until fully combined, then stir in the spinach until it wilts. Serve over white rice.

Serves: 6


I think "easy" is another requirement for a good slow cooker recipe. If you have to brown a bunch of meat, or pre-cook/prep a bunch of other ingredients, all you're really saving is the waiting time to eat from the time you walk in the door -- basically about 30 minutes to an hour. On those recipes, I'm not 100% sure it's worth it. I like the kind that involves dumping the ingredients and going. Period. This recipe definitely falls into the latter category (although you do have to wait about 20 minutes or so for the rice...) . While it may be ridiculously easy to throw together, this is one of those recipes that needs those extra few hours of TLC to get those spice flavors really melded together. Definitely a keeper for those random times we crave Indian food.


Nutrition Facts - does not include rice
Serving Size 279g
Amount per serving
Calories 146Calories from fat 29
% Daily Value
Total Fat 3.2g5%
Saturated Fat 0.0g0%
Cholesterol 32mg11%
Sodium 286mg12%
Total Carbs 13.8g5%
Fiber 3.1g12%
Sugars 7.3g
Protein 18.0g
Vitamin A 65%Vitamin C 44%
Calcium 13%Iron 13%

Thursday, November 10, 2011

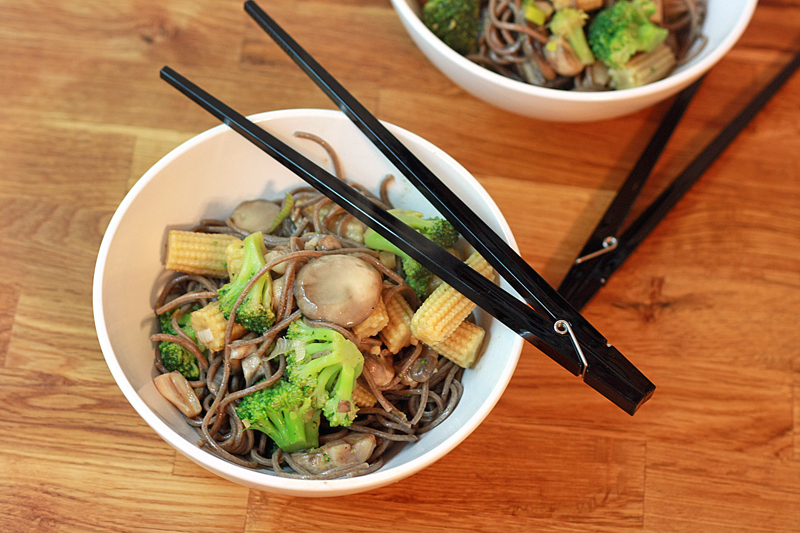
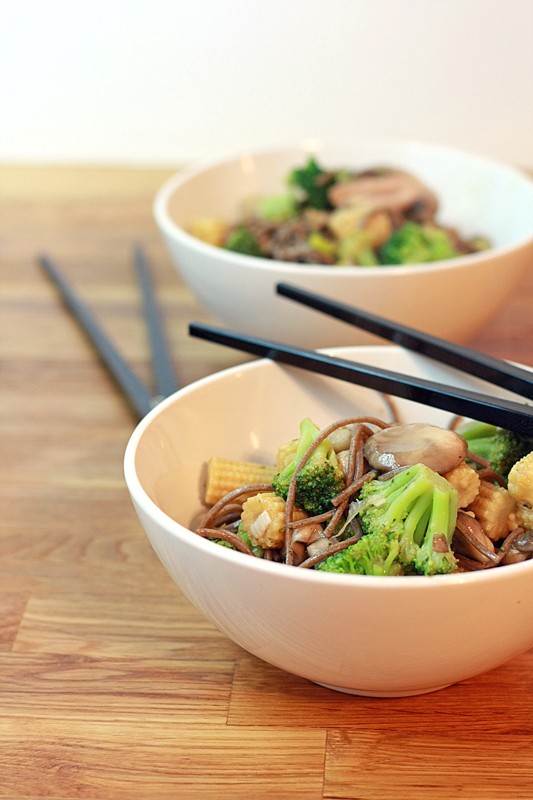
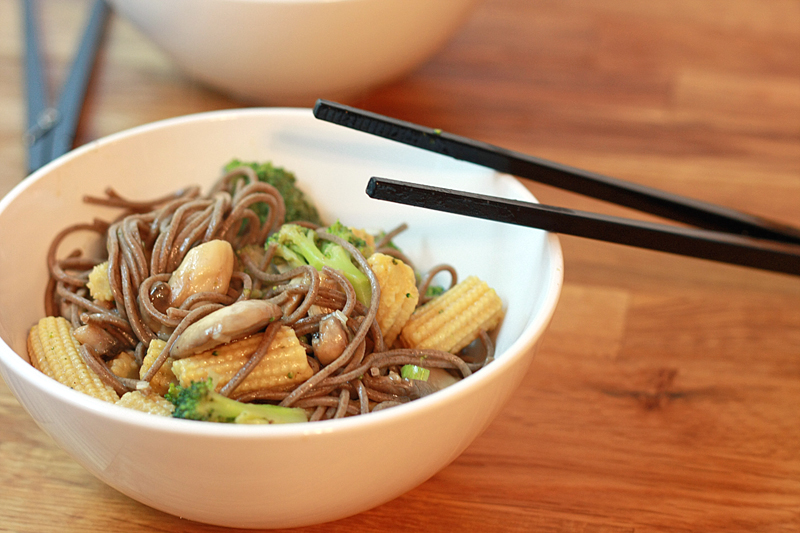
Ginger Hoisin Stir Fry

Fall is supposed to be about hearty, warm, rib-sticking meals -- laced with cinnamon, cloves, and nutmeg... right? On a chilly rainy day, absolutely.

As of late, there have been some absolutely gorgeous fall days. I'm pretty sure I saw the temps hit the low 70s earlier this week. Unbelievable, especially after it snowed the weekend before Halloween. But I love it. It just gives me more time to spend outside doing things (or maybe just running errands without being in a grouchy mood because I'm freezing).

If you can't tell, I'm not the biggest fan of winter. Thanksgiving? Christmas? Love. But I could totally do without gray slushy snow getting tracked into my house and finding its way into my shoes in the middle of January.

My husband especially hates cold weather. It means he gets icy toes stuck on him in the middle of the night. For some reason he seems to have a problem with this.

So before my fall and winter cravings hit full stride, I had to throw in a nice "lighter" dinner. Still filling and full of veggies, but not quite worthy of the stretchy pants. Thank goodness. I have plenty of that in my future.

Ginger Hoisin Stir Fry
Adapted from: Cooking Light, October 2011

1 1/2 teaspoons green onions, finely chopped
2 teaspoons rice wine vinegar
1 1/2 teaspoons soy sauce
1/3 teaspoon ground ginger
1/2 teaspoon honey
1 teaspoon hoisin sauce
8 ounces soba noodles
1 tablespoon canola oil
8 ounces frozen broccoli
6 ounces mushrooms, sliced
1 (15 ounce) can cut baby corn, drained

In a small bowl, mix together the first 6 ingredients (through hoisin). Set aside. Bring a medium pot filled with water to a boil. Cook the noodles according to package directions. Drain. Heat oil in a large skillet or wok over medium-high heat. Add broccoli and stir fry for 1 minute. Add mushrooms and baby corn, cook for an additional minute. Add cooked noodles, and stir fry for 1 minute. Pour the prepared sauce over noodles and cook for an additional minute.

Serves: 3


While good, not to mention fast, I think I could have gone for doubling the amount of sauce used. I didn't include it in the recipe as the sodium is fairly high, so I'll let you make that call. As with almost all Asian-inspired stir fries, you can easily switch out the veggies and add any kind of meat you wish. That's my kind of versatile dish.


Nutrition Facts
Serving Size 364g
Amount per serving
Calories 374Calories from fat 52
% Daily Value
Total Fat 5.8g9%
Saturated Fat 0.5g3%
Cholesterol 0mg0%
Sodium 1122mg47%
Total Carbs 70.0g23%
Fiber 4.9g20%
Sugars 4.9g
Protein 17.3g
Vitamin A 14%Vitamin C 117%
Calcium 7%Iron 21%

Wednesday, November 9, 2011

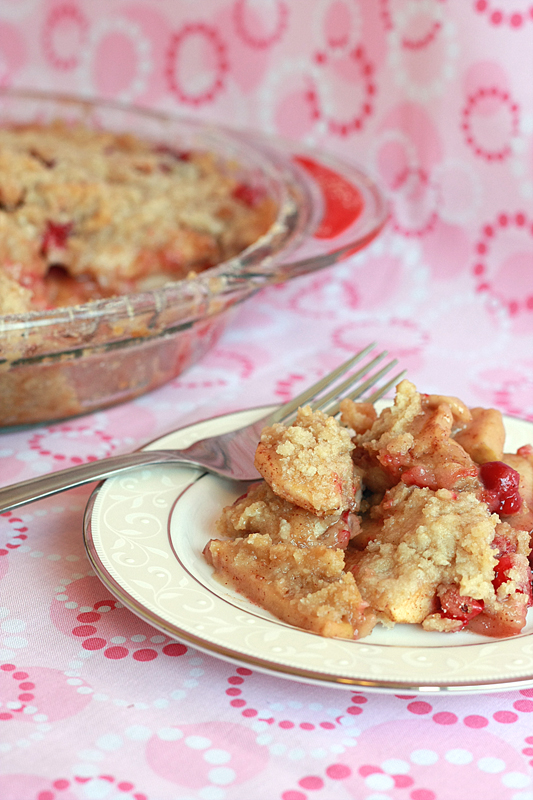
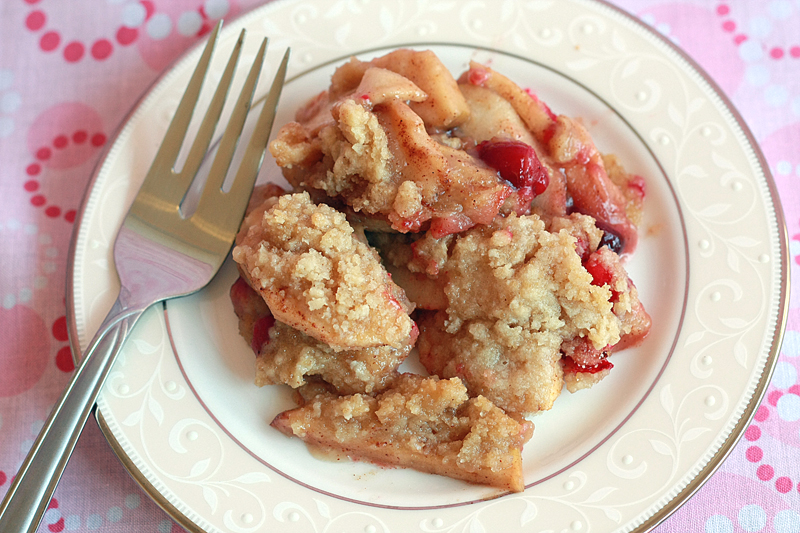
Apple-Cranberry Crumble


I have always claimed that I'm not an apple pie person. Or really any fruit pie for that matter. It's a issue regarding mushy fruit. Kind of weirds me out.

But 6 pounds of apples staring at me from the counter occasionally calls for desperate measures.

I know I didn't want just any ol' apple pie going on. I wanted something laden with butter, and gooey, without oats or nuts and preferably with more flavor notes than just apple and cinnamon. Not that I'm picky or anything. At some point I came across the apple-cranberry combination and just couldn't get it out of my head. Yet trying to find that particular combination in a crumble meeting all my requirements = not so easy.

While looking for menu ideas in my overflowing Foodbuzz inbox, I came across some Winter Mini Apple-Cranberry Crumbles from Cake Duchess I archived longer ago than I care to admit. Not only did those little beauties have the delicious apple-cranberry combo, but she also ingeniously gave them a bottom "crust" made out of crumble as well. Seriously? More of the gooey goodness on the bottom? Done.

I will admit, I might just look past my dislike of mushy fruit for this crumble. I may or may not have been up in the kitchen at 10:00 Friday night, cutting butter into flour in order to make this crumble (for a second time within a week!) for my parents who were arriving later that night. It is just.that.good.

I also may or may not have been tempted to simply eat the entire pan by myself as soon as it came out of the oven. Too bad my parents arrived before I had the chance. Drats.


Apple-Cranberry Crumble


Adapted from: Cake Duchess

6 small to medium McIntosh apples, peeled, cored, and thinly sliced
1 cup fresh cranberries
1/2 teaspoon kosher salt
1 tablespoon lemon juice
1/4 cup brown sugar
1 teaspoon ground cinnamon
1 teaspoon ground ginger

1 1/2 cups all-purpose flour
3/4 cup (1 1/2 sticks) cold butter, cut into small pieces
3/4 cup brown sugar
1/4 teaspoon ground cinnamon

Preheat oven to 350 degrees F. Spray a 9-inch pyrex pie plate with cooking spray. Set aside.

In a medium bowl, toss together the apple slices, cranberries, 1/4 cup brown sugar, lemon juice, 1 teaspoon cinnamon, and ginger. Continue tossing until all the apples slices are well coated.

In a large bowl, stir together the flour, brown sugar, and 1/4 teaspoon cinnamon. Using a pastry blender, cut the butter into the dry mixture until a crumbly texture forms (butter should be in pea-sized pieces). Pour half of the flour mixture onto the bottom of the prepared pie plate. Press the mixture down evenly across the bottom so a crust forms. Pour the fruit mixture onto the bottom crust, spreading out evenly. Sprinkle the remaining half of the flour mixture on top of the fruit, which should almost completely cover it.

Bake for 35-40 minutes, or until the crumble is nice and golden and the fruit mixture is bubbling.


Serves: 8


I think one of my favorite parts of this dish is the nice tartness that comes from the cranberries. It definitely adds that extra bit of oomph that I was looking for. As for that bottom layer of crumble? Such a genius move. Even more of that gooey deliciousness to wrap around each bite of fruit.

It's really quite possible that I may have eaten this as breakfast and as lunch. Not on the same day, though I really had to restrain myself. My logic - it has fruit it in, therefore it totally counts as being okay for breakfast/brunch. Right?


Nutrition Facts
Serving Size 192g
Amount per serving
Calories 370Calories from fat 158
% Daily Value
Total Fat 17.5g27%
Saturated Fat 11.0g55%
Cholesterol 46mg15%
Sodium 276mg11%
Total Carbs 50.3g17%
Fiber 2.5g10%
Sugars 18.2g
Protein 2.7g
Vitamin A 11%Vitamin C 4%
Calcium 3%Iron 7%

LinkWithin

Related Posts with Thumbnails
 
Pin It button on image hover