Monday, February 28, 2011

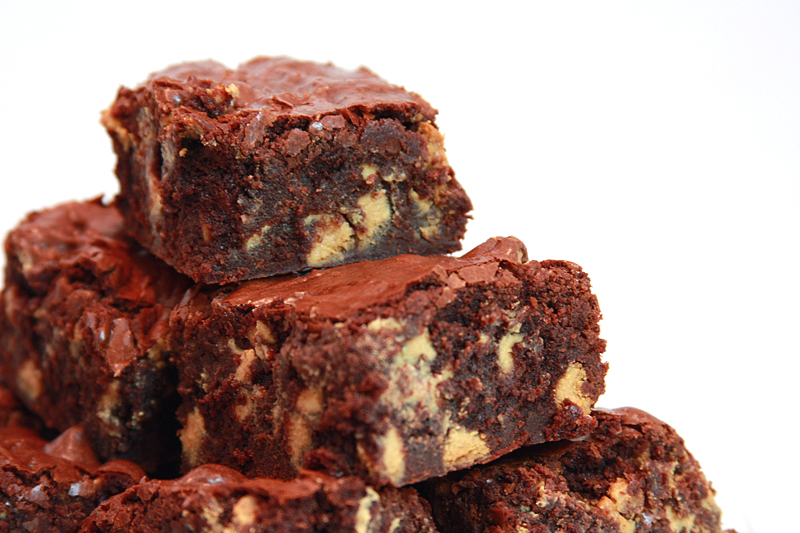
Brown Butter Brownies with Peanut Butter Chips


Do you ever have those recipes that you just always happen to screw up? It doesn't matter how much you prep beforehand, something always goes wrong. Such is the case with these brownies and me.

Of course I was lured in to the recipe, as like so many others, by the cover of the February issue of Bon Appétit. My first attempt at these decadent beauties was for the super bowl. Taking the advice of someone who had already made these, I doubled the recipe to make the brownies nice and thick, because let's face it, a thin skimpy little brownie is just sad. The genius that I am decided to simply double the amounts in my head as I went along. Which worked out fine until I forgot to double the eggs and didn't realize it until 5 minutes after they had already been in the oven. Luckily the batter hadn't even begun to set yet, so after a quick add-in and stir they were fixed, although all my peanut butter chips ended up melting into the batter.

The second time around I thought I was on top of things. I wrote down exactly how much of everything I would need and had everything ready to go. Except spraying the foil lining the baking sheet. Which, of course, was not realized until the batter was already in the pan. Sigh. So back into the bowl the batter went and the baking pan was re-lined (and sprayed).

Both times I was lucky enough to catch my mistakes before baking (or at least baking all the way through). Maybe, just maybe, third time's the charm?
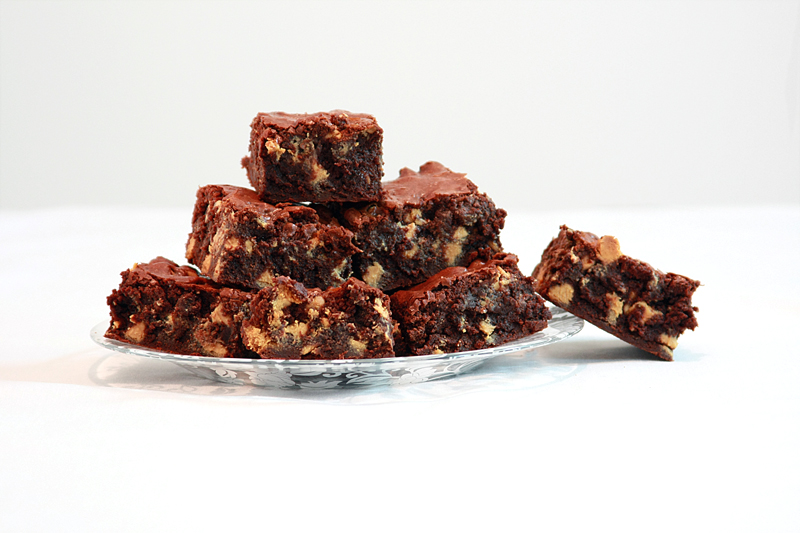

Brown Butter Brownies with Peanut Butter Chips
Adapted from: Bon Appétit, February 2011

Cooking spray
20 tablespoons (2 1/2 sticks) butter, cut into 1-inch pieces
2 1/2 cups sugar
1 1/2 cups natural unsweetened cocoa powder
1/2 teaspoon salt
4 teaspoons water
2 teaspoons vanilla extract
4 large eggs, chilled
2/3 cup plus 2 tablespoons all-purpose flour
1 1/2 cups peanut butter chips

Preheat oven to 325 degrees F. Prepare a 8x8-inch baking pan by lining the bottom and sides of pan with foil, leaving a 2-inch overhang. Coat the foil with cooking spray.

In a medium saucepan, melt the butter over medium heat. Stirring often, continue to cook the butter until the foaming subsides and browned bits have formed on the bottom of the pan, about 10 minutes. (The butter will also take on a very nutty smell when it is done.)

Meanwhile, combine the sugar, cocoa, and salt in a large bowl. In a small bowl, combine the water and vanilla extract.

Once the butter has finished browning, pour over the sugar and cocoa mixture, and add the water and vanilla extract. Stir until all the ingredients are fully incorporated. Let stand for 5 minutes.

Add eggs, one at a time, beating each egg vigorously into the batter before adding the next. When the batter become thick and shiny, add in the flour until thoroughly mixed. Then beat vigorously for 60 strokes. Fold in the peanut butter chips.

Transfer the batter to the prepared pan. Bake brownies 40-45 minutes, or until a toothpick inserted into the center comes out with only a few moist crumbs. Cool in pan on a cooling rack. Using foil overhang, lift brownies from pan. Slice the brownies into 4 strips by 4 strips.

Makes: 16 brownies
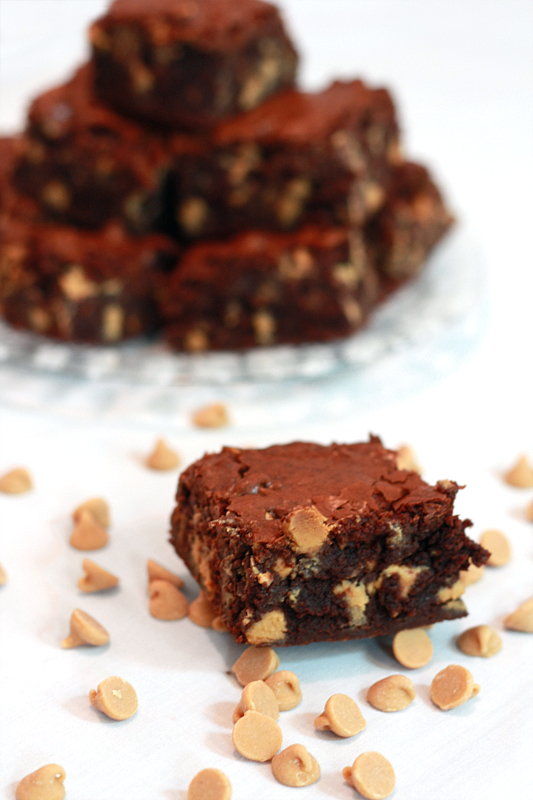

It's a good thing these brownies are pretty fantastic, or all this hassle might make me never want to try them again. But, these are definitely worth it. They are dense and fudgy and oh-so-chocolatey. I love the peanut butter in them, but it does kind of hide the nuance of the brown butter. Still, as of right now, these have taken over my #1 brownie spot. I have to admit, the people over at Bon Appétit might know what they're talking about when they called these some of the best.


Nutrition Facts
Amount per serving
Calories 413Calories from fat 205
% Daily Value
Total Fat 22.8g35%
Saturated Fat 15.4g77%
Trans Fat 0.0g
Cholesterol 91mg30%
Sodium 144mg6%
Total Carbs 54.1g18%
Dietary Fiber 2.6g10%
Sugars 43.6g
Protein 3.8g
Vitamin A 10%Vitamin C 0%
Calcium 2%Iron 10%

Thursday, February 24, 2011

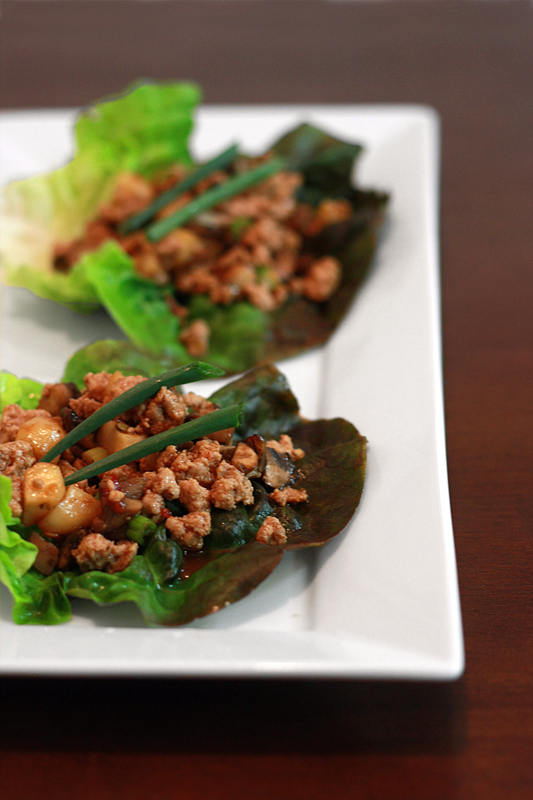
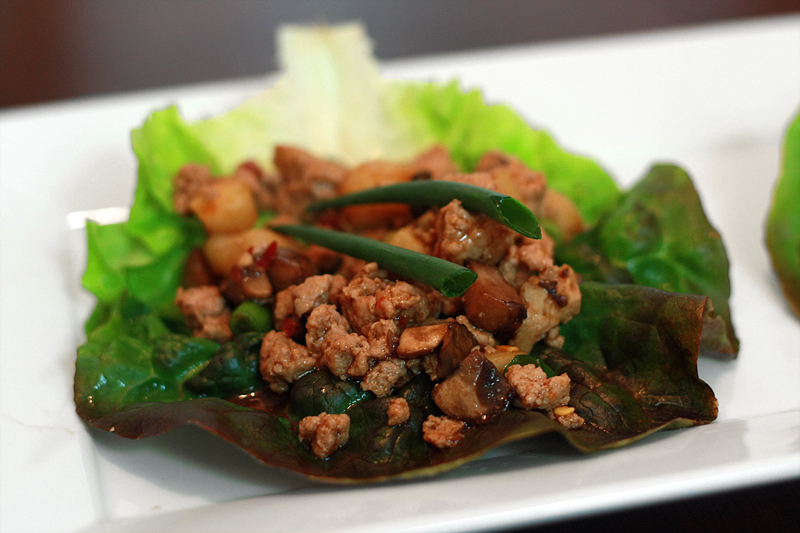
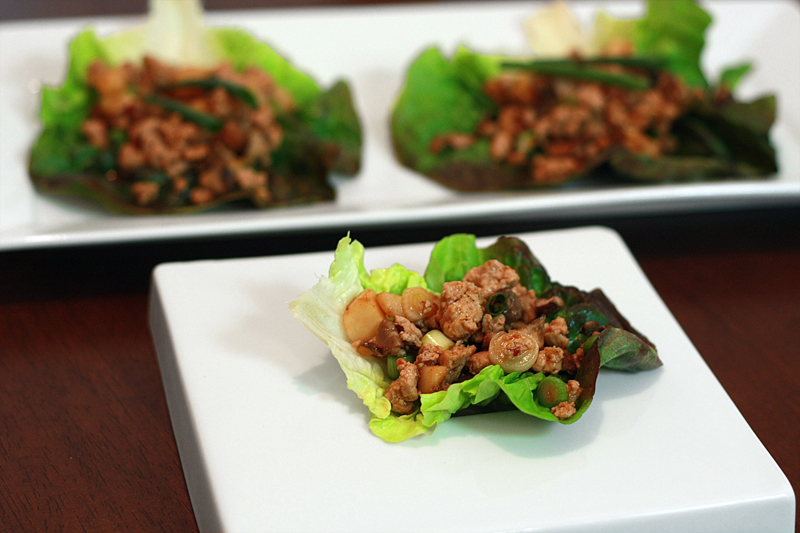
Asian Lettuce Cups


Spring is just around the corner. Despite the fact that there is snow on the ground, and the temps are hovering in the mid-30's, I some how know spring is on it's way. Much like I can tell winter has set in by my change in appetite towards heavy comfort food, the same kind of change happens when spring arrives. Or maybe it was just those two glorious 60 degree days that tricked me. Either way, I've noticed that I am starting to crave less heavy stick-to-your-ribs food and more bright, fresh, and lighter food.

I came across this recipe while flipping through my huge stack of food magazines this past week. I swear I always let those things accumulate for far too long before I get around to tearing out the interesting-looking recipes and throw the rest away. I think it was the concept of the "lettuce cup" that first caught my attention with this recipe, as I have always heard people rave about PF Chang's Chicken Lettuce Wraps.

I have never had those hyped-up wraps at PF Chang's as I usually get lured away by the promise of lovely steamed dumplings and won-ton soup instead. If these cups are any indication, I think I'm missing out.

Asian Lettuce Cups
Adapted from: Cooking Light, August 2010

2 tablespoons canola oil, divided
8 ounces Baby Bella mushrooms, diced
1 1/4 pound ground turkey
1 clove garlic, minced
1/8 heaping teaspoon ground ginger
2/3 cup thinly sliced green onions
1 (8 ounce) can diced water chestnuts, drained
12 Boston lettuce leaves
3 tablespoons hoisin sauce
2 tablespoons soy sauce
1 tablespoon rice vinegar
2 teaspoons chile garlic paste (such as sambal oelek)

In a large non-stick skillet, warm 1 tablespoon oil over medium heat. Add mushrooms and sauté until tender and just starting to release liquid, stirring occasionally, about 6 minutes. Transfer mushrooms to a large bowl.

In the same skillet, heat the remaining 1 tablespoon oil over medium-high heat. Add turkey, garlic, and ginger to pan. Cook until turkey is browned, about 6 minutes; stirring to crumble. Drain, if necessary.

Meanwhile, in a small bowl, whisk together the hoisin, soy sauce, rice vinegar, and chile paste.

Add the turkey mixture, green onions, and water chestnuts to the bowl with the mushrooms, tossing to mix. Drizzle with the hoisin mixture, continuing to toss until the turkey and mushroom mixture is completely coated.

Spoon about 1/4 cup of the turkey mixture into each lettuce leaf and serve.

Serves: 6


While the idea behind burrito-ing lettuce around ground meat is novel, putting it in to practice and trying to actually eat the dang thing is a whole different story in itself. I ended up with juice running down my hands and chin, looking at Adam, saying "can you pass me another napkin?". Not that this is necessarily a bad thing. Just not exactly something you probably want to do in public, or on a first date, well, unless you're trying to get rid of the guy, and then by all means, have at it. If you're not looking for that kind of mess to accompany your dinner, you could always serve the ground turkey mixture in a bowl over a bed of shredded lettuce. But, what's the fun in that?


Nutrition Facts
Amount per serving
Calories 360Calories from fat 159
% Daily Value
Total Fat 17.7g27%
Saturated Fat 3.6g18%
Trans Fat 0.0g
Cholesterol 97mg32%
Sodium 552mg23%
Total Carbs 20.4g7%
Dietary Fiber 1.3g5%
Sugars 3.4g
Protein 28.6g
Vitamin A 4%Vitamin C 22%
Calcium 5%Iron 17%

Wednesday, February 23, 2011

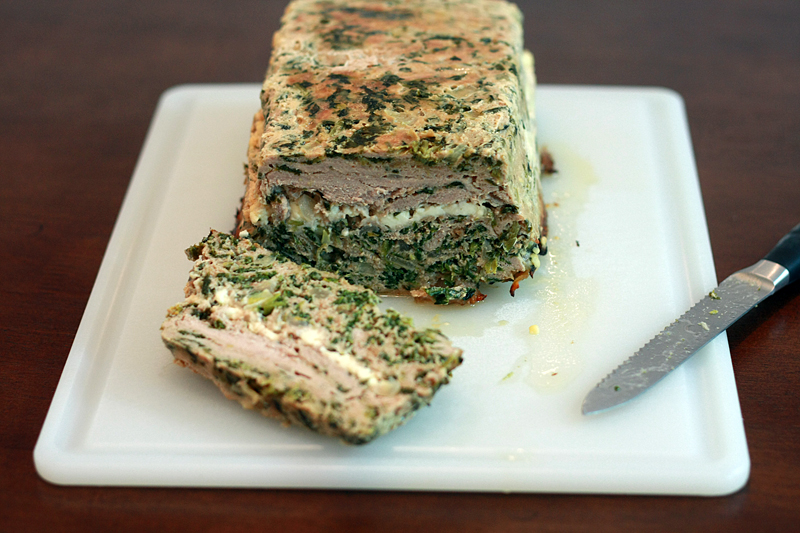
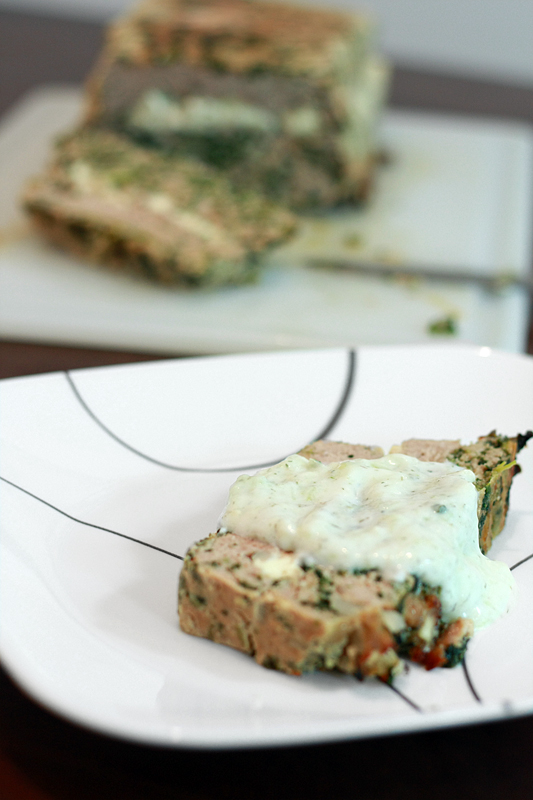
Turkey Feta Meatloaf with Tzatziki


I am not a meat craver of any kind. I very rarely have a hankering for a big juicy steak, or dream about half pound or larger burgers, and I'm really just fine with marinara on my spaghetti -- no meatballs necessary. And meatloaf? Just one huge chunk of ground meat smushed together? No thanks, I think I'll pass.

I almost didn't check out Carolyn's post once I saw the word "meatloaf" in the title. Almost. But I did anyways because I love her site and her amazing creativity when it comes to changing regular high-carb food (like cookies) into low-carb treats without losing the flavor. Of course I was skeptical at first, it was meatloaf after all. Then I saw that it was made from turkey rather than beef, and there was spinach, and cheese. I am such a sucker for cheese. Let's not even go into the fact that it's covered and smothered in tzatziki, not ketchup.

This was a flavor profile that I could get behind. Despite the fact it was all wrapped up in a bundle of meat. Let's just ignore that fact for now. I'd rather it not get out that I will actually eat a giant slab of ground meat with no bun to help it along. Let's just keep it a secret between you and me, mmmkay? And we also won't talk about how much I was looking forward to my leftovers for dinner the next night, because, as far as everyone else knows, I don't like those either.

Turkey Feta Meatloaf with Tzatziki
Adapted from: All Day I Dream About Food

1 cup yogurt
1 tablespoon lemon juice
1 clove garlic, finely minced
1/2 medium cucumber, grated & drained
1/3 teaspoon dried dill
1/4 teaspoon salt

1 tablespoon olive oil
1 cup onion, chopped
1 teaspoon salt
1/2 teaspoon ground pepper
1 (10 ounce) package frozen spinach, thawed and drained
2 pounds ground turkey
1/2 cup bread crumbs
1/4 cup reduced-sodium, fat-free chicken broth
1 large egg, lightly beaten
2 tablespoons Worcestershire sauce
1 cup (4 ounces) crumbled feta cheese

In a medium bowl, mix together the first 6 ingredients (through 1/4 teaspoon salt) to make the tzatziki sauce. Place bowl in refrigerator and chill until ready to serve.

Preheat oven to 325 degrees F. Coat a 9 1/4" x 5 1/4" x 2 3/4" loaf pan with cooking spray and set aside.

In a large skillet, heat the oil over medium heat. Add the onion, 1 teaspoon salt, and pepper. Sauté until onions are translucent and soft, about 15 minutes.

In a large bowl, combine the turkey, bread crumbs, broth, egg, onion mixture, spinach, and Worcestershire sauce. Lightly mix together with hands just until all the ingredients are fully incorporated.

Transfer half the turkey mixture to the loaf pan, spreading evenly across bottom. Top with the feta cheese. Add the remaining turkey mixture, spreading out until even.

Bake at 325 degrees for 1 to 1 1/4 hours, or until internal temperature reaches 160 degrees F on an instant read thermometer. Remove from the oven and allow the meatloaf to rest 5-10 minutes. Drain the loaf pan if necessary, then place a cutting board face down over the loaf pan. Holding the cutting board against the top of the pan, flip the two over so the cutting board in on the bottom and the loaf pan is upside-down on top of it. Remove loaf pan. Slice the meatloaf and serve drizzled with tzatziki sauce.

Serves: 8


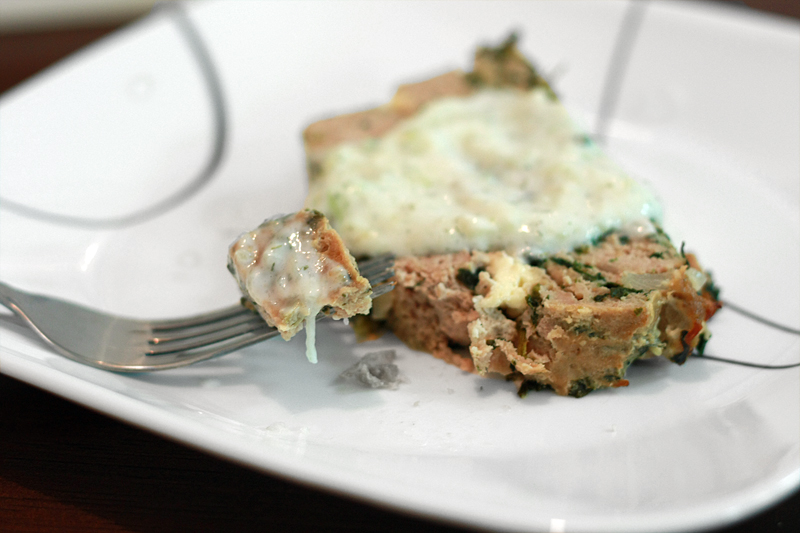
If you haven't gathered by this point, Adam and I both thought this was a fantastic spin on meatloaf. It wasn't super dense as some beef versions can turn out to be. Although making sure not to over-mix your meat is key in that as well. I loved the layer of feta in the middle -- it helps prevent those crumbles from getting lost in all that meat.

I would definitely make this again. It satisfies Adam's "comfort food" craving while not weighing me down like I just ate a ton of bricks. If you are looking for an even lower carb version of this recipe, head on over to All Day I Dream About Food, and you can check out all the other amazing goodies she has as well!


Nutrition Facts
Amount per serving
Calories 409Calories from fat 200
% Daily Value
Total Fat 22.2g34%
Saturated Fat 7.5g38%
Cholesterol 161mg151%
Sodium 876mg37%
Total Carbs 12.3g4%
Dietary Fiber 1.5g6%
Sugars 5.3g
Protein 38.5g
Vitamin A 69%Vitamin C 21%
Calcium 24%Iron 22%

Monday, February 21, 2011

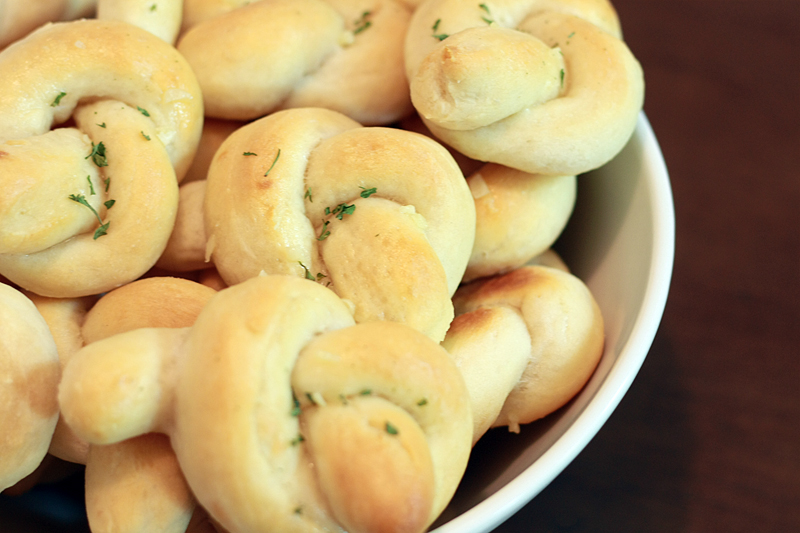
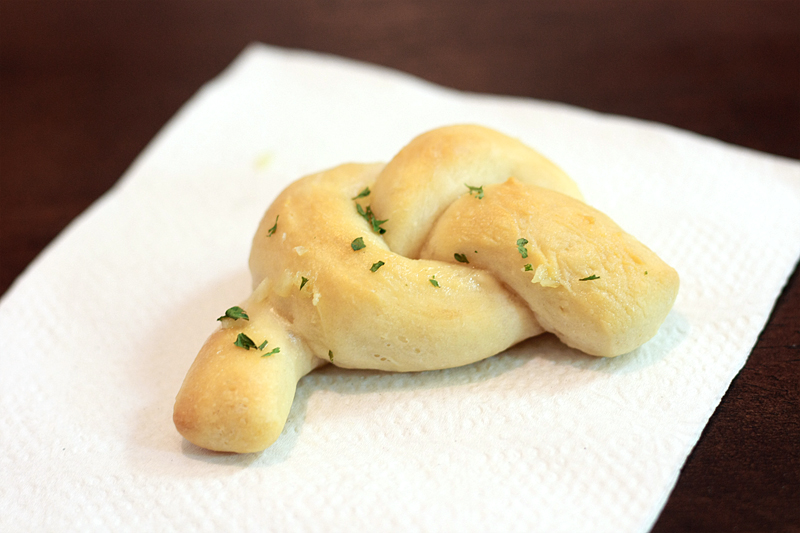
Garlic Knots


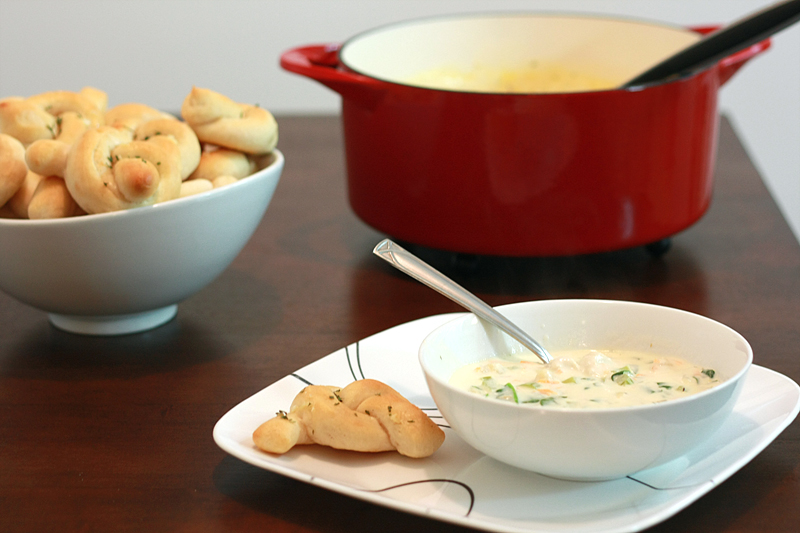
Last week, when I decided to make Chicken Gnocchi Soup for dinner, I felt like we needed something else to go with it. As the soup is full of veggies, I didn't think a vegetable side was in order (I mean, I can only handle so much green stuff), so where did that leave me? Well, bread of course. Since I was already doing an Olive Garden spin-off soup, why not go the whole 9 yards and throw in some garlicky breadsticks too? Well, maybe not quite like the ones at Olive Garden, as I'm not really a huge fan of those anymore.

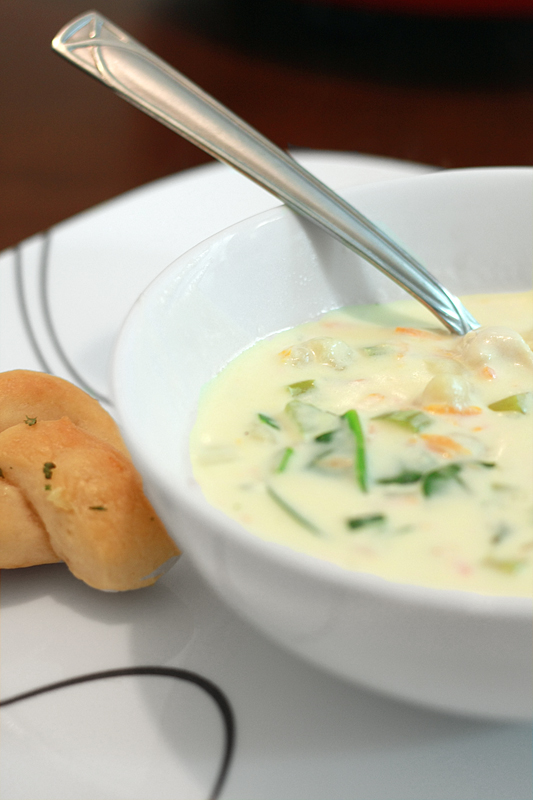
Of course, at this point, I was already running a bit short on time for playing with yeast, so I didn't want to spend forever searching for a recipe. I remembered seeing some garlic knots over at Brown Eyed Baker not that long ago, and after a quick scan of the recipe I decided it was a go. Adam was going to love the fact that he finally had some bread to dip in his soup.

Garlic Knots
Adapted from: White On Rice Couple via Brown Eyed Baker

5 1/2 cups all-purpose flour
1 3/4 cups warm water (110-115 degrees F)
1/4 cup olive oil
1 1/2 tablespoons active dry yeast
1 tablespoon granulated sugar
1 teaspoon kosher salt

2 tablespoons olive oil
2 tablespoons butter
4 cloves of garlic, finely minced
2 teaspoons dried parsley

Place the flour in a large bowl and set aside.

In a small bowl, add the water, olive oil, yeast, sugar and salt. Stir to dissolve the yeast. Pour the water mixture over the flour and stir with a wooden spoon until the water is fully incorporated and all of the flour is moistened.

Transfer the dough out to a lightly floured surface and knead for a minute or two, until the dough is soft and slightly tacky. Add more flour if the dough is too sticky, and more water if it is too dry. Place the dough in a well-oiled bowl, turning once to coat the top of the dough. Cover with plastic wrap, and place in a draft-free area until doubled in size, about 1 1/2 to 2 hours.

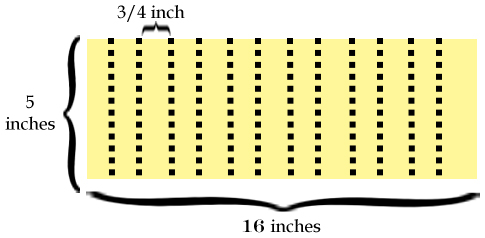
Line up to four baking sheets with parchment paper; set aside. (If you do not have 4 baking sheets, line as many as you have, then lay plastic wrap on the counter for the remaining rolls. You will have to transfer the formed dough knots to the lined, cooled baking sheets later.) Transfer the dough to a lightly floured surface, and divide into two. Take the first half and press down into a rough rectangle to release any trapped gasses. Flip the dough over and press down again. Using a rolling pin, roll the dough into a rectangle measuring 5 inches by 16 inches, and 1/2-inch thick. Using a pizza cutter or a sharp knife, slice the rectangle into 5-inch by 3/4-inch strips.


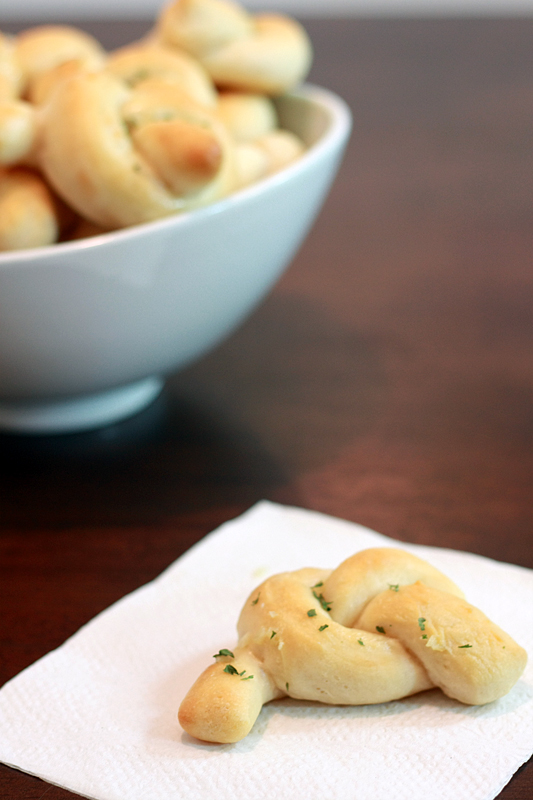
Lightly sprinkle the strips with flour. Gently roll each strip it back and forth (think play-doh snake) to create an even rope, 7-9 inches long. Tie it into a knot and place on a prepared baking sheet, about 1 1/2 inches apart. Repeat with the remaining dough, the again with the second half of the dough. Cover the baking sheets with a dry kitchen towel and place in a warm, draft-free area. Allow knots to rise for 30 minutes to 1 hour, or until doubled in size.

While the knots are rising, preheat the oven to 400 degrees F.

Once the knots have doubled in size, bake uncovered, one pan at a time, for 12 to 15 minutes, or until golden brown.

Meanwhile, prepare the garlic coating. In a small saucepan, warm the olive oil, butter and garlic over low heat. Add the parsley, cover and set aside.

Tranfer the knots from the oven to a cooling rack. While the knots are still warm, using a pastry brush, brush them with the garlic coating. Sprinkle with additional kosher salt to taste. Serve warm or at room temperature. Baked rolls can be individually wrapped and frozen in an airtight freezer bag. Rewarm in a 350 degree F oven for about 5 minutes.

Makes: 40 rolls


I was very excited to taste these rolls, as my kitchen was starting to smell wonderful. After smothering them with the garlic sauce, I oh-so-impatiently let them sit for another 5 minutes or so, to really soak up that garlic flavor. Finally... one bite in, two bites in... hmmm. Not quite what I expected. The outside crust was much firmer than I was hoping for, although the inside was still nice and chewy. Then I noticed that the garlic sauce hadn't soaked through at all (most likely due to the harder crust) and the inside was really lacking flavor. Bummer. These worked well when it came to dipping and soaking up soup (once bitten into), but on their own they were a bit lackluster in my book. I'm still trying to figure out if I missed something in these as the recipe came with glowing reviews.


Nutrition Facts
Amount per serving
Calories 89Calories from fat 25
% Daily Value
Total Fat 2.8g4%
Saturated Fat 0.7g3%
Cholesterol 2mg1%
Sodium 63mg3%
Total Carbs 13.7g5%
Dietary Fiber 0.6g2%
Protein 2.0g
Vitamin A 0%Vitamin C 0%
Calcium 0%Iron 5%

Thursday, February 17, 2011

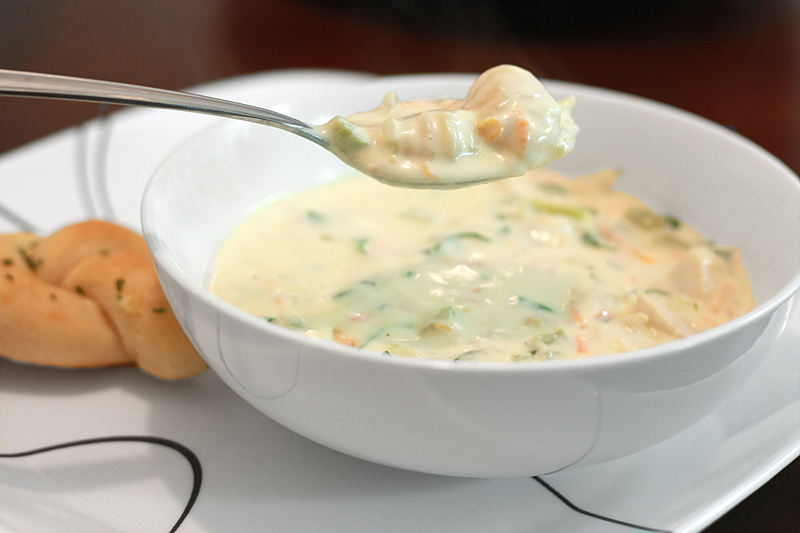
Chicken Gnocchi Soup


This past Saturday, neither Adam or I felt in the mood to cook (yes, it really does happen -- quite frequently, in fact), so we decided to brave the crowds and find a non-fast-food place to eat. As both of us had just finished our long runs earlier, we were both starving. Having a long wait was not an option. Since we didn't really want to drive very far for dinner, our first choice ended up being Olive Garden for some pasta. After finding out the wait time was over an hour, we decided to hop across the street instead to a local Mexican place. Good choice, as I already had this Olive Garden spin-off Chicken Gnocchi soup lined up for Monday night's dinner.

When I was younger, we would always have soccer tournaments and games a considerable distance away from where I lived. It was always a special treat to go to Olive Garden after (or sometimes before) the game as the town where I lived didn't have one. I swore up and down I could live on their breadsticks. Fast forward several years, and I have fallen out of love with the place. To me, it falls into the "boring chain restaurant" category with Friday's, Chili's, and Applebee's. It rarely has any dishes that truly stand out, or go outside the box with bold flavors. Even their breadsticks seem overly garlicky and salty now, especially on the bottom.

While most of their pasta dishes come across very flat and bland, their chicken gnocchi soup is one thing I do enjoy. It's rich and hearty with little pillows of gnocchi and chicken floating around. And gnocchi makes me happy.


Chicken Gnocchi Soup
Adapted from: Frugal Antics of a Harried Homemaker

16 ounces gnocchi
4 tablespoons butter
1 cup onion, diced
1/2 cup celery (about 2 stalks), diced
2 garlic cloves, minced
1/4 cup flour
1 quart half and half*
1 (14 ounce) can chicken broth
1 cup carrots, shredded
2 (4 ounce) boneless, skinless chicken breasts, diced and cooked
1 cup fresh spinach, coarsely chopped
1/2 teaspoon dried thyme
1/2 teaspoon dried parsley
1 teaspoon salt
1/2 teaspoon ground black pepper
1/4 teaspoon ground nutmeg

Bring a medium saucepan filled with water to a boil. Cook the gnocchi according to package directions. Drain and set aside.

Meanwhile, in a large dutch oven over medium heat, melt the butter. Add the onion, celery and garlic and sauté until the onion becomes translucent, about 7 minutes. Whisk in the flour, forming a roux. Cook for 1 minute. Pour in the half and half, and add the carrots and chicken to the dutch oven. Simmer until the mixture begins to thicken, stirring often, about 5 minutes. Add the chicken broth, and allow the mixture to thicken again, stirring often, about 5 minutes or until the consistency desired is achieved. Stir in the gnocchi, spinach, and seasonings and simmer until soup is heated through.

Serves: 8 (4 as an entrée)

*I don't recommend using a low-fat or fat-free version of half and half, but if you choose to do so, make sure you do not let the soup come to a boil as this will cause the cream to break (making it grainy).


While this rendition of Chicken Gnocchi soup isn't exactly the same as Olive Garden's, it's very close and still very good. Definitely do not leave out the salt, pepper, or nutmeg, as they help finish off the savory side of the soup. Trust me on that one... I might have done that and had to add it in after the fact. Adam and I both really enjoyed this, and it's perfect for one of those nasty chilly days.


Nutrition Facts
Amount per serving - 8 servings
Calories 374Calories from fat 231
% Daily Value
Total Fat 25.6g39%
Saturated Fat 15.1g75%
Trans Fat 0.0g
Cholesterol 95mg32%
Sodium 744mg31%
Total Carbs 21.5g7%
Dietary Fiber 1.6g6%
Sugars 2.3g
Protein 14.4g
Vitamin A 66%Vitamin C 10%
Calcium 17%Iron 8%

Wednesday, February 16, 2011

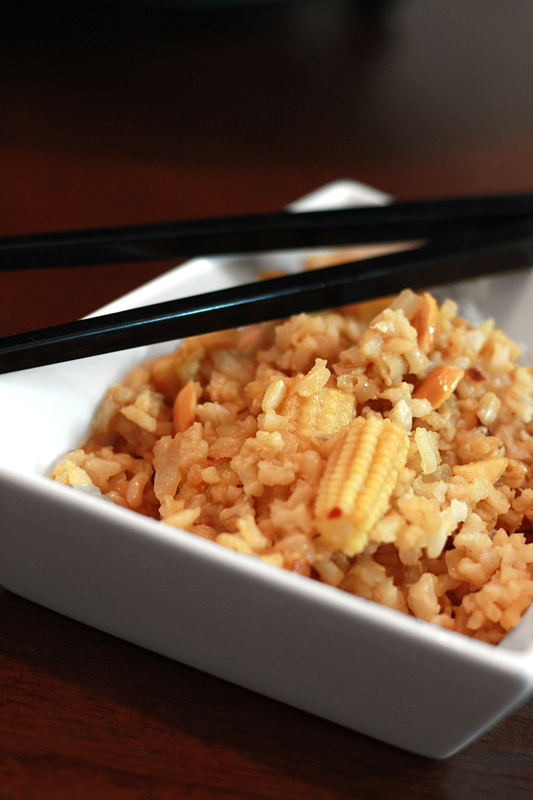
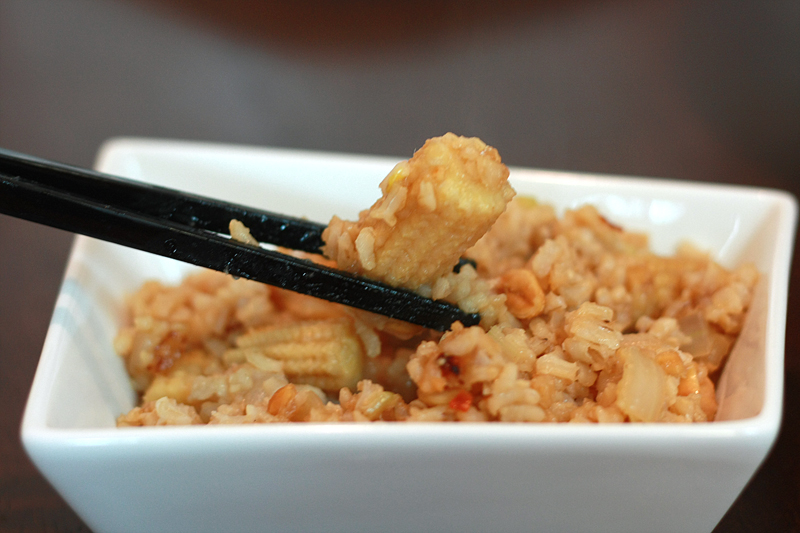
Spicy Chicken Fried Rice with Peanuts


Another spicy rice and chicken dish? Didn't I just post a Kung Pao recipe? I did. BUT I made it with some nasty rancid peanuts, so it didn't exactly satisfy my "spicy chicken and rice" craving. And me being me, I couldn't just be happy with re-making the dish with good peanuts, no I had to go off and find a different recipe. Good thing I had already earmarked this one in a recent Cooking Light magazine.

Spicy Chicken Fried Rice with Peanuts
Adapted from: Cooking Light

1/4 cup soy sauce
1 tablespoon brown sugar
1 teaspoon sesame oil
3/4 teaspoon crushed red pepper

2 tablespoons canola or vegetable oil
1 (15 ounce) can cut baby corn
1 cup onion, diced
1/4 cup green onions, thinly sliced, divided
2 teaspoons ground ginger
2 garlic cloves, minced
4 cups cooked brown rice, chilled
2 (4 ounce) boneless, skinless chicken breasts, cooked and cut into bite-sized pieces
1 (8 ounce) can sliced water chestnuts, drained
1/3 cup unsalted, dry-roasted peanuts, chopped

In a small bowl, whisk together the soy sauce, sugar, sesame oil, and red pepper. Set aside.

In a wok (or a large non-stick skillet), heat the canola oil over medium-high heat. Add baby corn, onions, and 1/2 of the green onions. Cook for 3 minutes or until tender, stirring frequently. Add ginger and garlic, cook for 1 minute, or until fragrant. Add in rice, chicken, and water chestnuts, cooking for 5 minutes or until heated thoroughly, gently stirring. Stir in soy sauce mixture. Cook for 2 minutes; tossing gently. Remove from heat and sprinkle with remaining green onions and peanuts.

Serves: 4


Surprisingly though, there was a pretty big difference between the Kung Pao Chicken and this dish. The Kung Pao had more of a sauce, but the spice was definitely more upfront and present in this dish. Either way you go, I don't think either will disappoint.


Nutrition Facts
Amount per serving
Calories 614Calories from fat 190
% Daily Value
Total Fat 21.0g32%
Saturated Fat 2.9g15%
Trans Fat 0.0g
Cholesterol 50mg17%
Sodium 977mg41%
Total Carbs 82.9g28%
Dietary Fiber 6.9g29%
Sugars 7.8g
Protein 29.9g
Vitamin A 9%Vitamin C 44%
Calcium 6%Iron 20%

Tuesday, February 15, 2011

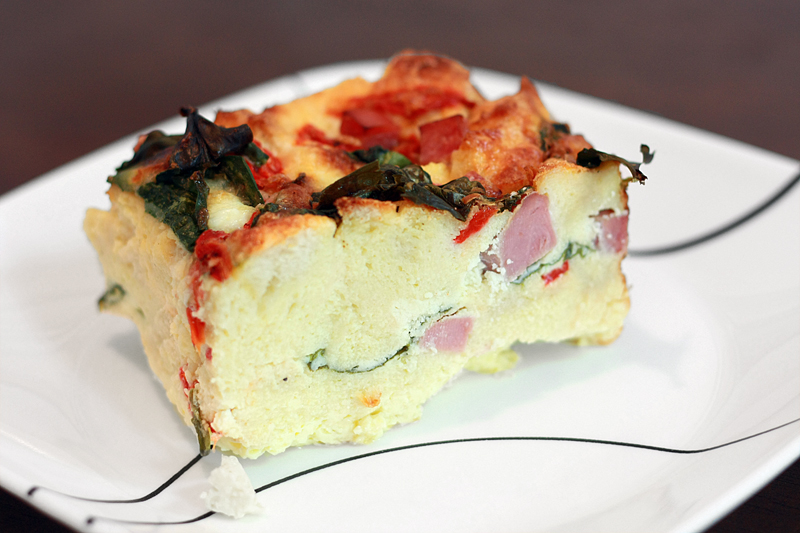
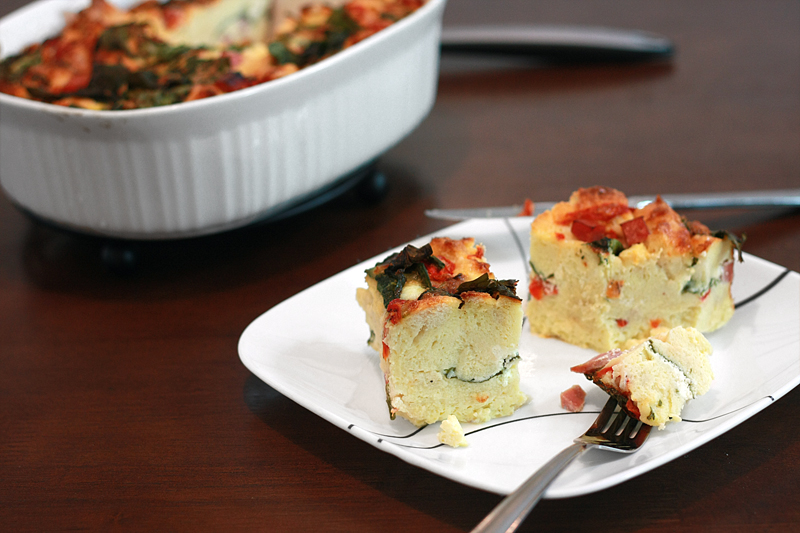
Roasted Red Pepper, Spinach, & Goat Cheese Strata


Right now, my fridge is a mess. It is so full of a hodge-podge of stuff from my daily staples to who-knows-what hiding in the back corners (for who knows how long). I decided to take matters into my own hands and try to get rid of a few things -- without just chucking them into the trash.

I just so happened to run across a recipe for a Cheese Strata with Ham from my Food Network calendar a few days prior while trying to clean up my desk area a bit. (Are we seeing a common theme here? I think so...) After giving it a quick skim, I realized I could make a few easy substitutions and get to work on the whole cleaning out the fridge business. Of course, by the time I actually looked at the list, I think I ended up buying more ingredients than I got rid of. Ah, such is my luck.


Roasted Red Pepper, Spinach, and Goat Cheese Strata
Inspired by: Food Network Kitchens

Cooking spray
12 eggs
1 1/2 cups milk
1/2 cup heavy cream
1/2 teaspoon kosher salt
1/4 teaspoon black pepper
1/4 teaspoon ground nutmeg
1/4 teaspoon cayenne pepper
4 ounces (1 cup) grated Parmesan cheese
1 cup ham, cooked and diced
6 ounces roasted red peppers, diced
4 ounces (1 cup) goat cheese, crumbled
2 cups baby spinach
1 pound sourdough bread, crust removed and cut into 1-inch cubes
1 tablespoon butter, melted

Coat a 2 1/2 quart baking dish with cooking spray. Set aside.

In a large bowl, lightly beat the eggs. Whisk in the next 6 ingredients (through cayenne pepper).

Sprinkle half of the Parmesan cheese evenly on the bottom of the baking dish. Add a layer of 1/3 of the bread cubes, followed by a layer of 1/2 of the ham, 1/2 of the goat cheese, 1/2 of the red peppers, and 1 cup of the spinach. Repeat with 1/3 of the bread, the remaining ham, goat cheese, red peppers, and spinach. Top with the final 1/3 of the bread at the remaining 1/2 cup of Parmesan cheese.

Pour the egg mixture over the top of the dish, then press down with the back of a spoon to ensure all the bread is moistened. Drizzle the melted butter over the top.

Cover with plastic wrap and store in the refrigerator at least 1 hour (and as long as overnight).

Preheat oven to 350 degrees F. Uncover strata and bake for 45 minutes. Cover with foil and bake for another 10-15 minutes, or until the strata is slightly puffed, golden brown, and lightly set in the middle. Let rest 10 minutes before serving.

Serves: 8


Prior to making this, neither Adam or I had ever had a strata, so we weren't quite sure what to expect. The original recipe called for the strata to only be baked for 45 minutes followed by a 10 minute rest. Well, it seemed a little jiggly in the middle when I took it out, but as it called for it to be "lightly set", I was thinking it would be okay and firm up a bit in the next 10 minutes. Wrong, it was definitely nice and runny in the center when I cut into it. Bummer. I ended up putting it back in the oven in bouts of 5-10 minutes, until it had been in around an hour and 5 minutes. At that point I gave up and let it just sit to cool off, then stuck it in the fridge to check it out the next day.

After pulling it out the following day, I didn't have very high hopes. However, everything had ended up setting up nicely, no runny eggs, yet everything was still nice and moist even after re-heating. Despite all the hard work I put into this dish, we both agreed that we like the texture of a quiche a little bit better than the strata, so we'll probably be sticking with that from now on.


Nutrition Facts
Amount per serving
Calories 479Calories from fat 211
% Daily Value
Total Fat 23.4g36%
Saturated Fat 12.0g60%
Trans Fat 0.0g
Cholesterol 334mg111%
Sodium 1177mg49%
Total Carbs 37.8g13%
Dietary Fiber 1.9g8%
Sugars 5.7g
Protein 29.4g
Vitamin A 30%Vitamin C 62%
Calcium 41%Iron 22%

Monday, February 14, 2011

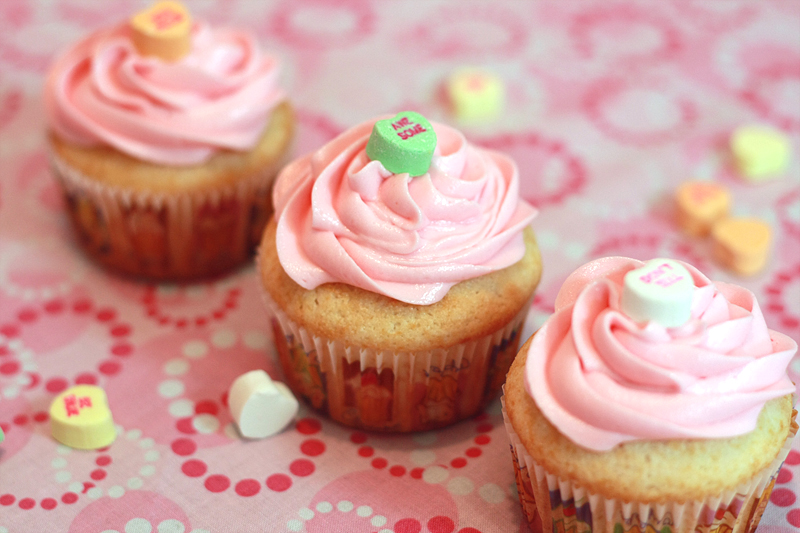
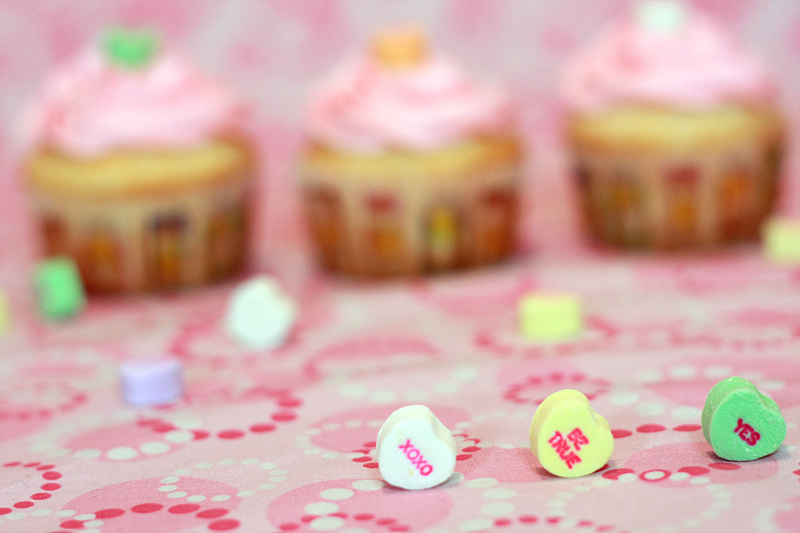
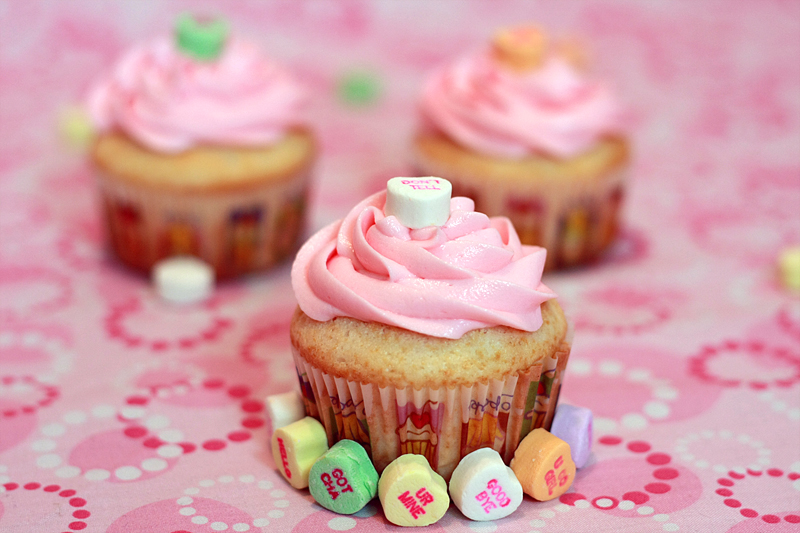
Pink Champagne Cupcakes


Adam has been teasing me for the last few days that I quite possibly might be the most anti-Valentine's Day girl he knows. I just don't see the point in spending money on flowers that cost over three times their normal price or buying some thoughtless heart-shaped diamond pendant that thousands of other guys are buying just because it's that store's "special line" they are pushing for the holiday. As for chocolates? Well, it's not like I would refuse them. Let's not be silly now.

Yet every time he teases me, I simply remind him how lucky he is that I don't expect (or want) all the bells and whistles today. I always feel bad for the guys with girls who do -- it never fails at some point they are going to miss something (whether it's the flowers or the dinner reservations), then end up in the dog-house for it. It's just seems strange to me that so much emphasis is placed on material things to show how much someone means to you. I see how much my husband loves me everyday, I don't need flowers or some necklace on one day to tell me that.

Despite the fact that Valentine's Day isn't my favorite holiday, it still works well as an excuse to make goodies. And I do like my excuses to bake. I decided to stick with the Valentine's Day theme, and go simple with some cupcakes. What? Cupcakes are sooo 2010, I know. But here's the long and short of it: I don't care. First off, I enjoy eating cupcakes -- as long as the frosting isn't so ridiculously sweet it makes my teeth feel like they are going to rot out right then and there. Secondly, they are far easier and quicker to decorate than a regular cake. And thirdly (is that even a word?), they travel much easier and are far more convenient for people to just pick up and eat. No forks or plates necessary. We won't even go into all the crazy fun flavor combinations you can have with them, or how you can either dress them up or dress them down, depending on the occasion. These cupcakes may appear to be dressed down a bit, but the champagne inside makes them perfect for Valentine's Day, don't you think?


Pink Champagne Cupcakes
Adapted from: Squirrel Bakes

3 cups cake flour
1 tablespoon baking powder
1 teaspoon salt
2/3 cup butter, at room temperature
1 1/2 cups granulated sugar
1 1/4 cups pink champagne, divided
6 egg whites
4-5 drops red food coloring

1 pound powdered sugar
1 cup butter, at room temperature
4 tablespoons pink champagne
4-5 drops red food coloring

Preheat oven to 350 degrees F. Line two muffin tins with cupcake liners. Set aside.

In the large bowl of a mixer, beat eggs whites with the whisk attachment until stiff peaks form.

Meanwhile, in a medium bowl, mix together flour, baking powder, and salt.

Divide the champagne into 3/4 cup and 1/2 cup.

In another large bowl, cream the 2/3 cup butter and granulated sugar. Slowly mix in 1/3 of the flour mixture, followed by 1/2 of the 3/4 cup of champagne. Add the next 1/2 of the remaining flour mixture, mixing until almost fully incorporated, followed by the remaining 1/2 of the 3/4 cup champagne. Add the remaining flour mixture and food coloring. Gently fold in 1/3 of the whipped egg whites and mix until fully incorporated. Fold in remaining egg white mixture until combined.

Divide the batter between the muffin tins, filling each cupcake liner 1/2-2/3 full of batter. Bake for 18-20 minutes or until toothpick inserted in center comes out clean. Let cupcakes cool in pan for 5 minutes, then remove and let cool completely on wire rack. Once cupcakes have cooled, poke 8-10 holes in each cupcake using a toothpick. Using a pastry brush, coat each cupcake with remaining 1/2 cup champagne.

In a large bowl, cream together the remaining 1 cup butter and champagne. Slowly add the powdered sugar and food coloring, mixing well until the frosting is smooth. (If too stiff add more champagne, if too runny add more powdered sugar.) Transfer to a pastry bag fitted with a decorating tip (or a Ziploc bag with the corner cut off), and decorate cupcakes.

Makes: 24 cupcakes


I'm not quite sure what I was expecting out of these, but the champagne flavor was very muted. As in, I'm pretty sure you would miss it if you didn't know that's what you were eating. They still tasted pretty good though, I mean, they are cupcakes after all. I'm not positive that whipping the egg whites, then folding them in was completely worth the work, however. These fell right in the middle of the cupcake density scale -- not overly heavy, but not super light and fluffy either. This flavor combo might actually work a little better with my Strawberry Basil Lemonade Cupcake base -- subbing out the strawberries (and basil) for the champagne.

And yes, I totally used "sparkling wine" for these, not actual champagne. You say tomato, I say tomahto.


Nutrition Facts
Amount per serving
Calories 307Calories from fat 117
% Daily Value
Total Fat 13.0g20%
Saturated Fat 8.1g41%
Cholesterol 34mg11%
Sodium 203mg8%
Total Carbs 43.8g15%
Sugars 31.1g
Protein 2.6g
Vitamin A 8%Vitamin C 0%
Calcium 3%Iron 4%

Friday, February 11, 2011

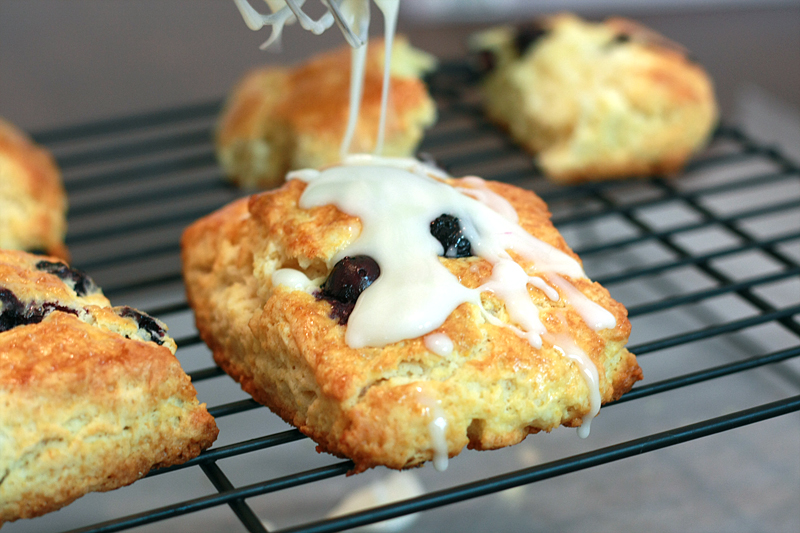
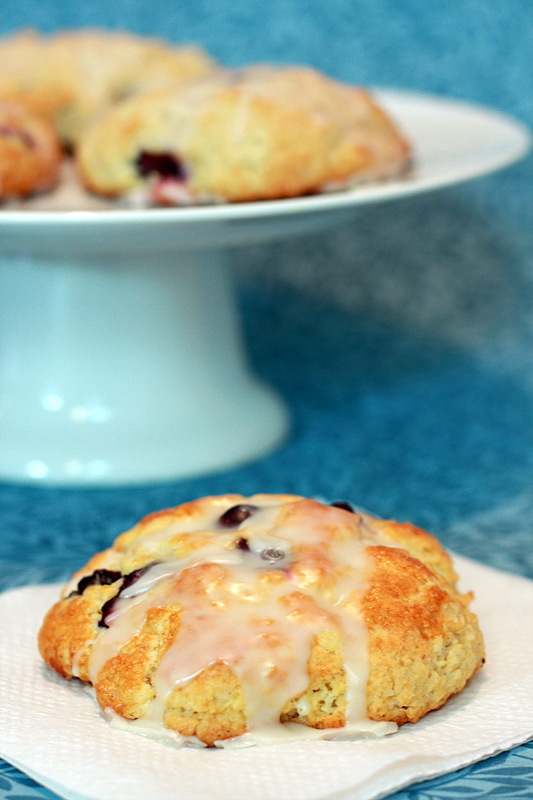
Blueberry Lemon Scones


A couple months ago when all the family was together, my mom decided to use us a guinea pigs to try out some Strawberry Shortcake Scones she had seen during Project Food Blog. All of my previous encounters with scones involved picking one out behind a glass counter where it had been sitting for who knows how long. They had all been rather dense and dry -- not too far removed from cardboard. So when she announced she was making these, I figured we could grin and bear it, I'm sure they wouldn't be all that bad.

I was completely wrong. They weren't "not that bad"... they were amazing. Instead of the typical denseness and lack of flavor I had come to expect, these were soft, with an almost cake-like pillow-y texture in the middle, surrounded by a nice thin crust. This was good. This made you want to go back and keep eating more, even though you were stuffed to the gills.

My first attempt at scones were delicious, but they were still fairly heavy and dense (although I think that might be better for a savory scone). However, I loved the convenience of freezing them individually and pulling them out for breakfast whenever we wanted. Since we had been out of my first scones for a while, I decided it was time to replenish our stock.

This time around, I opted for a sweeter combination. I really enjoyed the ones my mom had made for us (twice now, she loves them so much), but I wanted to try something a little different. Thus, I kept the same base, and swapped out the strawberries and chocolate for more lemon and blueberries. (Blueberries are, after all, one of Adam's favorite fruits, it was an easy decision.)


Blueberry Lemon Scones
Adpated from: Jacob's Kitchen

4 cups all-purpose flour
1/2 cup granulated sugar
2 tablespoons baking powder
1 teaspoon salt
1 1/2 cups (3 sticks) butter, chilled and diced
1 cup heavy cream
4 eggs, lightly beaten
2 teaspoons vanilla extract
zest from 1 lemon
1 cup fresh blueberries

3 cups powdered sugar
6 tablespoons milk
1 teaspoon vanilla extract
juice from 1/2 a lemon (about 2 tablespoons)

In a large mixing bowl, stir together the first 5 ingredients (through butter). In a small bowl, or 2-cup liquid measuring cup, whisk together the cream, eggs, 2 teaspoons vanilla, and lemon zest. Cover both dishes with plastic wrap and transfer to the refrigerator for 30 minutes.

Remove both bowls from the refrigerator. Cut the butter into the dry ingredients until the size of large peas. Stir in the wet ingredients, and mix until just combined. Gently fold in the blueberries.

Transfer the dough to a lightly floured surface. Gently roll out the dough into a rectangle, taking care not to burst the blueberries. Fold the dough over itself and repeat 4-5 times. Depending on the shape you want your scones, roll out your dough into an 1-inch thick disk or rectangle. Cut the dough into wedges (if shaped into a disk), or squares (if shaped into a rectangle), or cut out with a biscuit cutter. Transfer scones to a baking sheet and chill in the refrigerator for at least 1 hour.

Preheat oven to 400 degrees F.

Remove scones from refrigerator when ready to bake and directly place them in the oven. Bake for 15-18 minutes, or until the scones are golden brown and do not fall apart when nudged. Immediately transfer from pan to cooling racks.

Meanwhile, in a medium bowl, mix together the powdered sugar, milk, 1 teaspoon vanilla, and lemon juice. Stir until the mixture is smooth and runny. If too thick add more milk; if too thin add more powdered sugar.

While scones are still warm, drizzle a tablespoon of glaze over each. Allow scones to stand for a few minutes until the glaze forms a crust, then enjoy.

Makes: 16 scones


The result? The scones were just as I had remembered - light and fluffy, but this time with that lovely blueberry flavor. The lemon, however, didn't come through quite as much as I had hoped, I think on the next go-round I would add some lemon zest to the glaze as well. I definitely will be keeping this base, though, and play around with lots more flavor combinations.

These are definitely not something you can just whip up in the morning before work, but it works beautifully to make them when you have time, then freeze them. After that, it really is just as fast to transfer them to the fridge overnight, then send them into the microwave for a quick zap in the morning. You just can't beat something warm and filling for breakfast on a cold day over a bowl of cereal or a granola bar.


Nutrition Facts
Amount per serving
Calories 433Calories from fat 194
% Daily Value
Total Fat 21.6g33%
Saturated Fat 13.1g66%
Cholesterol 103mg34%
Sodium 293mg12%
Total Carbs 55.6g19%
Dietary Fiber 1.1g5%
Sugars 29.8g
Protein 5.2g
Vitamin A 14%Vitamin C 4%
Calcium 11%Iron 10%

Thursday, February 10, 2011

Strawberry Brownie Torte


Drooling yet? You should be.

This cake is fantastic, and perfect for Valentine's Day. Or any day for that matter.

What's important here is that you go make this. It's so easy, even the baking challenged can handle it. Promise.

Hop on over to see my guest post at Gingerbread Bagles for the recipe.

Come on. You know you want to. :)

Wednesday, February 9, 2011

South-of-the-Border Chicken & Pasta Skillet


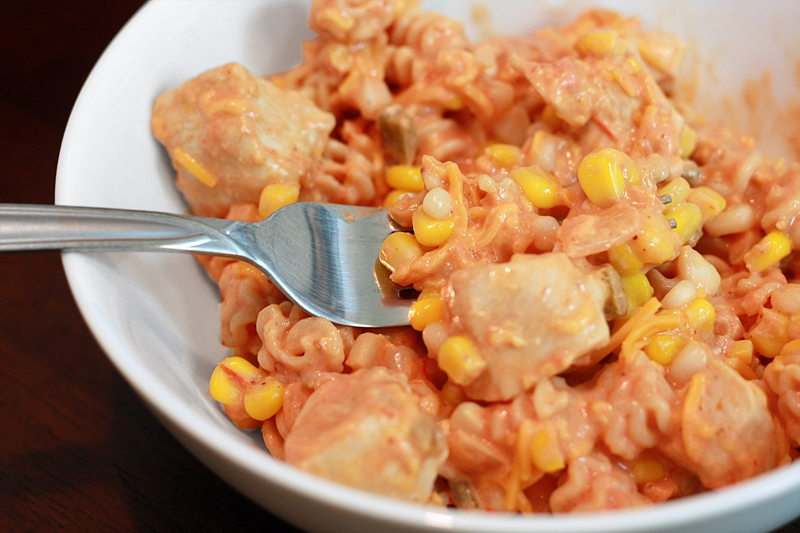
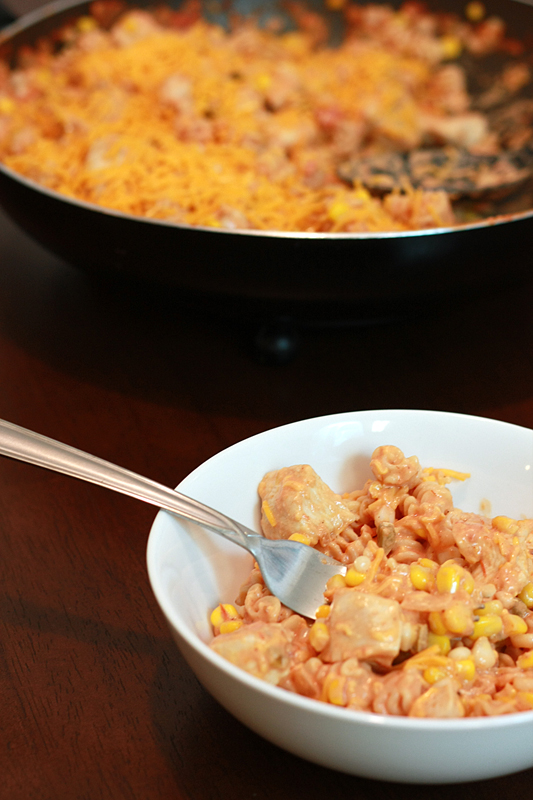
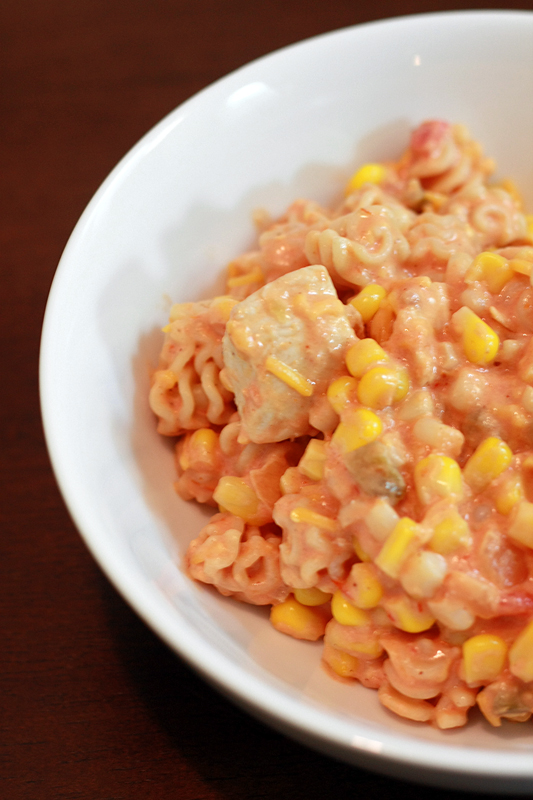
Let me just go on record saying that taking appetizing pictures of casseroles, or hodge-podge one-dish dinners is really quite difficult. It's a shapeless conglomeration of some sort of protein, veggies, sauce, and maybe some noodles or pasta. After a stir or two around the pan, everything turns the same nice shade of brown, or pink, or cream. There's just no two ways around it, it is what it is. Sure you can spruce things up with a sprinkle of cheese and a dash of parsley or cilantro, but you're still faced with the problem of your food wanting to wander all over the plate jump out of the bowl misbehave.

But maybe that's the "beauty" of the casserole/one-dish meal. They are filling, hearty, comforting, but they will never be accused of being a "pretty" meal. It's a good thing that what they lack in looks they usually make up for in taste (and often speed). This dish is a perfect example of all of the above. It definitely not much to look at, but easy and tasty it is.


South-of-the-Border Chicken and Pasta Skillet
Adapted from: Kraft Foods

2 cups medium-sized pasta
1 pound boneless, skinless chicken breasts, cut into bite-sized pieces
1 (16 ounce) jar salsa
1 (10 ounce) package frozen corn
4 ounces reduced-fat cream cheese, cubed
1/4 teaspoon chili powder
1 cup shredded cheddar cheese

Bring a large pot filled with water to a boil over high heat. Add the pasta and cook to al dente according to the package instructions. Drain.

Meanwhile, in a large skillet coated with non-stick spray, cook the chicken over medium-high heat until done, about 6 minutes. Add the salsa, corn, cream cheese, and chili powder, stirring well. Reduce heat to medium-low and simmer, stirring occasionally, until cheese is melted, about 6 minutes. Add the pasta and 1/2 cup cheddar cheese. Continue to stir, simmering 3 minutes or until cheese melts.

Top with remaining cheese and cover, removing from heat. Let stand until cheese is melted.

Serves: 4


This recipe is definitely one you want to keep on hand for those nights when making dinner is the last thing you want to do at the moment. It comes together in just over half an hour, and there's a short list of ingredients that mostly involve dumping and stirring. You really can't get much easier than that -- except maybe a PB&J.


Nutrition Facts
Amount per serving
Calories 684Calories from fat 270
% Daily Value
Total Fat 30.0g46%
Saturated Fat 14.9g74%
Cholesterol 203mg68%
Sodium 1064mg44%
Total Carbs 52.8g18%
Dietary Fiber 3.8g15%
Sugars 6.0g
Protein 52.4g
Vitamin A 25%Vitamin C 12%
Calcium 28%Iron 26%