Sunday, October 31, 2010

Happy Halloween!

Just wanted to pop in real quick and wish everyone a Happy Halloween!


Michael says Happy Halloween from "Pideyman!"

I'm super excited that November is almost here, and not only because of Thanksgiving. I've upped the ante next month by participating in National Blog Posting Month, which challenges bloggers to post every day for 30 days. Does this mean you're going to get the same ol' same ol' just in more quantity? Not quite. Yes, I will be making my usual posts multiple times a week, however, I am also setting up a challenge for YOU these next 30 days.

Don't worry. I am going to be participating with you!

So what's this challenge, you ask?

I am challenging YOU and your friends and family to Get Up and Move every day in November.

Do what? Yes, I know, I know, this blog is a food blog -- always has been, always will be. So where does this whole exercise bit come from? Americans are completely bombarded every day with messages to "lose weight with the quick and easy grapefruit diet", "drop 3 dress sizes by the end of the month!", "take this magic pill to keep those unwanted pounds off!". You know what I'm talking about. It saddens me. While weight loss for some people is a factor in their health, it's not the whole picture. And that's what we need to be focusing on -- health, not weight loss.

So for the next 30 days, that's what we going to be doing. Together. We are going to plan to make healthier choices when it comes to food and we are going to get up and get that blood flowing. Don't worry, I'm not going to leave you hanging with nothing to go on here. Every day I am going to post a diet and exercise related tip, debunk some common myths, investigate popular diet fads, among other health-related topics. Where do I get my info? Textbooks, exercise resource manuals, and academic peer-reviewed journal articles. No magazines referenced here (unless it's part of a question). No he-said-she-said, or I-heard-from-a-friend. Just facts. Which is what you deserve. (If you have any questions, feel free to ask and I'll do my best to answer them!)

Back to the challenge. What does it entail? Just get up and move. That's it. For the first 10 days of November, I am challenging you to get up and move around, getting that heart rate up a little bit, for at least 10 minutes. That's it. 10 minutes. It could be just getting out for a walk around the block, doing yoga in your bedroom, or having a dance party with your kids in the living room. Doesn't matter. Over the course of the month we will gradually increase this time to 30 minutes (10 minutes for the first 10 days, 20 minutes for the second 10 days, and 30 minutes for the last ten days). Think you can do it? I know you can. And I'll see you back here tomorrow.

Disclaimer: Because of course, it's necessary. If you have any known pulmonary disease (such as COPD), metabolic disease (such as diabetes or thyroid disorders), cardiovascular diseases, any pain in your chest, neck, jaw or arms with the onset of exercise, shortness of breath at rest or mild exertion, dizziness, shortness of breath while lying down, ankle edema, palpitations, leg pain that begins with the onset of exercise, or a known heart murmur check with your physician prior to starting any exercise program. The exercise and health advice presented are in no way intended as a substitute for medical consultation. If at any point during your workout you begin to feel faint, dizzy, or have physical discomfort, you should stop immediately and consult a physician. Be smart, exercise safely.

Thursday, October 28, 2010

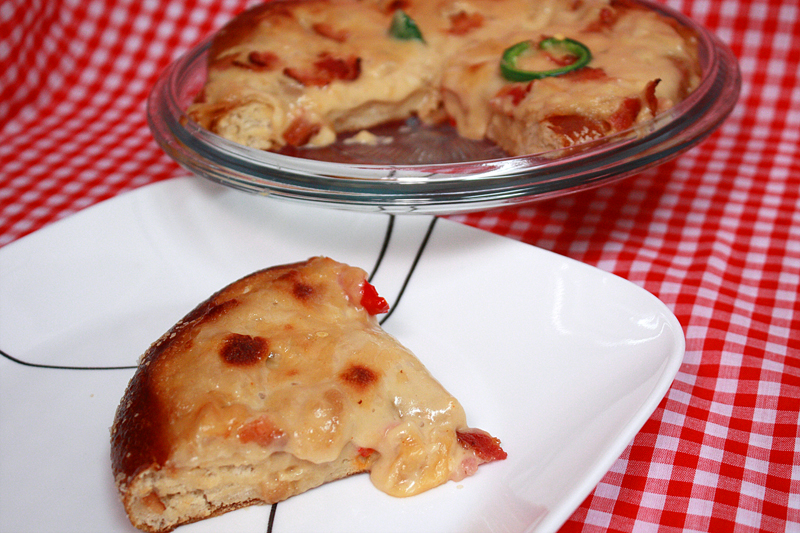
Cheddar-Ale Pretzel Pizza


A few weeks ago, Adam and I met up for lunch at Panera during his workday. (Yeah, I'm usually not that nice, he just forgot his basketball shoes.) It was a blustery fall day, so I opted for some warm soup in a bread bowl. Going for the complete carb overload, I got a baguette as my side order -- there's just something about dipping bread into soup that is absolutely delicious. Which is what I love about those bread bowls. That warm, soggy, soup-filled bread that remains after the soup is gone. Yum. (Now, let's not get this confused with your regular old soggy bread, typically from water. That's just gross.)
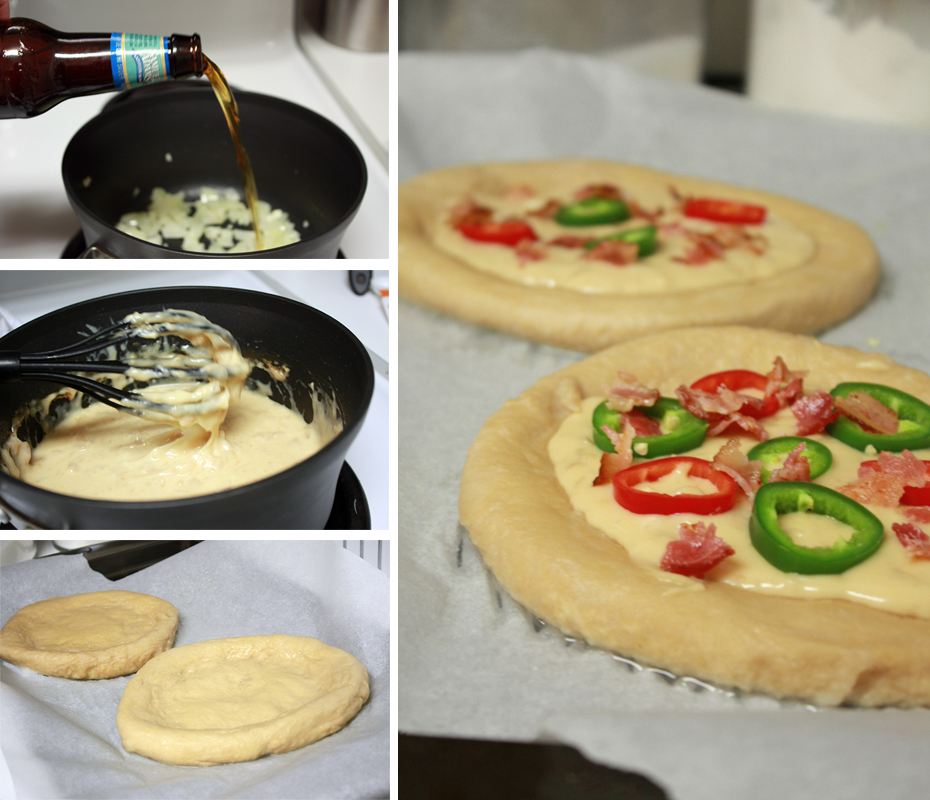
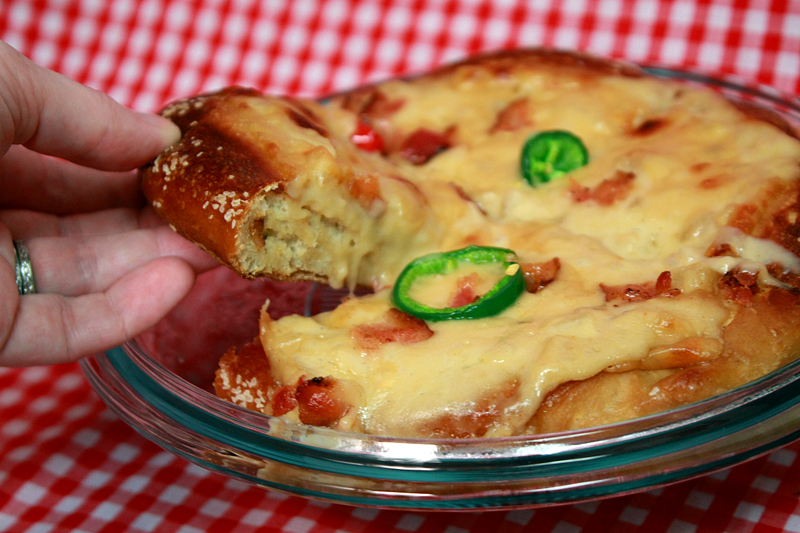

As we are sitting there munching away, Adam gets the brilliant idea that someone should make baguette rounds with soup on top (much like a crostini, but not toasted). Thus, the Cheddar-Ale Pretzel Pizza was born. Okay, well, I took a few liberties with the idea and had to think about how certain flavors would pair awhile, but eventually, the Cheddar-Ale Pretzel Pizza was born. Basically I really wanted to try a cheddar beer soup recipe and this gave me a very good excuse to do so.

Soup? On a pizza? Well, it's kind of a quasi-soup, as most of the "broth" and large liquid quantities were omitted. So I guess it's more of a sauce. Topped with peppers and bacon. Did I mention that there's beer in both the sauce AND the crust? Because there is. As for the pretzel part? The crust. I mean really, what goes better with a cheese sauce than a big soft pretzel? No dipping required.


Cheddar-Ale Pretzel Pizza
Original recipe adapted from: Alton Brown & Emeril Lagasse

For the crust:
1 1/2 cups warm beer (110-115° F), such as an ale or lager
1 tablespoon sugar
2 teaspoons kosher salt
2 1/4 teaspoons instant yeast
4 1/2 cups all-purpose flour
4 tablespoons unsalted butter, melted

Vegetable oil, for greasing the bowl
10 cups water
2/3 cup baking soda
1 egg yolk beaten lightly with 1 tablespoon water (egg wash)

For the sauce:
1 tablespoon butter
1/2 cup onion, diced
1 clove garlic, minced
1 bay leaf
1 teaspoon ground mustard
1/8 teaspoon cayenne
1 (12 ounce) beer or ale (do not use a dark beer or a pale ale)
1/3 cup flour
1 pound white cheddar cheese
1-3 tablespoons whole milk
1 teaspoon Worcestershire sauce

Remaining ingredients:
1 jalapeƱo, sliced, seeds and membranes removed
1 small red chile pepper, sliced, seeds and membranes removed
4 strips bacon, slightly undercooked and chopped

Combine the beer, sugar, salt and yeast in the bowl of a stand mixer fitted with the paddle attachment. Mix on low speed to dissolve the yeast. Add in the flour and melted butter and mix just until the dough comes together. Switch to the dough hook and knead on medium speed until the dough is smooth and clears the sides of the bowl, about 5 minutes. Transfer the dough to a bowl lightly greased with vegetable oil, turning once to coat. Cover with plastic wrap and let rise in a warm place, about 50-55 minutes or until doubled in bulk.

Meanwhile, melt 1 tablespoon of butter in a large pot over medium heat. Add in the onions, and allow to soften and become fragrant, stirring frequently, about 10 minutes. Stir in the garlic, and allow to cook until fragrant, about 1 minute. Mix in the beer, flour, cayenne, mustard, and bay leaf. Bring to a boil over medium heat, then reduce heat to medium-low. Let simmer for about 1 hour. Add in 3/4 pound cheese, and stir until completely melted (add in milk if it becomes too thick, or more cheese if too runny). Stir in Worcestershire sauce.

Preheat the oven to 450 degrees F. In a large pot, bring the water and baking soda to a boil. Line two baking sheets with parchment paper. Divide dough into 4 equal sections. On a lightly floured surface, roll out each section of dough into a 7-8" circle. Push excess dough toward the edges to form a lip. (The "edges" of the crust need to be formed prior to cooking to help keep the sauce on the pizza.) Place the pretzels pizza crusts into the boiling water, 1 at a time, for 30 seconds. Remove from the water with a slotted skimmer and return to the baking sheet (you may need to dab off excess water with a paper towel).

Layer the boiled pizza crusts with about 1/4 of the cheddar-ale sauce, then top with peppers and a sprinkle of bacon. Brush the outer edge crust with the egg wash and sprinkle with kosher or pretzel salt. Bake in the preheated oven until dark golden brown, about 10-12 minutes. Allow to cool for about 10 minutes (this also helps the sauce to set and stay in place).

Serves: 8 (1/2 a pizza)


Let me just stress that a pale ale, or Indian pale ale (IPA) should at all costs NOT be used. Of course, that's what we used, surprisingly suggested by Emeril Lagasse. A pale ale will give the sauce a bitter aftertaste, which we are most definitely not going for here. On the flip side, a stout, or a dark beer will probably give too prominent or heavy of a beer flavor. So be happy, and opt so somewhere in the middle. (Yes, I have no clue what in the world I am talking about here, non-beer drinker that I am. These suggestions are all from Adam, the self-named beer connoisseur.)

But really, you can't mess up pretzels and cheese too awful much. I mean, it's pretzels and cheese, and a great option for a game day meal/snack/munchie without the arena prices.


Nutrition Facts
Amount per serving
Calories 686Calories from fat 285
% Daily Value
Total Fat 31.6g49%
Saturated Fat 18.2g91%
Trans Fat 0.0g
Cholesterol 116mg39%
Sodium 1221mg51%
Total Carbs 66.2g22%
Dietary Fiber 2.9g12%
Sugars 3.1g
Protein 27.1g
Vitamin A 24%Vitamin C 23%
Calcium 45%Iron 27%

Wednesday, October 27, 2010

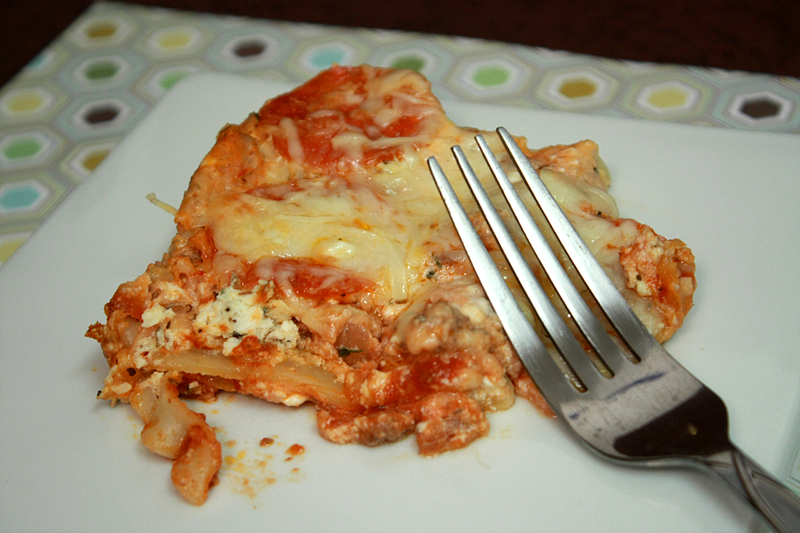
Cream Cheese Lasagna


So I know I just said that I'm not a huge "meat and potatoes" type person, but I feel like this particular homemade classic dish might be an exception to that rule. See, I have a very, very strong aversion to making dishes that require being ladled into a 9x13 ban and baked, i.e. casseroles. It's not that casseroles are really all that bad (usually), but it's just that there is so.much.of.it. and when you only have two people... you end up eating it for days on end. And then you never want to see it again for a very long time.

Well, Adam picked up a nasty cold from our nephew the other weekend, and by that following Tuesday he was not feeling so hot. We just had soup on Monday, so no repeat there. I needed a comfort food. Something I don't make all that often. Searching through some recipes I had tucked away, I came across this cream cheese lasagna that sounded fabulous, and I figured it would hit the spot. I thought I was being smart -- I'll make lasagna and then we can freeze it in individual-sized portions so we don't have to eat it all at once.

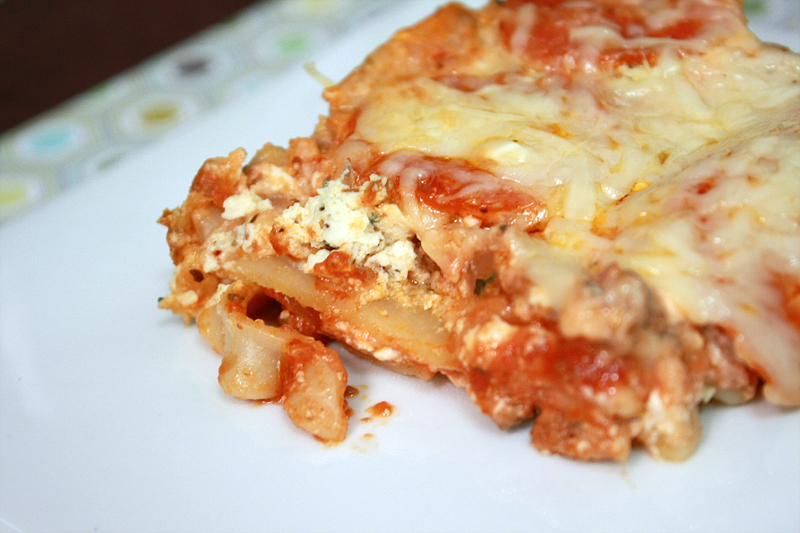
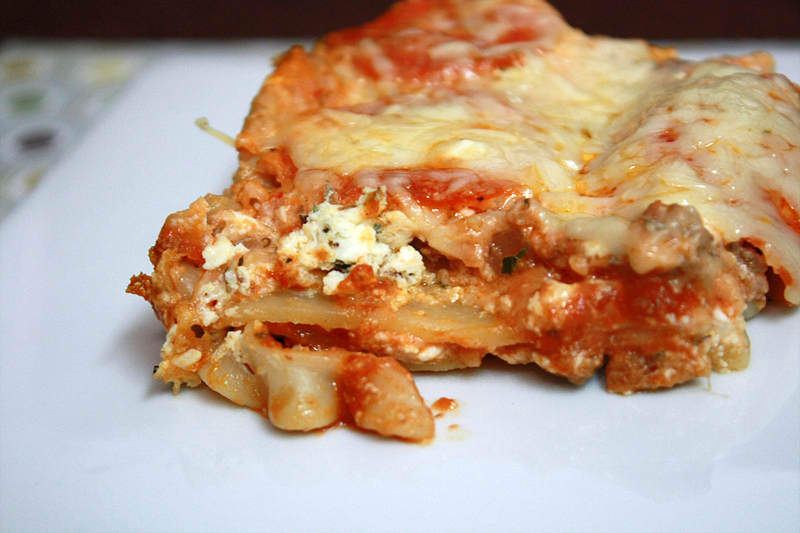
Wow, was I so wrong. And yet so right. This lasagna was in fact totally fabulous and completely hit the spot with the sick kid. He was super excited when he found out I was making lasagna, even more so when he found out it involved pepperoni. So how was I wrong? There was no freezing of this lasagna in any sort of way. Rather than sitting around growing mold, this was gone in just a few short days. Even I wished I was capable of taking down half of the pan in one sitting. And that just rarely happens.

Cream Cheese Lasagna
Adapted From: The Meat and Potato Foodie

6 Lasagna noodles
3 teaspoons olive oil, divided
1/2 cup onion, chopped
salt and pepper, for seasoning
1 pound ground beef
1/4 teaspoon garlic powder
1/4 teaspoon red pepper flakes
1 (8 oz) can tomato sauce
1 (6 oz) can tomato paste
1/4 cup fat-free low-sodium beef broth
1 (8 oz) package reduced-fat cream cheese, at room temperature
1 cup 2% cottage cheese
1/4 cup low-fat sour cream
2 eggs, beaten
1 teaspoon kosher salt
1/8 teaspoon ground nutmeg
1 teaspoon dried parsley
1 teaspoon dried basil
2 teaspoons lemon juice
1 teaspoon Italian seasoning
1 (4 oz) package pepperoni or salami slices
2 cups (8 oz) shredded part-skim mozzarella cheese
1/2 cup shredded Parmesan cheese

Preheat oven to 350 degrees F.

In a large stockpot over high heat, bring water to a boil (fill pot about 3/4 full). Add lasagna noodles and 1 teaspoons olive oil and cook according to package directions until al dente (olive oil helps to prevent the noodles from sticking together).

In a large nonstick skillet, heat the remaining oil over medium heat. Add in the onion, and cook until they start to become fragrant and soft, about 5 minutes. Add in the ground beef, breaking up into smaller bits with a wooden spoon. Sprinkle with garlic powder and red pepper flakes and cook until brown (about 8-10 minutes) stirring often. Turn off heat and stir in tomato sauce, paste, and broth until the mixture is fully incorporated.

Meanwhile, in a large bowl whisk together the cream cheese, cottage cheese, and sour cream. Stir in the eggs until well mixed, then add in the salt, nutmeg, parsley, basil, lemon zest, and Italian seasoning.

Spray a 12x8x2 glass or ceramic baking dish with nonstick spray. Spread part of meat mixture on the bottom of the pan so it is lightly covered. Layer with 3 lasagna noodles. Spoon half of the cheese mixture over the noodles, spreading evenly across the noodles. Top with 1/2 the pepperoni, followed by 1/2 the mozzarella. Repeat with the remaining meat mixture, lasagna noodles, cheese mixture, pepperoni, mozzarella and finally the shredded Parmesan.

Cover lasagna with foil and bake at 350 for 30 minutes. After 30 minutes, remove the foil and cook for an additional 5-10 minutes. Let stand for 10 minutes, dabbing off excess grease from the pepperoni if necessary prior to serving.

Serves: 12


When preparing lasagna, it is always crucial to perform a thorough mise en place to be able to just whip those layers right out. Note to self: don't leave the noodles hanging out by the sink while everyone else is having fun on the counter. You are highly likely to forget them, again. That's right, I carefully applied each and every layer to this beautiful work of art and was almost done, only to turn around and find the colander still half full of noodles. Oh yeah, I totally forgot to add in the second layer. Hmmm. Well, after scrapping off all the pepperoni and mozzarella cheese, I managed to get them in there and re-covered, then topped with the Parmesan. Whew. Crisis averted. Not really all that pretty anymore, but still delicious. Make that super-creamy-slightly-spicy-meaty-goodness fantastic. Nom. nom. Now I want to go make another batch.


Nutrition Facts
Amount per serving
Calories 370Calories from fat 194
% Daily Value
Total Fat 21.6g33%
Saturated Fat 10.9g54%
Trans Fat 0.1g
Cholesterol 118mg39%
Sodium 1929mg80%
Total Carbs 15.2g5%
Dietary Fiber 1.0g4%
Sugars 3.8g
Protein 28.6g
Vitamin A 15%Vitamin C 9%
Calcium 24%Iron 15%

Tuesday, October 26, 2010

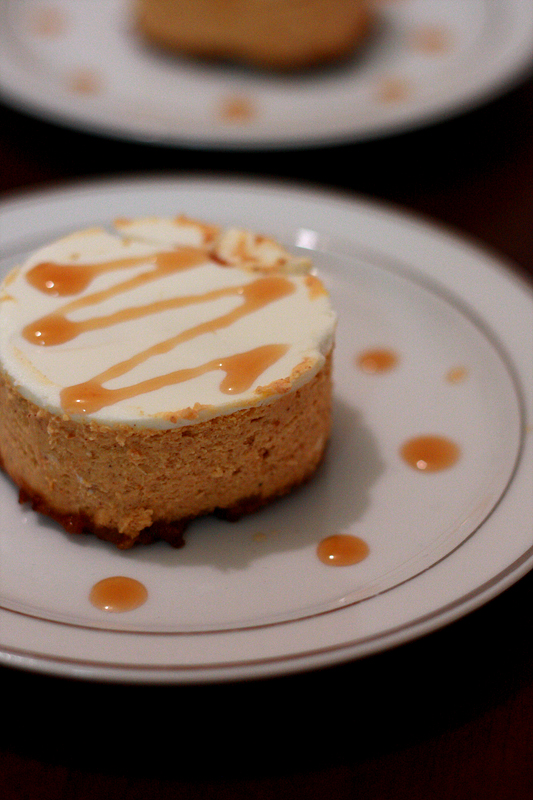
Bourbon Pumpkin Cheesecake

**This is the seventh and final recipe installment from my Seven-Course Fall Feast.**


Ah, the end. We have arrived at the final dish from my Seven-Course Fall Feast. And what a finale to a long and luxurious dinner. Going into the final dish is right where your guests are hovering between "oh I could eat a little bit more" and "I'm really full". Where they are doesn't matter. Because they will eat this. (Although you really want to aim for them to be in the first category -- we don't want to have to roll them home!)

This cheesecake takes a few steps (and a few hours of hanging out) to put together, but I think it's totally worth it. The end result leaves you with a surprisingly rich and creamy cheesecake, but one that's not over the top sweet like so many tend to be.

As for the bourbon. Let's just say I'm not a fan of bourbon, neat or on the rocks. Yet I sucked it up and made sure it found it's way in there anyways. If you are a bourbon lover, I would suggest doubling the bourbon in this recipe, but for everyone else, I think what's in there is just the right amount. Honestly, you can't really taste the bourbon, but it gives the cheesecake a nice extra layer of flavor, one you can't quite put your finger on. Which, in my case, would be a good thing.


Bourbon Pumpkin Cheesecake
Adapted From: Gourmet, November 2003

3/4 cup gingersnap cookie crumbs
1/2 cup pecans (1 3/4 ounces), finely chopped
1/4 cup packed light brown sugar
1/4 cup granulated sugar
1/2 stick (1/4 cup) unsalted butter, melted and cooled

1 1/2 cups canned solid-pack pumpkin
3 large eggs
1/2 cup packed light brown sugar
2 tablespoons heavy cream
1 teaspoon vanilla
1 tablespoon bourbon
1/2 cup granulated sugar
1 tablespoon cornstarch
1 1/2 teaspoons cinnamon
1/2 teaspoon freshly grated nutmeg
1/2 teaspoon ground ginger
1/2 teaspoon salt
3 (8-ounce) packages cream cheese, at room temperature

2 cups sour cream (20 ounces)
2 tablespoons granulated sugar
1 tablespoon bourbon

Caramel topping

Assemble, lock together, and butter a 10-inch springform pan.

In a medium bowl, stir together crumbs, pecans, 1/4 cup brown sugar, 1/4 cup granulated sugar and 1/4 cup butter in a bowl until combined well. Press crumb mixture evenly onto bottom and 1/8-1/4 inch up side of pan. Chill crust for at least 1 hour.

Preheat oven to 350 degrees F.

In a medium bowl, whisk together pumpkin, eggs, 1/2 cup brown sugar, cream, vanilla, and 1 tablespoon bourbon until well incorporated.

In the large work bowl of a mixer, stir together 1/2 cup granulated sugar, cornstarch, cinnamon, nutmeg, ginger, and salt. Add cream cheese and beat on high until creamy and smooth, about 3 minutes. Reduce speed to medium, adding in pumpkin mixture. Beat until smooth.

Place springform pan with crust onto a baking sheet with edges. Slowly pour filling into crust, smoothing top. Bake on the middle rack until center is just set, 50 to 60 minutes (center should still be able to slightly shake). Leaving the oven on, transfer cheesecake to rack and cool 5 minutes.

In a medium bowl, whisk together sour cream, 2 tablespoons granulated sugar, and 1 tablespoon bourbon. Spread mixture on top of cheesecake and bake for an additional 5 minutes.

Cool cheesecake completely in pan on a cooling rack, about 3 hours.

Cover and transfer to the refrigerator (can be carefully removed from the baking sheet) until cold, at least 4 hours. Remove side of pan and drizzle slices with caramel before serving.

Serves: 12


If making for a party (or a nice alternative to pumpkin pie for Thanksgiving), start working on the cheesecake first. There is a lot of down time between letting the crust chill, baking, and letting the cheesecake cool/chill. As with most cheesecakes, you definitely want to serve this throughly chilled, so baking this a day in advance is even better.

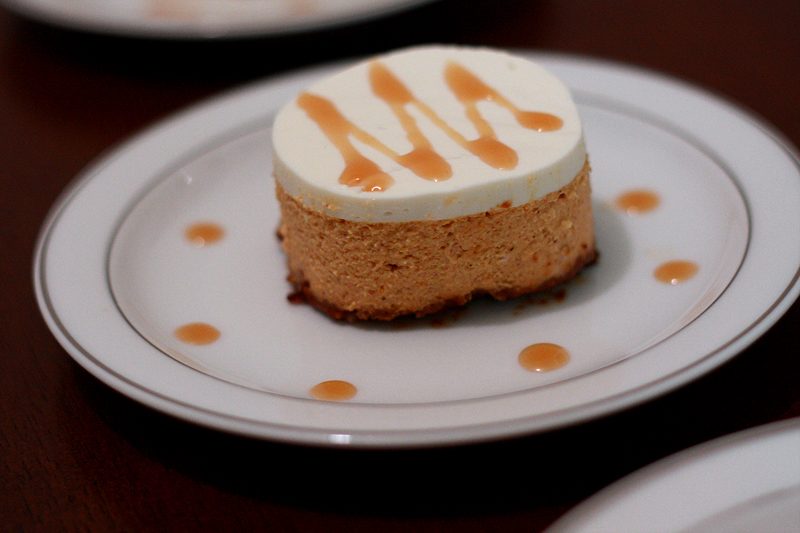
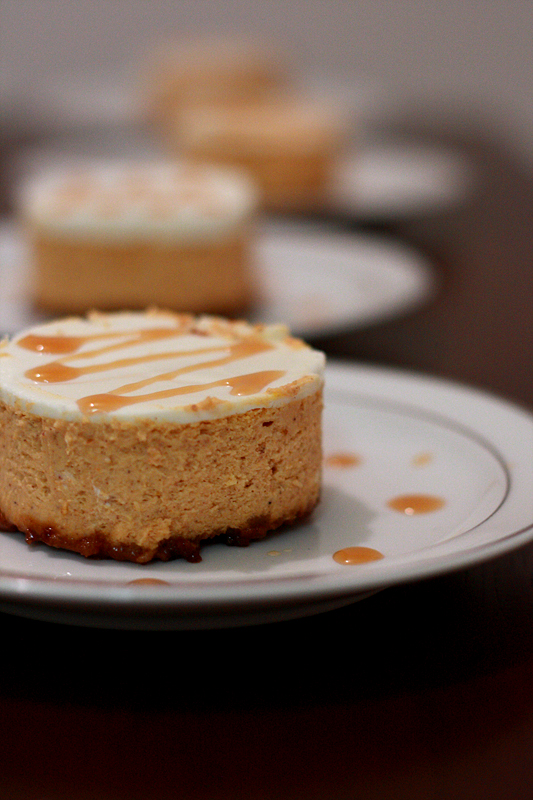
I knew that I wanted to plate these cheesecakes as cute mini cheesecakes, but my round cookie cutter wasn't quite tall enough to cut all the way through. So my handy-dandy engineer hubby came to the rescue, cutting down a soda can and punching holes at the top to allow me to cut 2-inch rounds out of the cheesecake. If you follow the same method, a 9-inch cake will suffice for 6 rounds, but you need that 10-inch for 8 rounds. (And then you have lots of leftover scraps to hide in the fridge for later.) Or you can always just go for the regular slices, just don't forget that caramel drizzle!


Nutrition Facts
Amount per serving
Calories 493Calories from fat 336
% Daily Value
Total Fat 37.3g57%
Saturated Fat 21.2g106%
Trans Fat 0.0g
Cholesterol 146mg49%
Sodium 351mg15%
Total Carbs 32.8g11%
Dietary Fiber 1.5g6%
Sugars 25.8g
Protein 8.0g
Vitamin A 120%Vitamin C 3%
Calcium 12%Iron 10%

Sunday, October 24, 2010

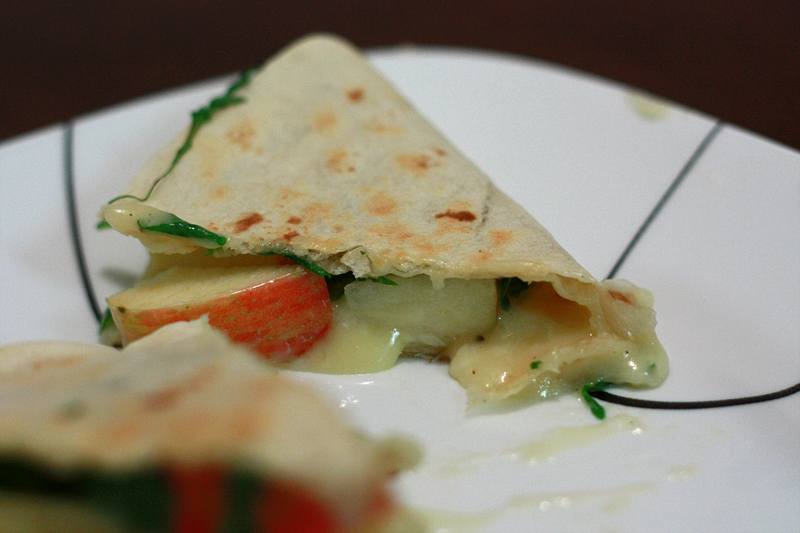
Brie, Apple, and Arugula Quesadillas


I have come to the realization that I am just not a "meat and potatoes" kind of person, and I am completely fine with that fact. Okay, this may not be a new realization, but it is pertinent. When Adam and I got married, I was worried that we would butt heads when it came to what to eat for dinner. He loves his meat, and I could go either way -- I don't think eating meat every.single.night is a necessity.

There was a time when Adam refused to call any dish without meat a "meal", but I have slowly weaned him away from this thinking. While we definitely still eat our fair share of meat, we have tamed it down quite a bit, and added it in more for flavoring, rather than eating one massive chunk (although we definitely take exception to this at times). Not only is this healthier, but it's more budget friendly as well.

The biggest trick I've learned when preparing a meatless meal for those hardcore carnivores is substance. A light and frufu salad daintily drizzled with a fat-free dressing just isn't going to cut it. Nope, things like heavy veggies, beans, and other protein-packed items are where it's at. Which is exactly why I was slightly worried when planning this for dinner. Cheese. Fruit. Lettuce. Tortilla. Period.

Adam loved it. So much so, that he keeps asking me to me these again and again (obviously these get a green light for substance).

Brie, Apple, and Arugula Quesadillas
Adapted From: Cooking Light, October 2010

1 teaspoon coarse-ground mustard
2 teaspoons apple cider
3 (10-inch) flour tortillas
8 ounces Brie cheese, rind removed, cut into 1/4" slices
1 Honeycrisp apple, cored and cut into 1/4" slices
3 cups arugula
3/4 teaspoon ground black pepper

In a small bowl, whisk together the mustard and apple cider.

Heat a large nonstick skillet over medium heat. Using a pastry brush, spread about 1 teaspoon of the mustard mixture on each tortilla. Place one tortilla, mustard side up, in skillet. Cover half of tortilla with 1/3 of brie slices, followed by 1/3 of apple slices. Top with 1 cup of arugula and sprinkle with 1/4 teaspoon pepper.

Fold tortilla in half, pressing gently with a spatula. Cook for 2 minutes on each side, or until golden brown. Remove from pan, and repeat procedure twice more with remaining ingredients. Cut each quesadilla into 4 wedges.

Yields: 3 servings


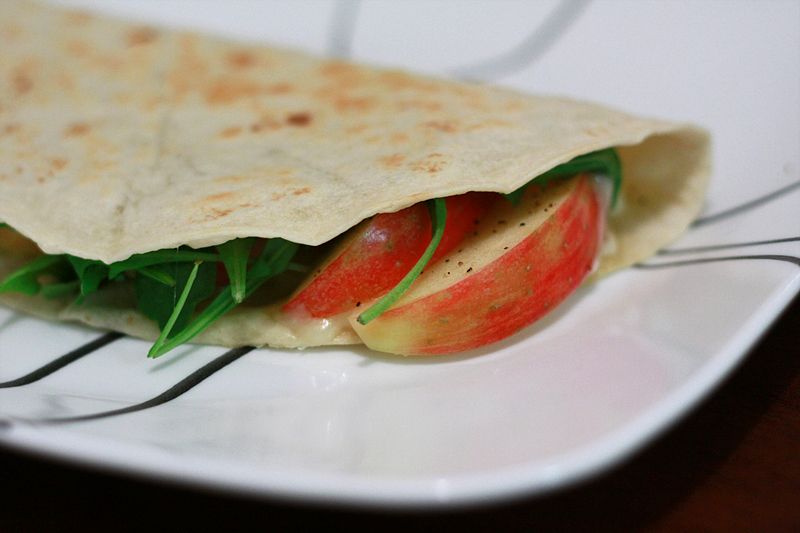
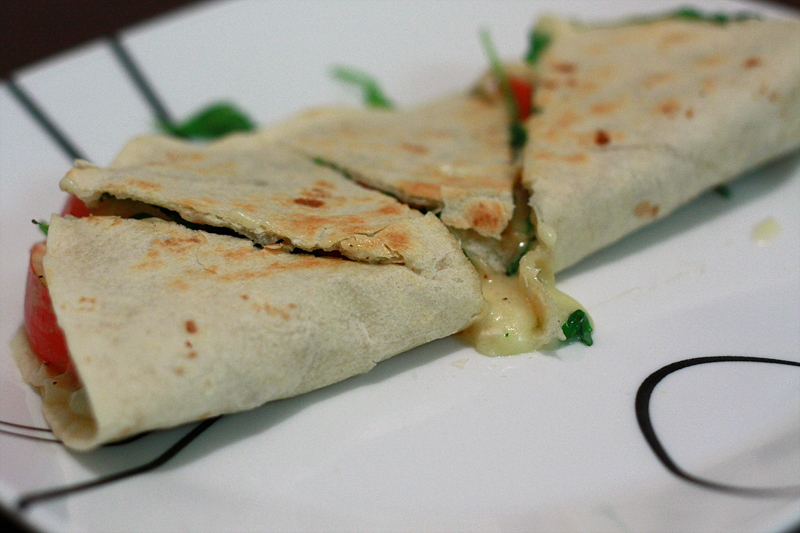
Warm, cheesy, with crunchiness and tartness from the apples. Mmm mmm. Seriously though, it really can't get much easier to make such a tasty dinner.


Nutrition Facts
Amount per serving
Calories 409Calories from fat 206
% Daily Value
Total Fat 22.8g35%
Saturated Fat 13.5g67%
Cholesterol 76mg25%
Sodium 515mg21%
Total Carbs 33.6g11%
Dietary Fiber 5.1g21%
Sugars 6.4g
Protein 19.6g
Vitamin A 19%Vitamin C 9%
Calcium 22%Iron 9%

Thursday, October 21, 2010

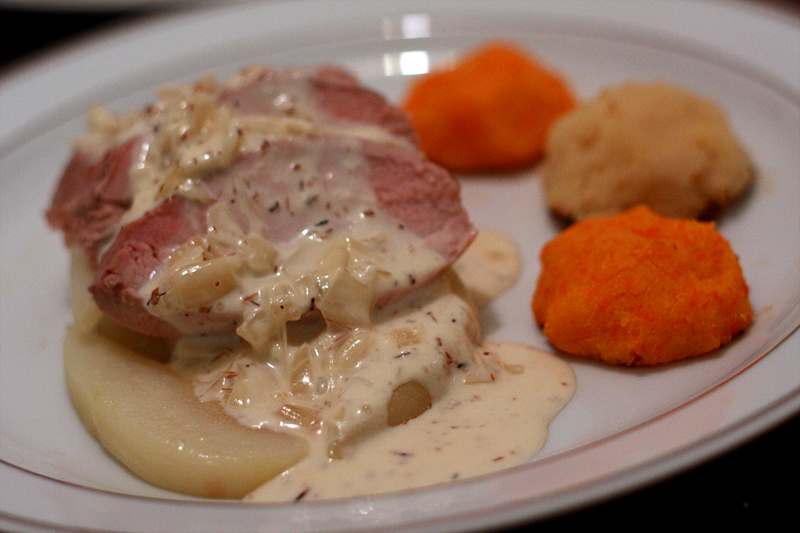
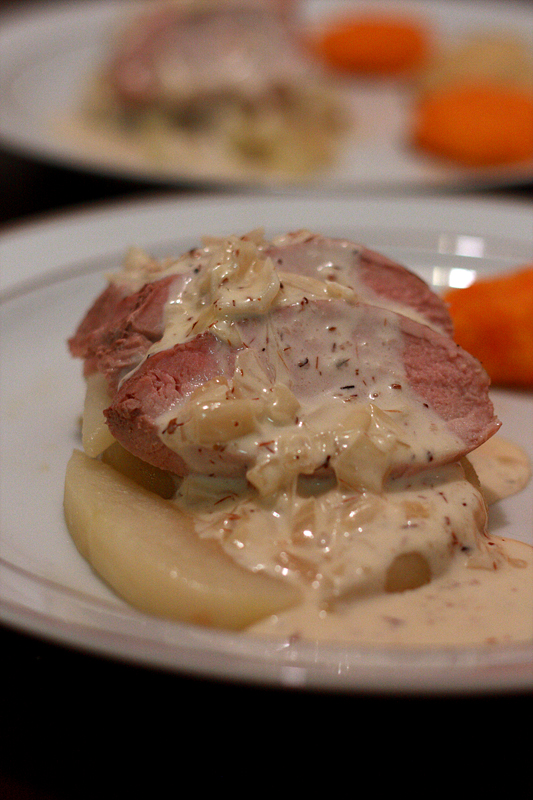
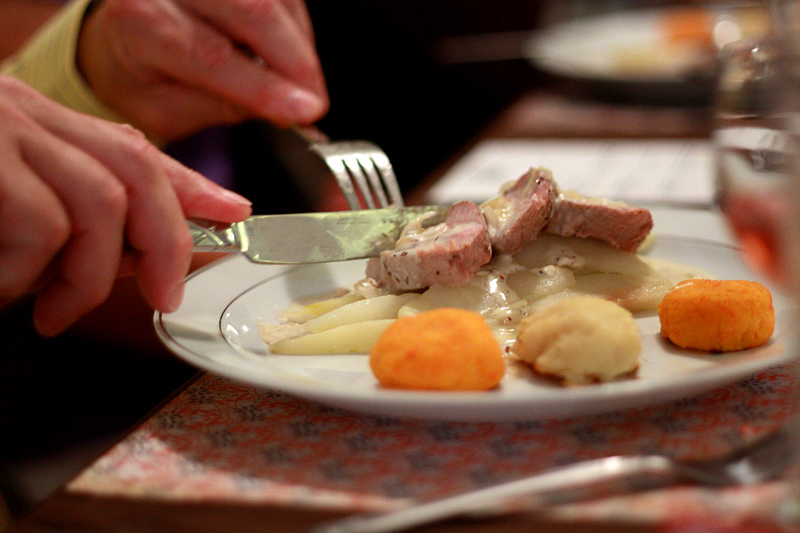
Pork Tenderloin with Caramelized Pears and Pear-Brandy Cream Sauce & Autumn Root Vegetable PurƩe

**This is the sixth of seven recipe installments from my Seven-Course Fall Feast.**


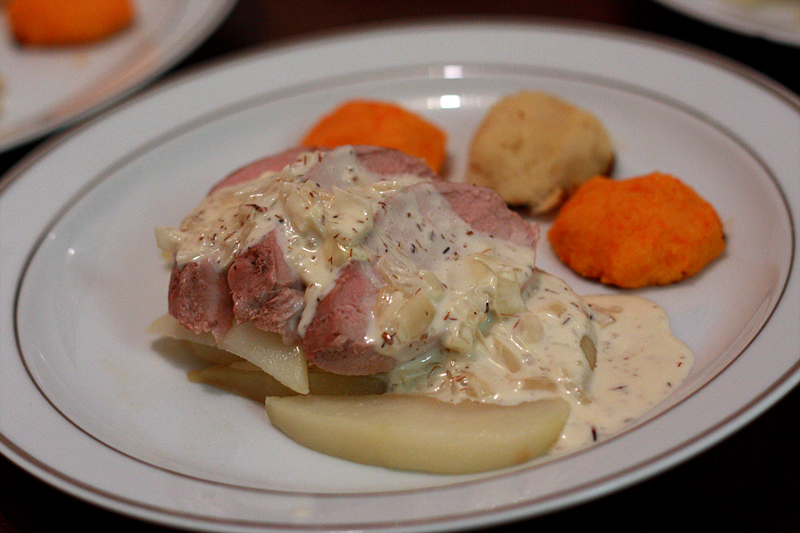
Holy long post title Batman! I know, I know. But despite the long name, this pork was one of the top dishes that came out of my Fall Feast. The pears and pork work beautifully together in this dish and that cream sauce. Yum. That is pretty much the only way to describe it.

Oh, and silly me. Have I failed up to this point to mention that this dish is EASY? And relatively quick? That's right, I pretty much did zero prep work for this dish and it went from start to table in about 40 minutes. (Yes, I know, a little longer than I would have liked between courses, but I promise it was worth it.)

Let's not forget about that lovely neon orange and white side dish hanging out over there. While everyone traditionally thinks "mashed potatoes" for pretty much any type fall meal, I remembered seeing a similar dish but instead made with an assortment of root vegetables (besides potatoes). I have to admit (hanging my head in shame) that we did in fact wander around the produce department for a while looking for some of these veggies. And we may or may not have had to Google image what a parsnip looked like. Yeah, we were "those" kids.

Pork Tenderloin with Carmelized Pears and Pear Peach-Brandy Cream Sauce
Adapted From: Bon AppƩtit, February 1996

2 pounds pork tenderloin, trimmed
3/4 teaspoon salt
1/2 teaspoon pepper

6 1/2 tablespoons butter
6 1/2 firm but ripe large Anjou pears, peeled, halved, cored, cut into 1/3-inch-thick wedges
1 2/3 teaspoons sugar

1 scant cup chopped shallots
2 teaspoons dried thyme
2/5 cup peach brandy (or pear eau-de-vie (clear pear brandy) or pear schnapps)
1 2/3 cup whipping cream

Preheat oven to 350 degrees F. Prepare a roasting rack inside a small roasting pan.

Sprinkle the salt and pepper over the pork. Place on roasting rack, then bake at 350 degrees for 25-30 minutes, or until a thermometer reads 155 degrees. Remove to a cooling rack, and allow to rest for 10 minutes. When ready to serve, cut crosswise into 1/4" slices.

Meanwhile, melt 3 tablespoons butter in a large skillet over high heat. Add pears and sugar; sautƩing until pears are tender and a deep golden color; about 12-15 minutes. Remove to a large bowl; reserving any remaining juices.

Melt remaining butter in separate large skillet over high heat. Add shallots and thyme, sautƩ for 2 minutes. Add brandy, and boil until liquid is reduced to a glaze, scraping up any browned bits; about 3-4 minutes. Add cream and remaining juice from caramelized pears (if any), a boil until thickened to a sauce-like consistency; about 7-8 minutes. Season with salt and pepper.

If necessary, reheat pears, then spoon into center of serving plate. Arrange sliced pork around the pears, pouring the cream sauce over the pork.

Serves: 8

Autumn Root Vegetable PureƩ
Adapted From: Epicurious, 2004

2 medium turnips
2 small carrots
1 medium parsnip
1 medium yam (or sweet potato)
1/2 medium rutabaga
Kosher salt
3 tablespoons butter

Cut turnips, carrots, and parsnips into 2" pieces. Cut the yam and rutabaga into small chunks, roughly the same size as the other vegetables.

In a medium saucepan, add all the vegetables and cover with 2" of water. Add in a pinch of salt. Bring to a boil over high heat, then reduce heat to bring the water to a simmer. Cook until the vegetables are tender, 30-40 minutes.

Drain the vegetables and return to the saucepan over medium heat to dry; about 2 minutes. Remove from heat. Using a ricer (or food mill or hand mixer), purƩe the vegetables in a large bowl. Add butter and salt and pepper to taste.

Serves: 4


If preparing for a party, unfortunately all you can prepare ahead of time on the pork is chopping the shallots. However, for the Autumn Root Vegetable PurƩe, you can prepare completely in advance, then simply reheat prior to serving.


Like I said, this pork is a.mazing. We will definitely be making that one again. Wondering about the switch to peach brandy from pear? It's called - make sure your dad has his reading glasses when he goes to the store for you. :) And honestly, you couldn't tell. It was still super tasty.

As for the root puree... it could probably use a bit more butter to smooth it out a bit. I'm pretty sure Adam thinks I'm crazy because I kept randomly yelling out "rutabaga!" while making this. Just because rutabaga is fun to say. Okay, so maybe I am crazy. Just a little.

Pork Tenderloin with Carmelized Pears and Pear-Brandy Cream Sauce:

Autumn Vegetable Root PurƩe:

Nutrition Facts - Pork Tenderloin
Amount per serving
Calories 463Calories from fat 192
% Daily Value
Total Fat 21.3g33%
Saturated Fat 12.1g61%
Trans Fat 0.0g
Cholesterol 135mg45%
Sodium 361mg15%
Total Carbs 31.5g10%
Dietary Fiber 5.4g22%
Sugars 17.6g
Protein 31.5g
Vitamin A 17%Vitamin C 15%
Calcium 5%Iron 12%

Nutrition Facts - Root Vegetable Puree
Amount per serving
Calories 165Calories from fat 80
% Daily Value
Total Fat 8.9g14%
Saturated Fat 5.5g28%
Trans Fat 0.0g
Cholesterol 23mg8%
Sodium 171mg7%
Total Carbs 20.7g7%
Dietary Fiber 4.7g19%
Sugars 7.2g
Protein 2.0g
Vitamin A 90%Vitamin C 55%
Calcium 6%Iron 4%

Wednesday, October 20, 2010

Peanut Butter Chocolate Cupcakes


Have you ever noticed that as you grow older, the amount of time you take to celebrate your birthday gets longer? No? Just me? When I was younger, there was so much anticipation that built up to my birthday. There was the "family birthday dinner" with the birthday person deciding on the meal, and family presents exchanged. And then there was the Big.Birthday.Party with all my friends invited. Just those two days, and that was it. (Two days because I am the child with the odd-day not-typically-on-a-weekend birthday, and we all know Saturdays are the best for parties, right?) See, as I grow older, my birthday celebration actually gets longer. We had cake and opened presents at my sister's on Saturday, I had my actual birthday on Monday with presents from the hubby, presents randomly showed up on my doorstep yesterday, and we are going out for a belated birthday dinner tonight. Don't get me wrong, I actually kind of like it this way. More celebrating and reasons to eat cupcakes!

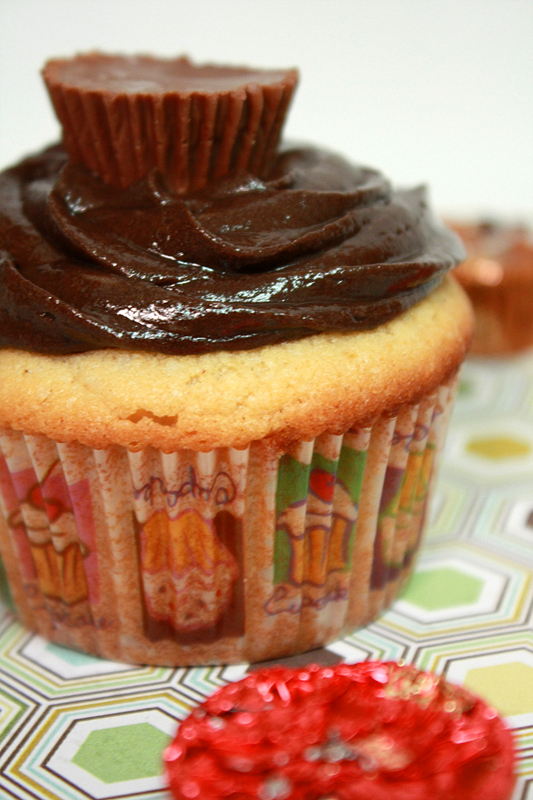
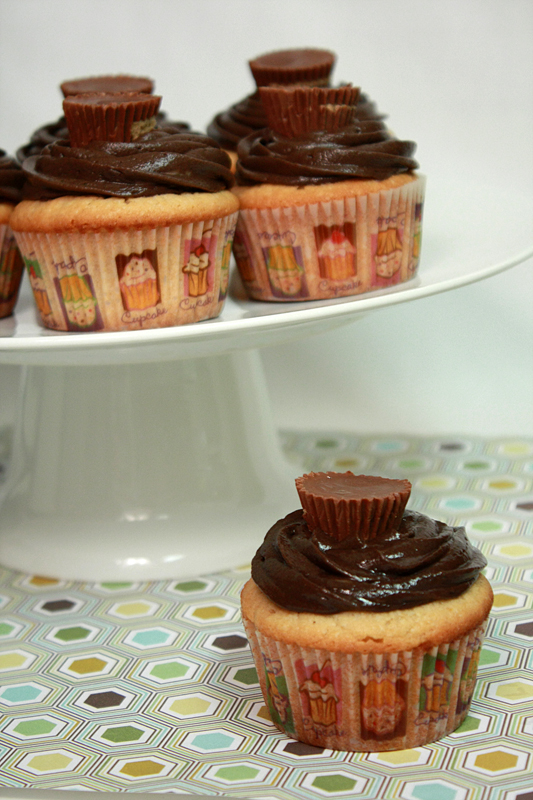
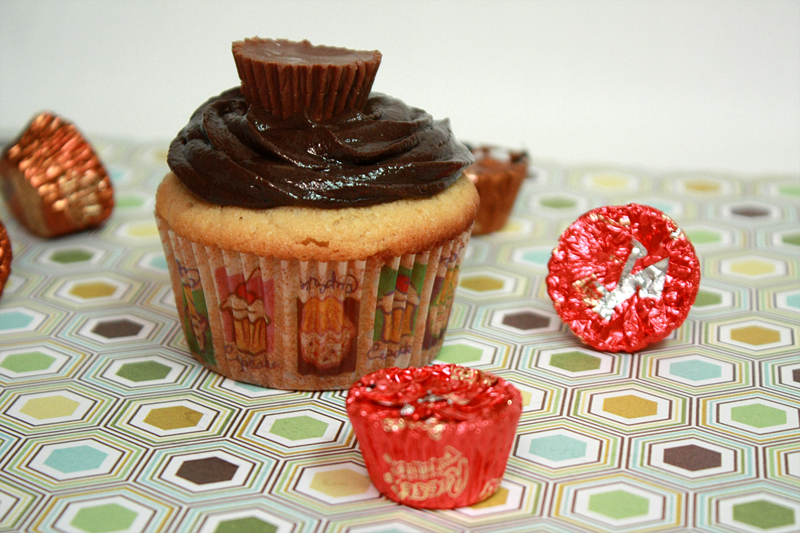
Hold on. Now just wait a minute. Didn't I just make some Dark Chocolate Peanut Butter Cupcakes not too long ago? Why yes, I did. But here I am, being sneaky and switching it up on you. Instead of a chocolate cupcake with peanut butter frosting, I opted for a peanut butter cupcake with dark chocolate frosting instead.

Surprisingly, peanut butter cupcakes are not a popular as one would think (especially after eating one). With chocolate cupcakes, it just takes a simple search or two to be completely overwhelmed by all the different variations. With peanut butter cupcakes, you have, oh, about 8 choices. Makes for an easy decision. And good ol' Martha Stewart came through, as always.


Peanut Butter Chocolate Cupcakes
Cupcake Adapted From: Martha Stewart.com
Frosting From: Original Recipe

3/4 cup (1 1/2 sticks) butter, room temperature
1 1/3 cups granulated sugar
2/3 cup natural, creamy peanut butter
3 large eggs
1 3/4 cups all-purpose flour
3/4 tablespoon baking powder
1/4 teaspoon baking soda
1/2 cup sour cream
1/2 teaspoon pure vanilla extract

1 cup butter (2 sticks), room temperature
1 teaspoon vanilla extract
1 pound powdered sugar
6 tablespoons Hershey's Special Dark cocoa
4 tablespoons milk

Preheat oven to 350 degrees F. Line two muffin pans with 18 cupcake liners.

In the work bowl of a mixer, combine 1 1/2 sticks (3/4 cup) butter and granulated sugar. Mix together until light and fluffy. Add in the peanut butter, and mix until smooth. Add in eggs, one at a time, mixing until each is fully incorporated before adding the next egg.

In a medium bowl, sift together the flour, baking powder, and baking soda. (If using unsalted butter, add in 1/2 teaspoon of salt.)

Add 1/2 of the flour mixture to the wet ingredients. Mix until fully incorporated. Mix in the sour cream and 1/2 teaspoon vanilla until well combined. Add in remaining flour mixture, mix until fully incorporated and batter is smooth.

Bake at 350 degrees for 18-22 minutes, or until a toothpick inserted in the middle come out clean. Allow cupcakes to cool in pan for 10 minutes, then remove to a wire rack and let cool completely.

In a large bowl, beat the butter on medium-high until smooth and creamy. Add in 1 teaspoon vanilla, and mix well. Slowly add in the powdered sugar, beating until smooth. Add in 3 tablespoons of cocoa, mix until well incorporated. Mix in 2 tablespoons of milk. Add remaining 3 tablespoons of cocoa, followed by the remaining 2 tablespoons of milk. Mix until frosting is smooth and fluffy. Decorate cupcakes once they are fully cooled.

Makes: 18 cupcakes


I was a little leary going into this project -- I was assuming that the peanut butter was either not going to be very prominent, or it was going to make these cupcakes very dense. And I am happy to report that it did neither of those two things. The cupcakes were light and fluffy, just as they should be.

Of all the cupcakes I have made before, I am in absolute shock that I have yet to try a chocolate buttercream. Seriously, no chocolate frosting? Nope, only ganache. I didn't want to go with ganache on these as it can get heavy and super sweet, fast. Instead I simply modified my typical buttercream recipe by adding in cocoa and milk (the cocoa stiffens up the buttercream, and the milk helps to loosen it back up). And I think it worked out just fine. Don't be scare by the high quantity of cocoa added in, you really do need that much (or more) if you are going for a nice deep chocolate flavor.

Nom.nom.nom. I think my birthday should come around more often.


Nutrition Facts
Amount per serving
Calories 447Calories from fat 228
% Daily Value
Total Fat 25.3g39%
Saturated Fat 13.6g68%
Cholesterol 86mg29%
Sodium 205mg9%
Total Carbs 52.9g18%
Dietary Fiber 1.4g6%
Sugars 40.7g
Protein 5.5g
Vitamin A 13%Vitamin C 0%
Calcium 6%Iron 7%

Tuesday, October 19, 2010

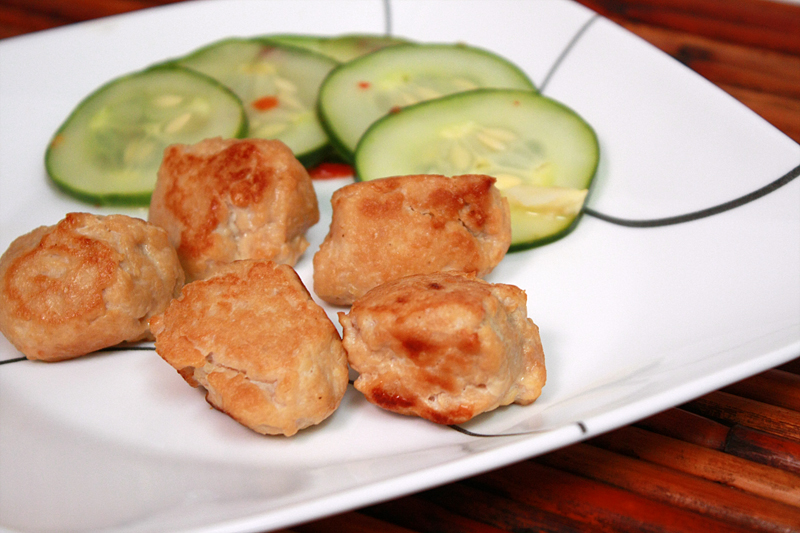
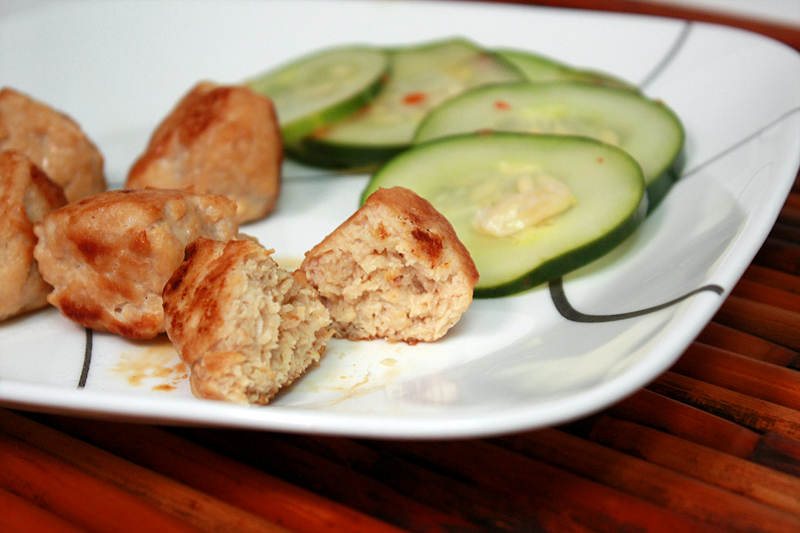
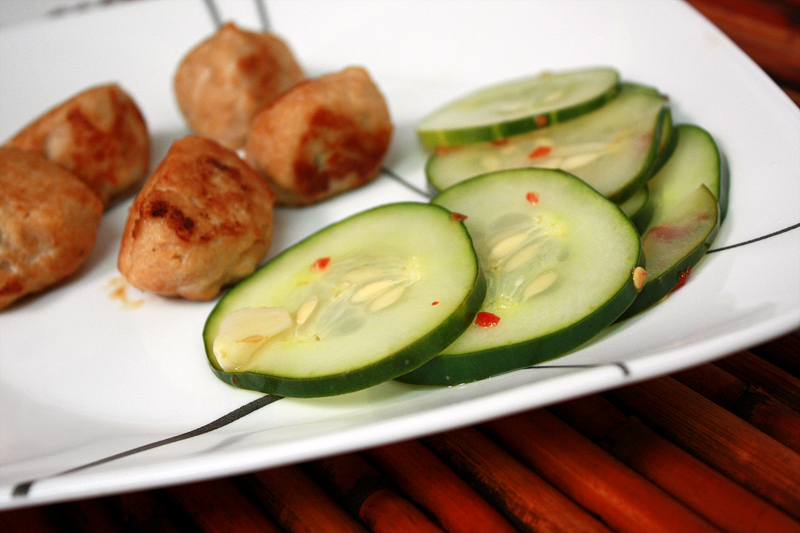
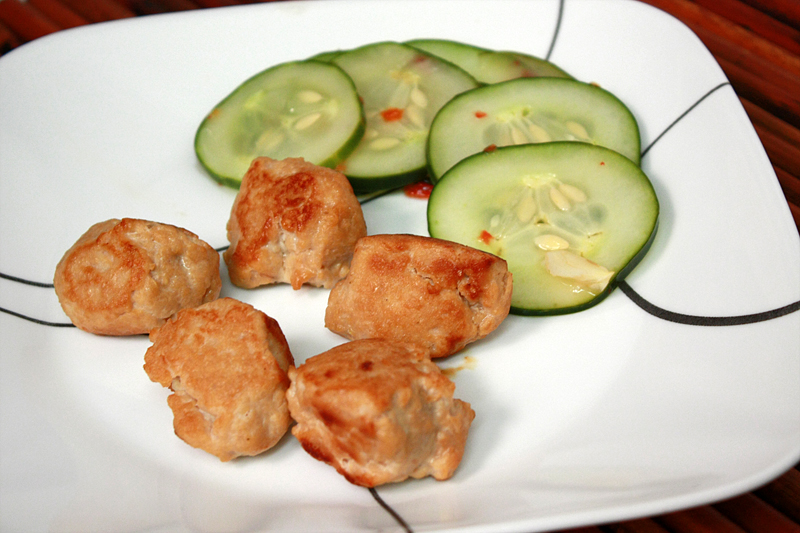
Korean Meatballs & Quick Pickled Cucumbers


Everybody has their list of foods they don't like. I am probably the worst -- that list is ridiculously long. Seafood, coffee, coconut, I could really go on and on for a very long time. Adam, on the other hand, has a very short list. Up until now it had included:
* Feta Cheese
* Bell Peppers
Period. That was it. I could get him to practically eat anything else, as long as it was reasonably edible. And then I decided to *gasp* once again make a side to go with my meal (I mean really, meatballs on their own are just kind of boring and look very lonely).

I knew that Adam wasn't the cucumber's biggest fan, but I didn't realize to what exact extent. The Quick Pickled Cucumbers weren't just straight cucumbers, they were pickled cucumbers. And I know for a fact he's a fan of pickles. Let's just say the kid keeps a jar in the fridge at all times for his late night cravings.

Of course, when he sees what's on his dinner plate, the nose automatically goes up. "You know I don't like cucumbers, right?" After much cajoling, arm-twisting, and stink-eyes shot his way, I convinced him to at least try them. One disappeared. Then another. And another. "You know, these actually aren't all that bad." Silly kid, he should learn to trust me. Except where bell peppers and feta cheese are involved.

Korean Meatballs
From: Cooking Light, October 2010

2 tablespoons brown sugar
2 tablespoons canola oil
8 garlic cloves
3 tablespoons soy sauce
1 pound skinless, boneless chicken breasts, cut into 1-inch pieces
Cooking spray

Preheat oven to 400 degrees F.

In the bowl of a food processor, combine brown sugar, oil, and garlic. Process until finely ground. Add soy sauce, salt, and chicken; and process again until finely ground. Divide chicken mixture into 20 equal portions. With moist hands, shape each portion into a meatball, and set aside.

Heat a large skillet over medium-high heat. Add 10 meatballs to pan; sautƩ 4 minutes, turning to brown meatballs on all sides. Arrange browned meatballs on a parchment-lined baking sheet. Repeat procedure with remaining meatballs. Bake at 400 degrees for 5 minutes or until done.

Serves: 4

Quick Pickled Cucumbers
From: Cooking Light, October 2010

1 cucumber, sliced crosswise into thin rounds
2 cloves garlic, crushed
1 cup rice vinegar
3/4 cup water
2 tablespoons sugar
1/2 teaspoon salt
1 tablespoon garlic chile paste (sambal oelek)

In a medium bowl combine the cucumber and crushed garlic.

In another medium, microwave-safe bowl, combine the vinegar, water, sugar and salt. Microwave on High for 2 minutes, or until boiling.

Pour hot vinegar mixture over cucumbers. Add in 1 tablespoon chile paste, and stir well. Cover and chill at least 4 hours. Drain prior to serving, or serve with a slotted spoon.

Serves: 4


The meatballs are tangy and garlicky with a hint of the sweetness from the brown sugar; but more importantly, they are delicious. Definitely a nice twist from your usual Italian-style beef meatballs.

Even though you only "pickle" the cucumber for 4 or so hours, it actually takes away most of the "cucumber" flavor, infusing it with the vinegar bite you typically associate with a pickle. Which totally works in my book, as neither of us are cucumber-on-its-own fans.

What's even better about this complete meal (besides the fact that I actually served a side that wasn't bagged salad)? You can have up to two servings of meatballs (that's 10 of those tangy meatballs) with a serving of cucumbers, and you will still be under 500 calories. How's that for awesome? Well, as long as you can get to them before your husband, which in my case, probably isn't going to happen.


Nutrition Facts - Korean Meatballs
Amount per serving
Calories 206Calories from fat 86
% Daily Value
Total Fat 9.6g15%
Saturated Fat 1.0g5%
Trans Fat 0.0g
Cholesterol 66mg22%
Sodium 861mg36%
Total Carbs 7.3g2%
Sugars 4.6g
Protein 24.4g
Vitamin A 0%Vitamin C 3%
Calcium 2%Iron 2%

Nutrition Facts - Quick Pickled Cucumbers
Amount per serving
Calories 78Calories from fat 1
% Daily Value
Total Fat 0.1g0%
Saturated Fat 0.0g0%
Trans Fat 0.0g
Cholesterol 0mg0%
Sodium 319mg13%
Total Carbs 9.6g3%
Sugars 7.6g
Protein 0.6g
Vitamin A 2%Vitamin C 7%
Calcium 2%Iron 1%

Monday, October 18, 2010

And the winner of the $45 gift card is...

Crystal's Cozy Kitchen!

Crystal's favorite birthday present ever:
My favorite birthday gift - the only one I can really remember is that two years ago my husband got me the boardgame Ticke to Ride Nordic Countries. I love it!

Congrats Crystal, you should receive a $45 promo code to use at any of CSN's 200+ stores in the next couple of days! Thanks to everyone who participated in my giveaway! It was so much fun to see what was everybody's favorite birthday gift, or a something that you all really want.

As for me, my favorite birthday "gift" is getting to go pumpkin picking every year so far with my nephew!

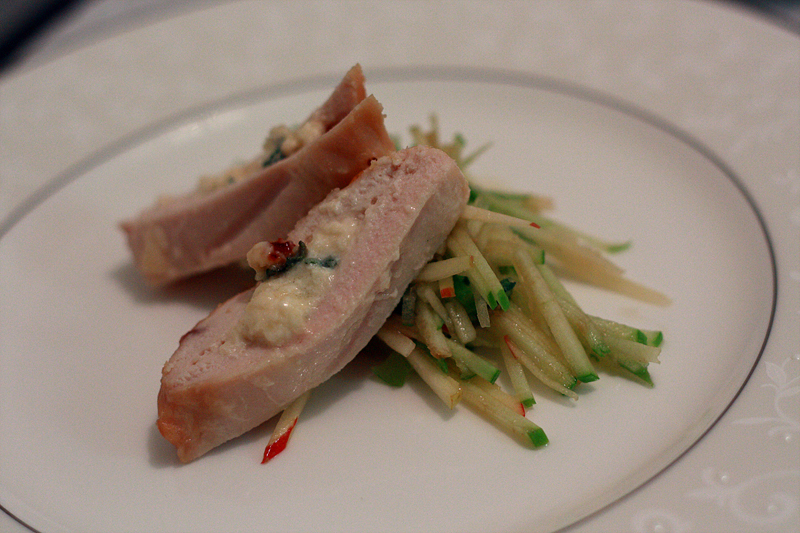
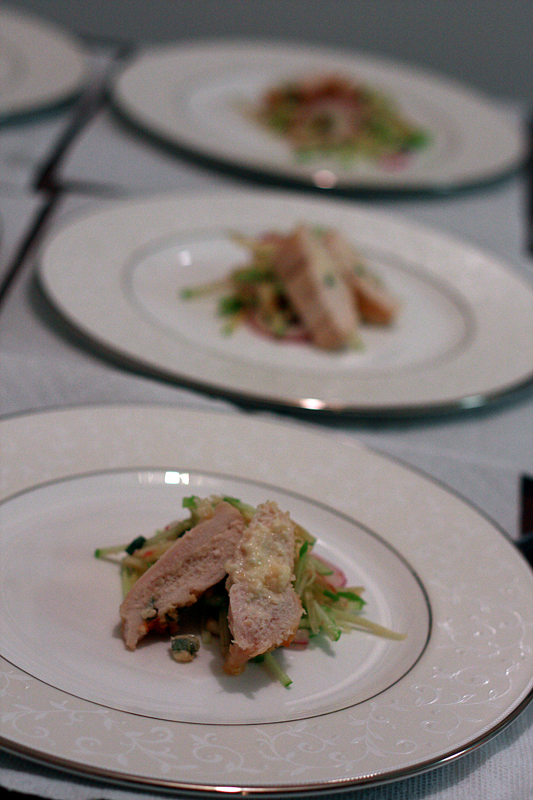
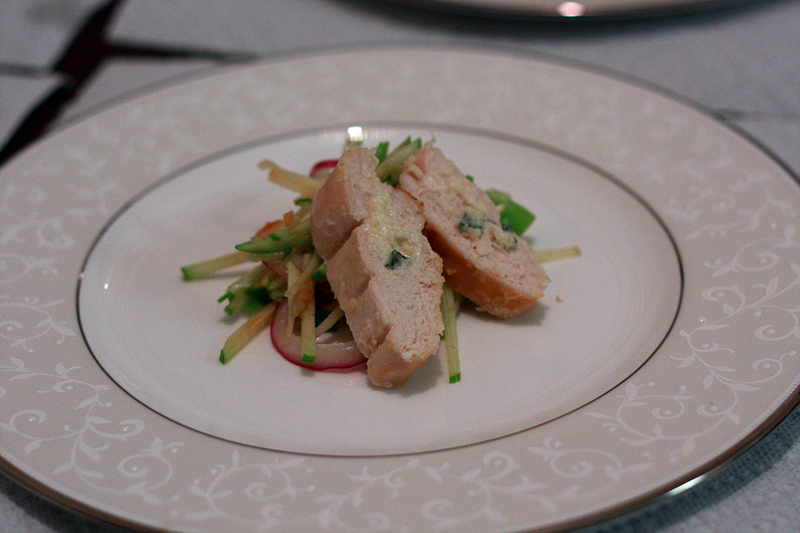
Smoked Cheddar-Stuffed Chicken with Green Apple Slaw

**This is the fifth of seven recipe installments from my Seven-Course Fall Feast.**


When planning a 7-course meal, it is fairly easy to find the order and type of dishes to serve. While there are multiple variations, the meal usually follows this order: 1) appetizer, 2) soup, 3) salad, 4) palate cleanser or pasta, 5) a lighter meat, such as poultry, 6) red meat or fish, 7) dessert. Well, problem. I wasn't serving a red meat or fish. I knew I was serving some type of pork, which I was pretty confident was going in as the sixth course. Finding a chicken dish with fall flavors was really throwing me for a loop. Until I ran across this recipe. The combination of smoked cheddar, maple syrup, whiskey, and sage all combined perfectly to bring fall into this chicken dish.

Smoked Cheddar-Stuffed Chicken with Green Apple Slaw
Adapted from: Bon Appetit, July 2005

1 cup coarsely grated smoked cheddar cheese
1/2 cup pure maple syrup
2 tablespoons cream cheese, room temperature
2 teaspoons chopped fresh sage
4 (4 ounce) boneless skinless chicken breast halves
1/4 cup Scotch whisky
2 tablespoons (packed) golden brown sugar
2 tablespoons (1/4 stick) unsalted butter

1 tablespoon olive oil
1 tablespoon lemon juice
1 tablespoon pure maple syrup
1 tablespoon Scotch whisky
1 1/2 teaspoons chopped fresh sage
1 very large Granny Smith apple, halved, cored, cut into matchstick-size strips (about 2 1/2 cups)
1/4 cup paper-thin slices red onion
2 green onions, chopped

Nonstick vegetable oil spray

Preheat oven to 450 degrees F.

Stir 1/2 cup cheddar cheese, 1/4 cup maple syrup, 1 tablespoon cream cheese, and sage in small bowl to blend. In another small bowl, combine the remaining 1/2 cup cheddar cheese and 1 tablespoon cream cheese. Place 1 chicken breast on work surface. Using small sharp knife, cut 1 1/2-inch-deep by 2-inch-long horizontal pocket in chicken. Coat the inside of the pocket with 1/4 of the syrup mixture (some may leak out). Stuff pocket with 1/4 of the cheese-only mixture. Close the pocket opening with toothpicks. Repeat with remaining chicken and stuffing. Arrange chicken on small roasting rack placed inside of a roasting pan.

Combine remaining 1/4 cup maple syrup, whisky, brown sugar, and butter in small saucepan. Whisk over medium heat until sauce comes to simmer and is blended.

Bake in oven for 20 minutes, basting with sauce after 10 minutes, then again at 15 minutes.

Whisk together the olive oil, lemon juice, 1 tablespoon maple syrup, whiskey, and 1 1/2 teaspoons sage in medium bowl to blend. Mix in apple, red onion, and green onions. Season slaw to taste with salt and pepper. Refrigerate at least 1 hour and up to 4 hours, tossing occasionally.

Serves: 4


If serving at a party, the chicken and basting sauce can easily be made up to one day in advance. Just make sure to store them in the refrigerator separately.

Now, I have to be honest here: this dish was probably my least favorite -- solely because I am not a fan of raw onions in any shape or form. I'm pretty sure it was just me though, as all of the other guests seemed to really enjoy the dish.

If you are looking to cut out some of the calories or saturated fat here, I think this chicken would still be great without the cheddar/cream cheese filling, allowing the maple and whiskey flavors to become more prominent.


Nutrition Facts
Amount per serving
Calories 640Calories from fat 260
% Daily Value
Total Fat 28.9g44%
Saturated Fat 13.6g68%
Cholesterol 151mg50%
Sodium 336mg14%
Total Carbs 43.9g15%
Dietary Fiber 1.8g7%
Sugars 37.0g
Protein 40.7g
Vitamin A 15%Vitamin C 11%
Calcium 28%Iron 14%

LinkWithin

Related Posts with Thumbnails
 
Pin It button on image hover