Thursday, September 30, 2010

Adobo Chicken

**Don't forget, today is the last day to vote for the 2nd Challenge in Project Food Blog! Click here to vote!**


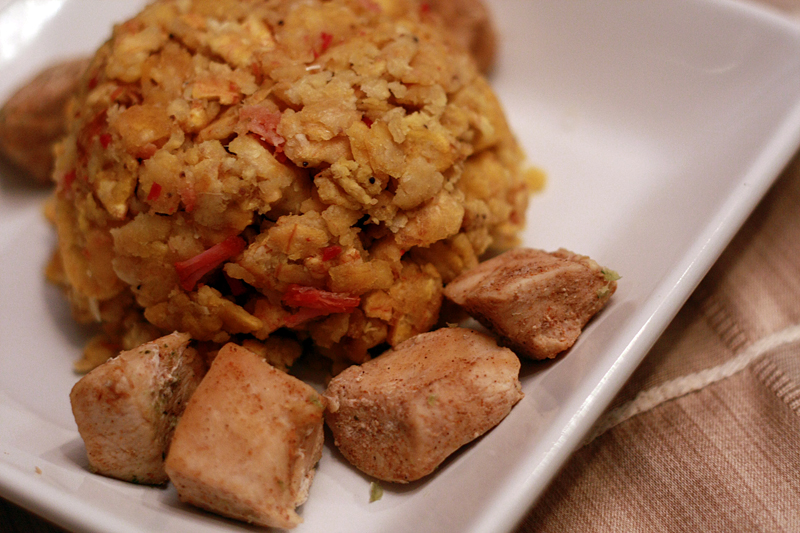
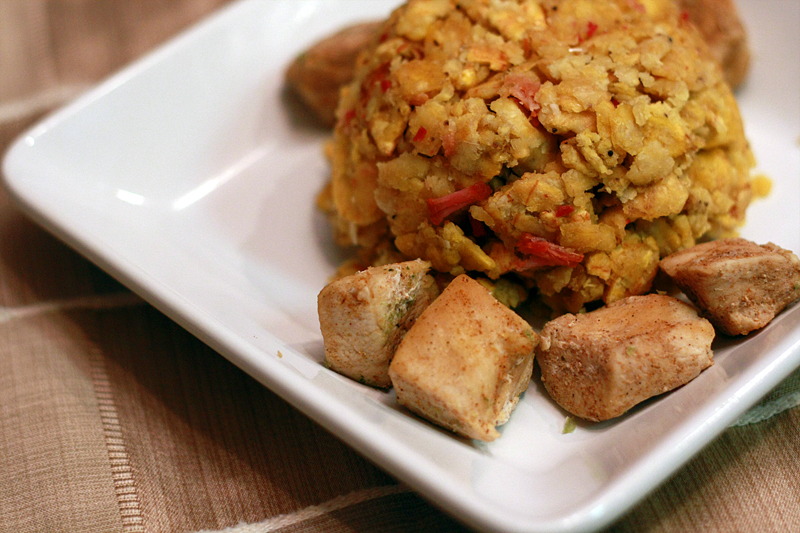
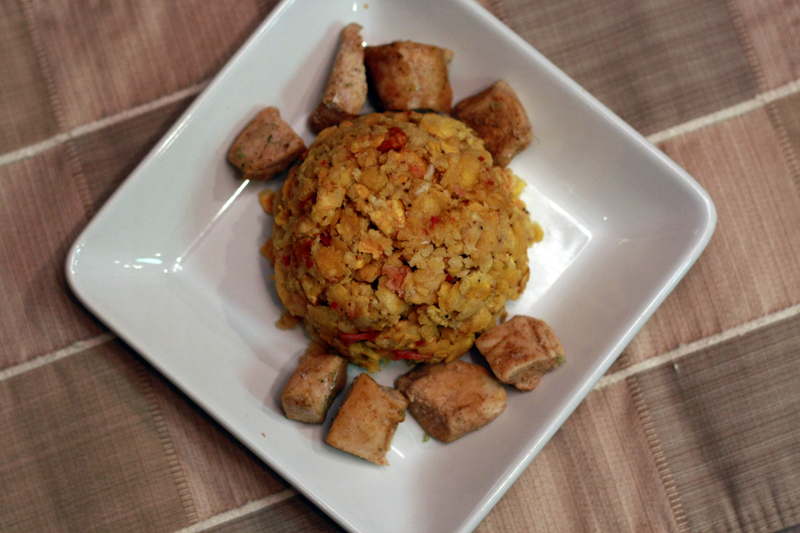
Last, but definitely not least in my Puerto Rican line up was the Adobo Chicken. Of the three dishes I made, this was by far the easiest to throw together. Cube the chicken (if desired), sprinkle with Adobo seasoning, sear the outside, then cover with water, add sofrito, and boil until done. Period. The end. That's all folks. Nothing more to it.

I love me an easy-peasy dish. You could easily just serve this with some boxed yellow rice and be on your way.


1 pound boneless skinless chicken (I used chicken breasts, but you can certainly use thighs as well)
1 tablespoon adobo
2 tablespoons sofrito (green, not red)

Cube and trim fat from chicken (or leave whole). Sprinkle all sides of chicken with adobo seasoning. In a large skillet over medium-high heat, sear the outside of the chicken (about 1 minute per side). Pour water into skillet so all of the chicken is just covered. Add in sofrito. Boil on high until chicken is done, about 5 minutes.

Serves: 4


This is one of those dishes that, to me, just sings with Puerto Rican flavorings. And seriously, how easy is this to make? (Although finding the sofrito is a little tricky...)


Nutrition Facts: working on it... as soon as I can find the info for sofrito....

Tuesday, September 28, 2010

Yuca Fries


What, you really thought I would mention making two other Puerto Rican dishes and not be nice enough to share? Especially since they are SO.good? Think again. (Okay, well maybe I'm a little tempted to keep these for myself.)

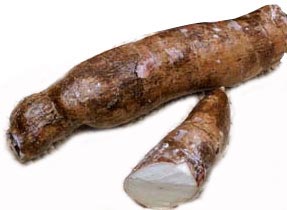
Yuca is simple, plain, unassuming brown tuber. Easy enough to walk on by it in the grocery store. If you are lucky enough to have a grocery store that carries it. Which I am not. Oh no, I had to drive half and hour each way out to a Market District just to find these. The first time I made them anyways.


That's right, I made these twice. See, mofongo was actually not my first dish of choice for the second challenge in Project Food Blog. Originally, I was going for alcapurrias, a traditional Puerto Rican fritter with several types of pork and seasonings cooked together then fried inside a batter made from taro root and bananas or plantains. Well. Let's just say it involved a major fail, a slight temper tantrum, and the "oh crap, now what do I make?" realization. That was the actual reason I drove over an hour for groceries (taro root and plantains don't exist at my usual grocery store either).

While perusing the produce section for taro root and plantains, I came across yuca (which is also known as cassava) and all I could think about were these amazing yuca fries we had at La Flor de la Canela, a Peruvian restaurant, when we were living in DC. Good thing yuca is also a staple food in Puerto Rico because this baby was coming home with me and I was going to find a way to incorporate it into my meal.

Well why not fries? I was frying (or at least attempting to) alcuparrias, it wouldn't be too much extra work to throw some fries in. Not to mention I love that I think I'm eating a typical ol' french fry until that oh-so-subtle sweetness hits. Mmmm tasty.

Yuca Fries
From: No recipe used

1 2-pound yuca (cassava) root
2 teaspoons salt

Fill a large skillet with frying oil (vegetable works fine) to a depth of about 2". Attach a thermometer to the pan and bring oil to 375 degrees F (this is assuming the oil will drop to about 350 while cooking).

Meanwhile, peel the yuca, removing all the brown skin. Cut off the ends. Slice the yuca into roughly 3" sections (the yuca is very firm and hard to cut). Cut each section lengthwise into 1/8s (so it resembles french fry wedges). Try to keep the sizing as uniform as possible.

Place all the yuca into a large saucepan. Fill the sauce pan with water until all the yuca is covered. Bring to a boil over high heat and cook for 20-25 minutes, or until all the yuca is fork-tender (a fork should easily sink into the yuca when poked). Remove from heat and drain.

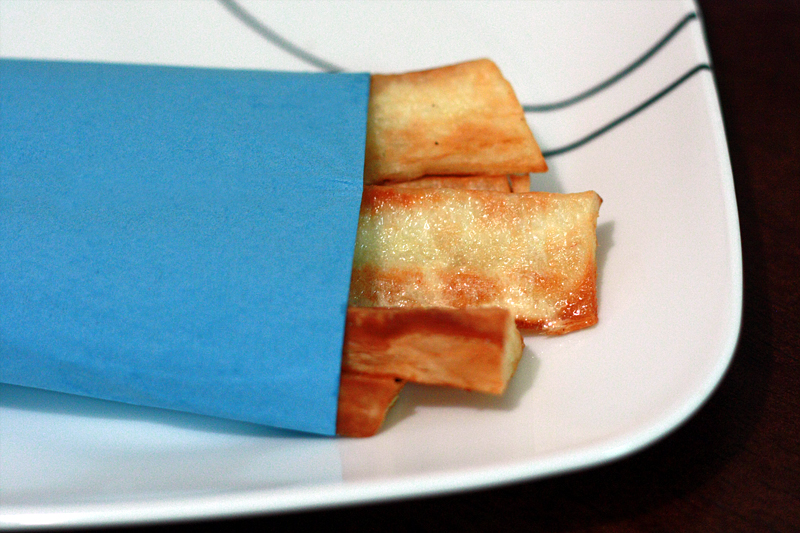
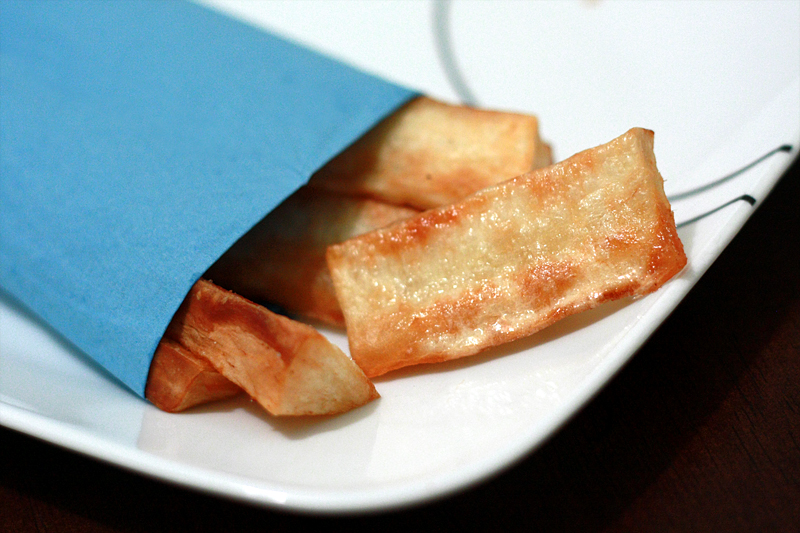
Once the oil is at temperature, add about 1/4 of the yuca into the pan with oil. (Be careful not to overcrowd.) Fry for about 5 minutes, or until the outside of the yuca starts to turn light brown. The outside should be crispy while the inside is mushy. Remove from the oil with a slotted spoon to a paper-towel lined plate and sprinkle with salt.

Serves: 4

Disclaimer: Yuca contains linamarin and lotaustralin, which are broken down by enzymes in the root producing hydrogen cyanide. Not exactly friendly stuff (read: it can kill you if you eat enough). Don't be scared though! The yuca you typically find in stores is the sweet yuca (the bitter yuca is generally used more for commerical purposes) which contains FAR less of the nasty stuff. AND simply boiling this guy will eliminate the toxicity. Whew! Glad we got that covered. In short -- don't eat this raw.


Of all the dishes I made over the course of attempting my second PFB challenge, I honestly think the yuca fries were my favorite. The light sweetness is really balanced out by the starchiness of the yuca and the salt. Please don't try these first time with ketchup or some other dipping sauce - the sweetness in these is so light it's easy to get covered up. I actually prefer just eating them plain (or with a slightly spicy cheese sauce).


Nutrition Facts - Assumes 10% absorption from 4 cups of oil
Amount per serving
Calories 556Calories from fat 202
% Daily Value
Total Fat 22.4g35%
Saturated Fat 4.5g22%
Cholesterol 0mg0%
Sodium 1194mg50%
Total Carbs 86.3g29%
Dietary Fiber 4.1g16%
Sugars 3.9g
Protein 3.1g
Vitamin A 1%Vitamin C 78%
Calcium 4%Iron 3%

Monday, September 27, 2010

Time to vote for Project Food Blog Round #2!!

Can I just stop for a minute and say you guys are amazing and awesome and the absolute best for sending me on to round #2 of Project Food Blog? Because you are.

Here is your chance to do it all over again and send me on to round #3. Yay!


If you're new to this, here's how it goes down:

What is this so-called Project Food Blog?
"Project Food Blog is the first-ever interactive competition where thousands of Foodbuzz Featured Publishers are competing in a series of culinary blogging challenges for the chance to advance and a shot at the ultimate prize: $10,000 and a special feature on Foodbuzz.com for one year."

What was the challenge?

"Challenge Prompt: Ready to tackle a classic dish from another culture? Pick an ethnic classic that is outside your comfort zone or are not as familiar with. You should include how you arrived at this decision in your post. Do your research then try to pull off successfully creating this challenge. Try to keep the dish as authentic as the real deal, and document your experience through a compelling post."

You can check out my entry post here.

How does voting work?
50% of the total score is awarded by three judges:
Dana Cowin Editor-in-Chief of FOOD & WINE Magazine
Nancy Silverton Founder La Brea Bakery, Co-owner Mozza
Pim Techamuanvivit Author of ChezPim.com and The Foodie Handbook
AND
50% of the total score is from votes by Foodbuzz Featured Publishers

I'm not either of those, can I still vote?
Absolutely! Each round there is 1 "Reader's Choice" winner that automatically advances. This is where everybody else comes in! The Reader's Choice is chosen by all non-Featured Publisher members of Foodbuzz. You don't need a blog or anything like that to join. All you need to do is make an account (or sign-in if you already have one) and then vote! Second round you have 200 votes (number of contestants moving on).

To sign up for an account (they don't spam, and you can opt out of any and all emails) all you have to do is go to Foodbuzz.com and click on the "Join Foodbuzz" link all the way in the top right hand corner. Once you have an account, you can then go into "Project Food Blog" in the top menu bar, find me, and vote!

You can also click on the orange "Vote For Me" button above or in the Project Food Blog picture in the sidebar.

Or, you can just click here to go straight to my entry page.

Thank you so much for taking time to vote for me! I appreciate it SO much!

Sunday, September 26, 2010

PFB Challenge #2: Mofongo


Alright ladies and gents, grab your suitcase and Spanish-English Dictionary -- we are headed south of the border. No, not Mexico; think east. Project Food Blog Challenge #2 has given us the boot, sending outside the country in search of "an ethnic classic that is outside your comfort zone or are not as familiar with". Well for me, that could be a lot dishes from a lot of places. Or at least that's what I first thought.


Ever since I started this blog, I have frequently tested myself and stepped outside my comfort zone. I try new cuisines and new techniques on a regular basis. Where many home cooks shy away from certain dishes containing strange ingredients or a process they haven't used before, I jump in feet first. Usually into the ignorant-kid pool. But that's how you learn.

So where do I even begin? Obviously a simple hop across the pond to classic dishes from Western Europe isn't really a stretch outside my comfort zone. I'm not even sure it's out of my comfort zone at all. I wanted to find a dish that not only is something I've never made before, but also is so far outside my comfort zone I've never even worked with most of the ingredients. However, the other stipulation of the challenge is to "keep the dish as authentic as the real deal", which means you have to know what you're eating to know if it's authentic or not.


I was over thinking it. What food do I LOVE to eat, but NEVER make? Oh. That's easy. Puerto Rican food. The summer after I moved out to DC, my mom, sister and I went down to Puerto Rico to visit our roommate, Laura and her family. It's one thing to travel places armed with your Frommer's and tour guides, but a completely different ball game to know someone that actually lives there. Of course we did some touristy things, but we also got a behind-the-scenes tour. We went to La Bombonera, a restaurant in Old San Juan with to-die-for sweet rolls and a ham and cheese sandwich with a kiss of powdered sugar, we explored the kiosks at El Luquillo (which is not something we would have ever been brave enough to attempt on our own), and the best part -- Laura's mom made us a Puerto Rican feast full of authentic local foods. Including mofongo. Mmmm mofongo.


Mo-what-o? Mofongo. A quintessential Puerto Rican dish found in few other places, consisting of mashed plantains and chicharrón, sometimes stuffed with various meats, or if not, served as a side dish. (Don't feel bad if you don't know what it is... Guy Fieri didn't either.) In my quest to find the "classic dish" that was outside of my comfort zone, this one fit the bill. I had happily smashed plantains for tostones while Jennifer or Laura fried and poked and prodded them (the actual work), yet I had never made tostones on my own. And chicharrón? Did I even want to know what that is? Not really, but I had to. Chicharrón is also known in the States as pork rinds, yeah, those golden brown crispy bits found on the snack shelves next to the chips. Fried pork skin. Erm...

But I was committed.

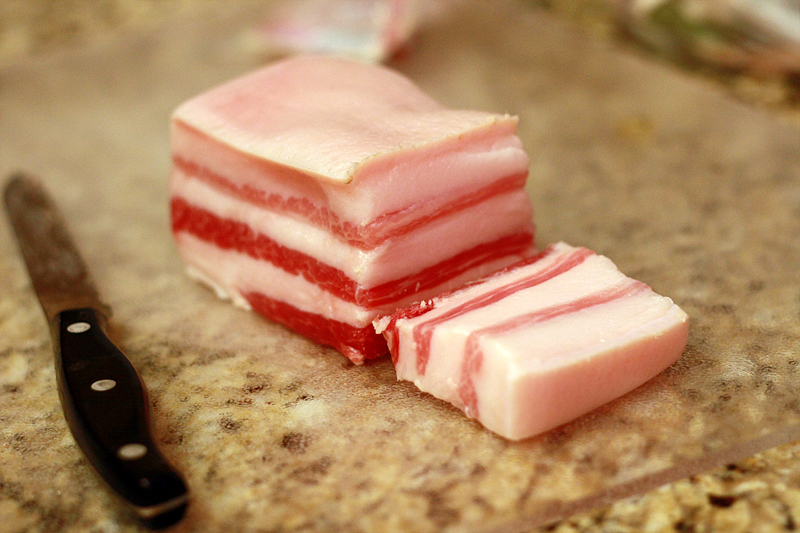
Puerto Rican recipes are like any other recipes handed down generation to generation. Measurements and timing are lacking, and depending on who is making it depends on what exact ingredients are found in mofongo. Every recipe I came across (including the ones from Laura's and her husband's mothers) called for 3 green plantains, garlic, and oil. What exactly to use for pork, though, was all over the board. I saw everything from pork skin, to salt pork, to bagged chicharrón, to bacon. Bacon? Yeah, that one doesn't qualify as authentic, sorry. (Not to mention it would completely change the flavor of this dish.) After much searching, and not finding pork skin, I went with the next best option -- salt pork. Salt pork does contain actual pork skin, as well as a layer of fat, meat, fat, meat, fat. Kind of like bacon. But was it authentic? A quick phone call to Laura and I was in the clear, good to go. It qualified.

So mofongo. Let's get started.

The ingredient list is simple: 3 green plantains, 1/2 pound of salt pork, a couple cloves of garlic, and oil.

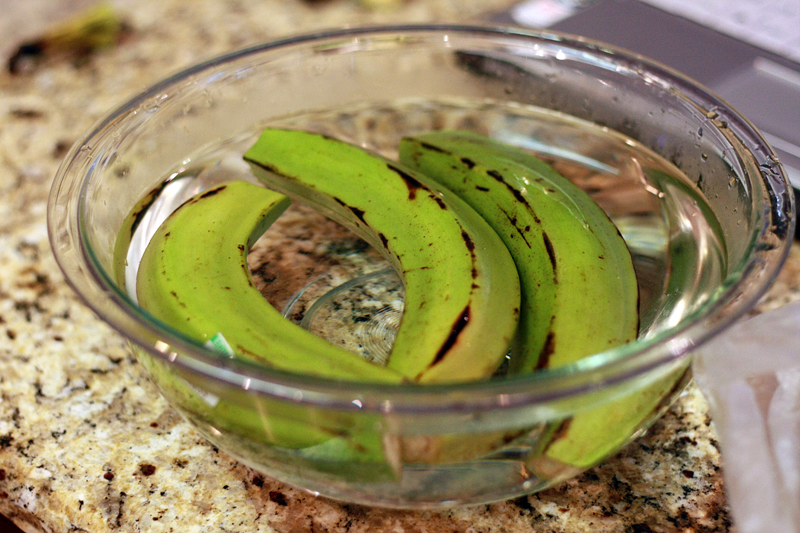
Cut the ends off the plantains, slice the skin lenthwise, and submerge in a bowl of hot water for a few minutes. This will make peeling these bad boys MUCH easier.

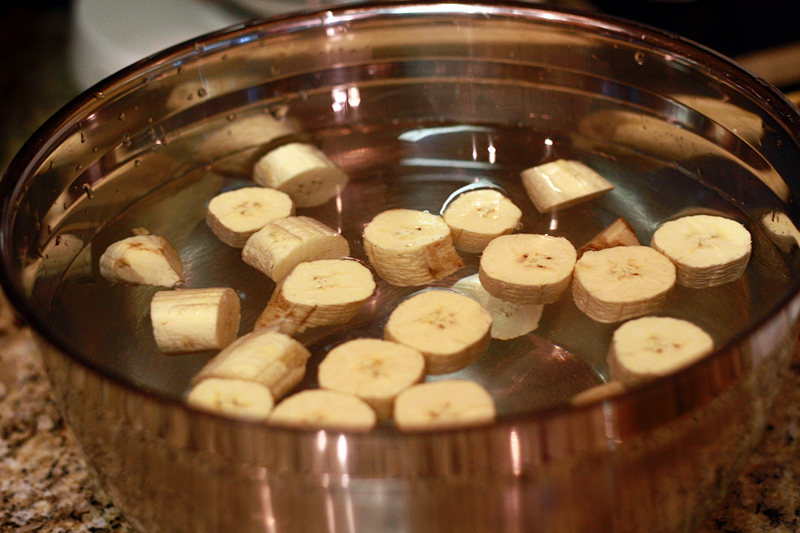
Slice the plantains into 1" pieces, then soak in a bowl of salted water for about 15 minutes.

Cut the salt pork into 1/4" - 1/2" strips, then divide those into thirds. Careful, the skin is very tough to cut through -- we ended up using a kitchen shears.

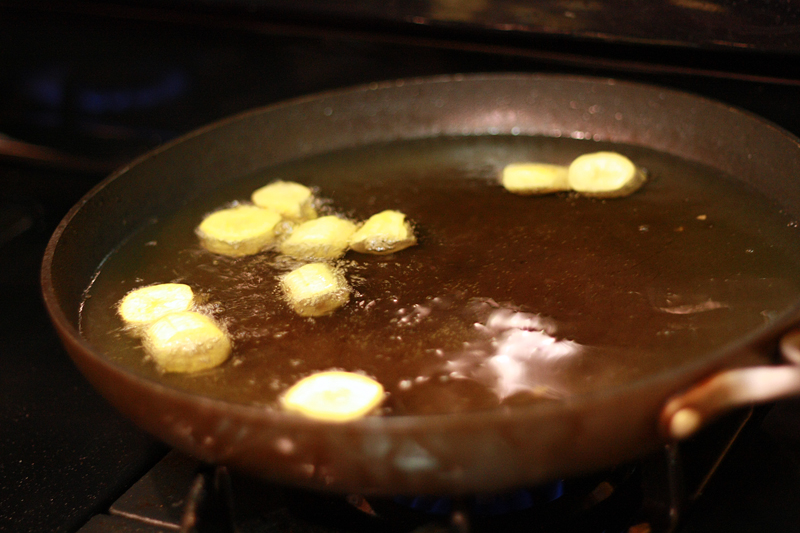
Meanwhile, bring a pan of oil to 375 degrees F. Once at temperature, add in 1/4 to 1/2 of the plaintain pieces. You want bubbles, kind of like a fizzy drink to come up around the plaintains. We're not going for the jacuzzi on super high jets here -- that means the oil is too hot.

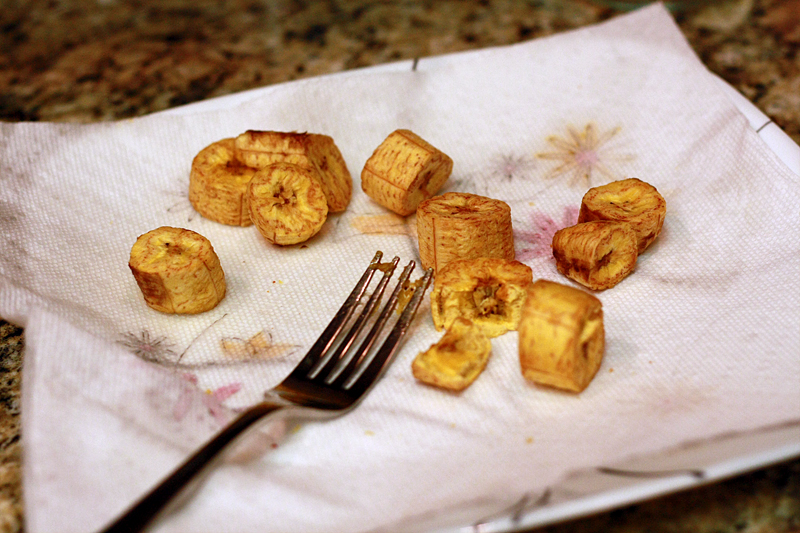
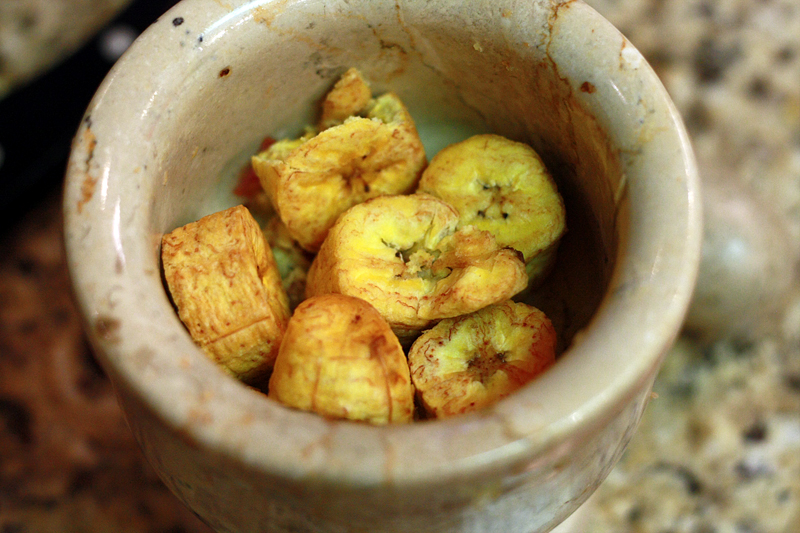
The plaintains are cooked when the top is crisp, but the insides are still mushy. You should be able to tap the top and the fork doesn't sink in, about 5 minutes. Repeat with the remaining plantains.

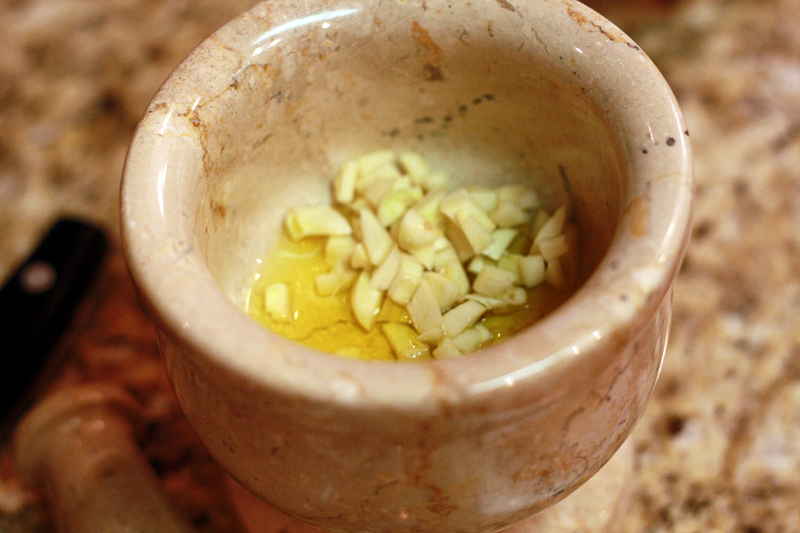
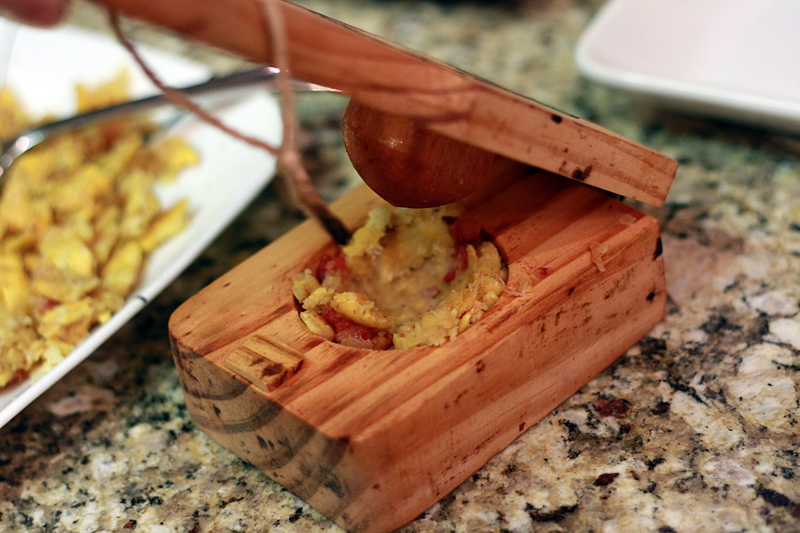
While the plantains are frying, mash together the garlic and oil in a pilón (you can also use a mortar and pestle). Remove to another bowl when finished.

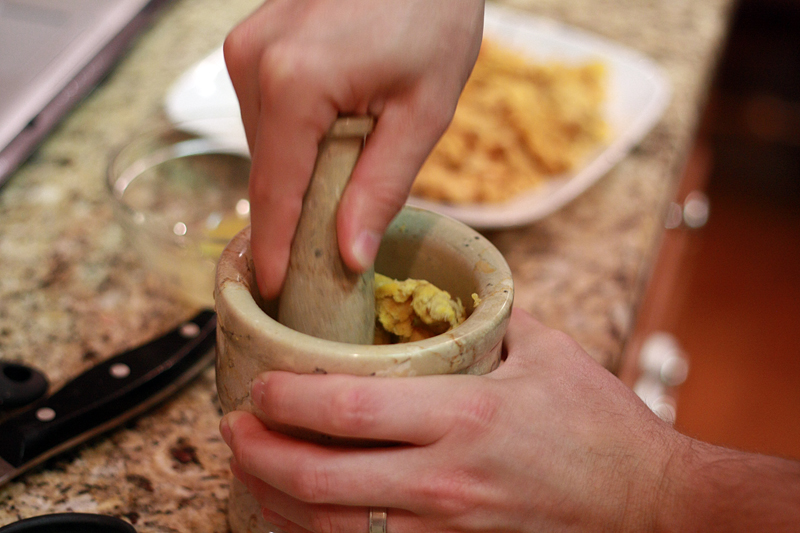
Place the cooled plaintains in the pilón and start mashing. In the meantime, bring the oil back to temperature and start frying the salt pork. Fry for 5-7 minutes -- it will resemble bacon when it is done. Remove with a slotted spoon to a paper-towel lined plate and allow to cool.

Remove the plantains from the pilón and replace it with the salt pork. Mash it well. Take out those anger issues. Once the salt pork is mashed, you are ready to begin combining. If you have room in your pilón, add in all the plantains and salt pork and mash together, adding in the garlic mixture to taste. If you are like me and simply have a small mortar and pestle, add in a healthy amount of plantains, followed by mashed salt pork. (This dish highlights plantains, not the salt pork, so keep that in mind with how much you add of each.)

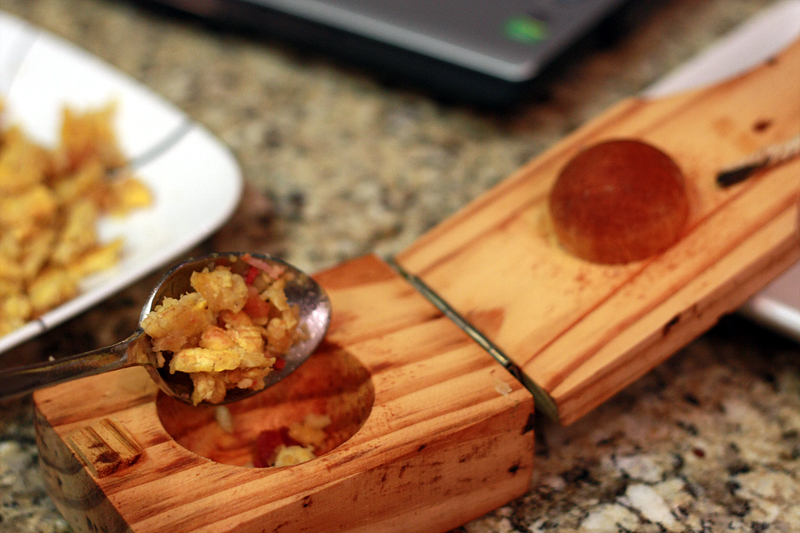
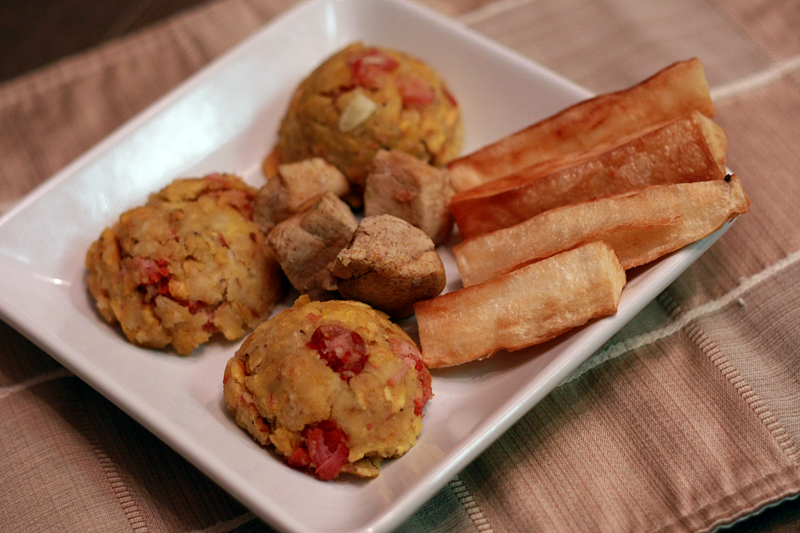
Form mofongo into a ball and serve. Or, you can use a fancy mofongo maker (thank you for buying random souvenirs Jen) to hollow out the center to stuff with meat.


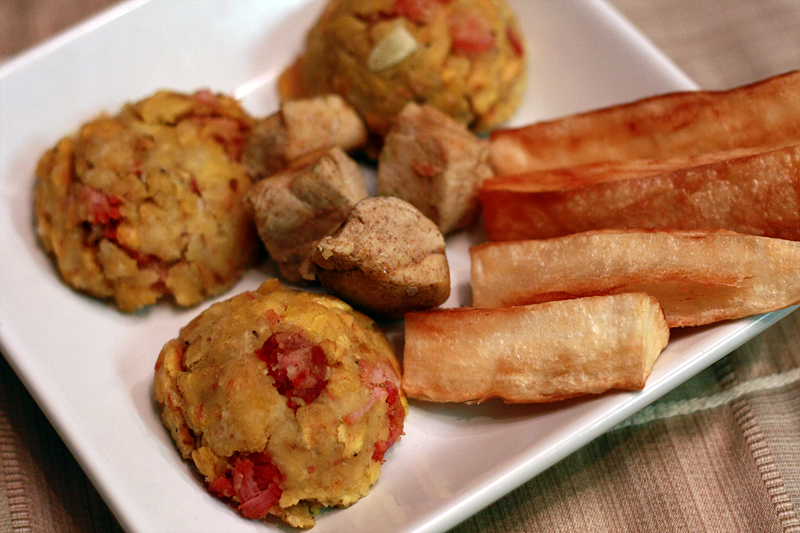
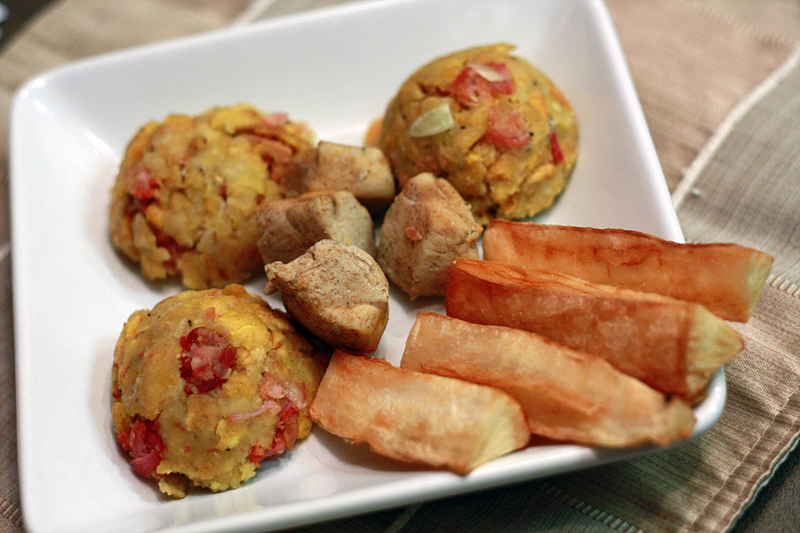
Serve with your other favorite Puerto Rican dishes -- I went with adobo chicken and yuca fries. Yum.

Mofongo
Adapted from: Laura's mom, Juan's mom, and Cocina Criolla

3 green plantains
12 ounces salt pork with skin
3 cloves garlic
1 tablespoon oil (can use the oil from the frying pan)

In a large skillet bring vegetable oil to 375 degrees F.

Cut the ends off the plantains, and slice the skin lengthwise once. Place in a bowl of hot water for several minutes. Peel plantains and cut them into 1" slices. Place in a bowl with salted water (4 cups water to 1 tablespoon salt) for 15 minutes. Fry plantains in the oil for about 5 minutes, or until the outsides are crispy and the insides are still soft, allowing the oil to return to temperature between batches. Remove the plantains from the oil with a slotted spoon or strainer to a paper towel-lined plate.

Cut the salt pork into 1/4" to 1/2" slices. Cut the slices into thirds. Fry the salt pork in the oil (at 375 dgrees) for 5-7 minutes. It will look like bacon does when it is finished cooking. Remove with the strainer to the paper-towel lined plate.

In a pilón or mortar and pestle, add a tablespoon of oil from the frying pan and the garlic. Mash well. Remove to a small bowl.

Add the plantains to the mortar, mash well. Remove and repeat with the salt pork. Once everything is mashed, place all the plantains in the mortar and some of the meat. Add a little bit of garlic and mash everything together. Taste the mix and add in more garlic or meat if necessary.

Form small balls from the mix and serve. Or make slightly larger balls, form a well in the center and stuff with your favorite kind of seasoned meat. Cover meat with extra mofongo mix to finish forming a ball.

Makes: about 9 2" balls


I just love the salty/sweet combination of this dish. But I will admit, this did take me a while to make. Amateur. So totally worth it though. And I definitely appreciated the challenge to finally force myself to make this.


Nutrition Facts
Amount per serving
Calories 328Calories from fat 241
% Daily Value
Total Fat 26.8g41%
Saturated Fat 9.1g46%
Trans Fat 0.3g
Cholesterol 31mg10%
Sodium 273mg11%
Total Carbs 19.4g6%
Dietary Fiber 1.4g6%
Sugars 9.0g
Protein 4.2g
Vitamin A 14%Vitamin C 19%
Calcium 2%Iron 3%

Note: This is my entry post for Project Food Blog Challenge #2. Voting begins on September 27th and closes on September 30th.

Saturday, September 25, 2010

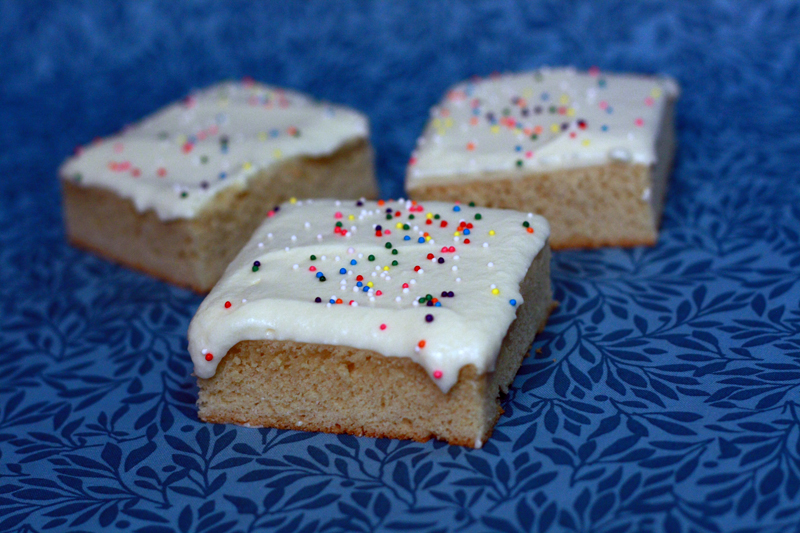
Lazy Man's Sugar Cookies


I just want to give a huge THANK YOU for all those people out there who voted for me and sent me on to Challenge #2 in Project Food Blog! Woohoo!

Just because I like you, and I think you are SUPER awesome for voting for me, I am going to share a nice lazy Saturday sugar cookie recipe with you. Or it can also be used as a last-minute-I'm-supposed-to-bring-a-dessert-to-a-friend's-what-do-I-have-in-the-house? type recipe. I mean, not that I would use it as the latter recipe or anything.... AHEM... moving on.

Lazy Man's Sugar Cookies
Adapted From: Annie's Eats

1 cup (2 sticks) unsalted butter, at room temperature
2 cups sugar
4 large eggs
2 teaspoons vanilla extract
1 teaspoon almond extract
5 cups all-purpose flour
1 tsp. salt
½ tsp. baking soda

1 cup (2 sticks) unsalted butter, at room temperature
1 tsp. vanilla extract
Pinch of salt
4 cups powdered sugar, sifted
5 tablespoons milk

To make the cookies, preheat the oven to 350˚ degrees F. Grease a 13 x 18″ rimmed baking sheet. Combine the butter and sugar in the work bowl of a mixer. Beat on medium-high speed until light and smooth, about 2 minutes. Mix in the eggs one at a time, beating well after each addition and scraping down the sides of the bowl as needed. Blend in the vanilla and almond extracts. In a medium bowl, combine the flour, salt and baking soda. Stir together with a fork to blend. Add the dry ingredients to the mixer bowl and beat on low speed just until incorporated.

Transfer the cookie dough to the prepared baking sheet and press into an even layer. Bake 10-15 minutes, until light golden brown and a toothpick inserted in the center comes out clean. Transfer the pan to a wire rack and let cool completely before frosting.

To make the frosting, place the butter in the bowl of an electric mixer. Beat on medium-high speed until smooth, about 1 minute. Blend in the vanilla, salt, and confectioners’ sugar until smooth, 1-2 minutes. Mix in the milk. Spread over the cookie in the pan, cut into bars and serve.

Makes: 24 bars


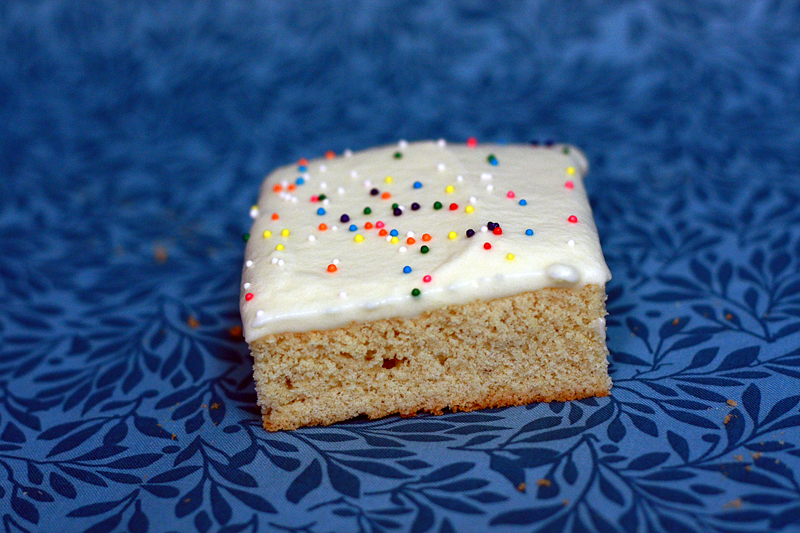
Yes, I did decide to make these for a party at the last minute. I was a little worried as the first time I'd ever made these I overbaked them and they turned out dry and bland. I was determined not to repeat it the second time around, making sure to take them out right before they looked "done" (around 12 minutes). After hurriedly frosting these (it would help if I had checked all the ingredients ahead of time and not just assumed I had powdered sugar... but that's another story) and taking pictures, I stole a quick bite or two and my heart dropped. Adam was giving me the stink-eye for making us late, and I wasn't sure what to do -- they tasted dry, again.

I decided to take them with anyways (along with the stuffed pretzels which I knew would make up for any lackluster sugar cookie bars) and figured I would make a last minute decision to bring them in or not. Well, we get there and after waffling for a moment or two I brought them in. After a couple of hours minding their own business on the table, Adam figured he was hungry and gave them a try. And he said he didn't know what I was talking about, they weren't dry. What? I had to try them again. Surprisingly, they were fine.

So here's my take on it. (After that long spiel.) These are good. First day, but not right away. Let these sit around for a bit after frosting to absorb some of the moisture from the icing. Those extra tablespoons of milk go a long way towards adding towards helping out these bars. At least from what I can figure out.

These may not be the sugar cookies that just wow you and blow you away, BUT. But. They are incredibly easy to make, especially last minute, and especially when you don't feel like plopping little balls of batter on a baking sheet and wait around for multiple batches. Just one and done. I think I can handle that every once in a while.


Note: If you are interested in my next Challenge for Project Food Buzz, I will be posting a classic dish that is "outside my comfort area" sometime today or Sunday. Keep an eye out for it, voting re-opens on the 27th!

Nutrition Facts
Amount per serving
Calories 388Calories from fat 149
% Daily Value
Total Fat 16.5g25%
Saturated Fat 10.1g50%
Cholesterol 76mg25%
Sodium 255mg11%
Total Carbs 56.8g19%
Dietary Fiber 0.7g3%
Sugars 36.6g
Protein 4.0g
Vitamin A 10%Vitamin C 0%
Calcium 2%Iron 8%

Thursday, September 23, 2010

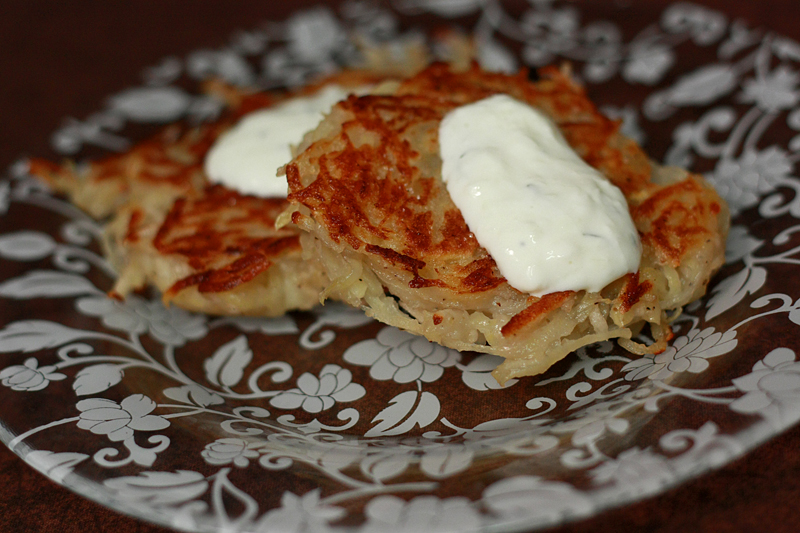
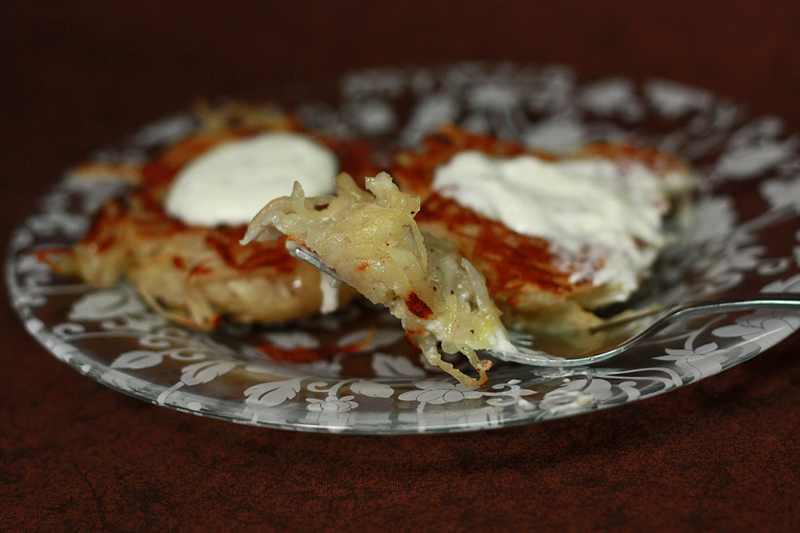
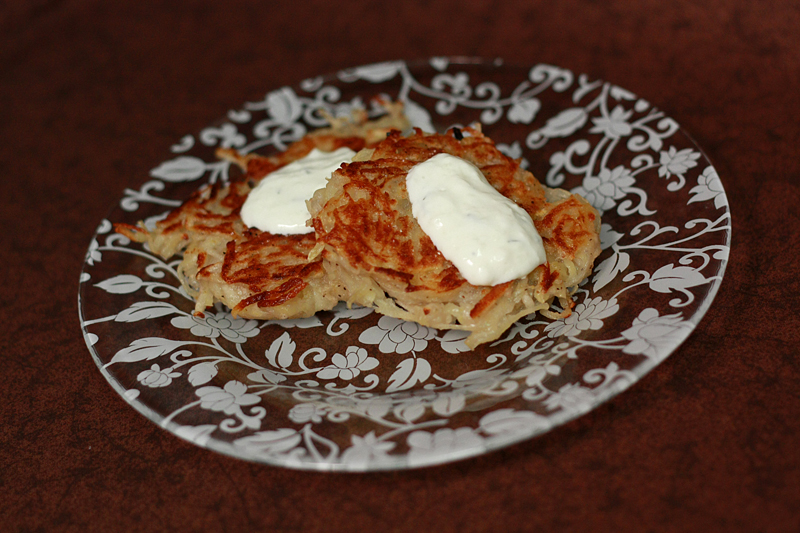
Potato-Apple Latkes


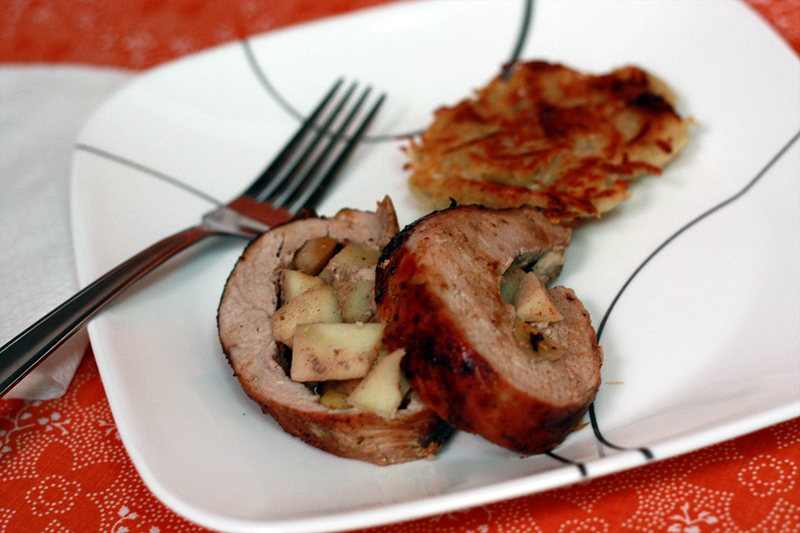
Take a seat. Yes, you really need to be seated for this one. I actually made a side dish to go with my Pork Roulade the other night. Seriously, I know. What's the world coming to? And.... wait for it.... they were both brand-new recipes. Whew, that just wears me out thinking about it again. :)

The apple pickins' from our trip a while back were still hanging around and I wanted to actually use them up. You know, versus my typical throwing away habit. I found a recipe for Potato-Apple Latkes hiding out amongst my other unloved unmade recipes and decided it used up 2 apples, count it in. But you just can't have that for dinner. Well I suppose you could, but I don't think Adam would talk to me for a while after that... that's where the roulade came from. Bye-bye apples!

Potato-Apple Latkes
Adapted from: Bon Appetit, December 2009

6 cups shredded, peeled Yukon gold potatoes (about 2 pounds)
2 cups shredded apples (I used Empire)
1 1/2 teaspoons salt, divided
1/2 teaspoon ground black pepper
1/2 cup all-purpose flour
6 tablespoons canola or vegetable oil, divided
1 teaspoon granulated sugar

In a colander, combine shredded potatoes, shredded apples, and 1 teaspoon salt. Let stand 20 minutes, pressing occasionally with the back of a spoon until barely moist.

In a large bowl, combine potato mixture, remaining 1/2 teaspoon salt, and pepper. Add flour to mixture and toss well to combine.

Heat a 12" nonstick skillet over medium heat. Add 1 1/2 tablespoons oil to pan, swirling to coat. Add potato mixture in 1/3 cupfuls to pan, forming 4 latkes; flatten slightly. Cook for about 6 minutes on each side, or until golden brown. Remove latkes from pan and keep someplace warm. Repeat 2 more times with remaining oil and potato mixture.

Makes: 12 latkes


These actually went really well with the roulade, the starchiness of the potato nicely complimenting the heavy amount of pork. A great addition to this is to add just a little dollop of either sour cream or greek yogurt to the top. The apple flavor in these isn't so much prominent, but it is more there for the juice anyways. And can I say just how great it is to have a shredder attachment for my food processor? Makes life SO much easier.

After cooking one or two of these at the recipe's recommended medium-high heat, I decided that medium heat worked best (read... I burnt the crap out of those first two guys), and it still cooked the latkes through nicely. Definitely a nice side dish for a meat heavy meal, in a non-breakfasty kind of way.


Nutrition Facts
Amount per serving
Calories 160Calories from fat 63
% Daily Value
Total Fat 7.0g11%
Saturated Fat 1.4g7%
Cholesterol 0mg0%
Sodium 299mg12%
Total Carbs 22.9g8%
Dietary Fiber 2.3g9%
Sugars 3.1g
Protein 2.5g
Vitamin A 0%Vitamin C 14%
Calcium 1%Iron 6%

Wednesday, September 22, 2010

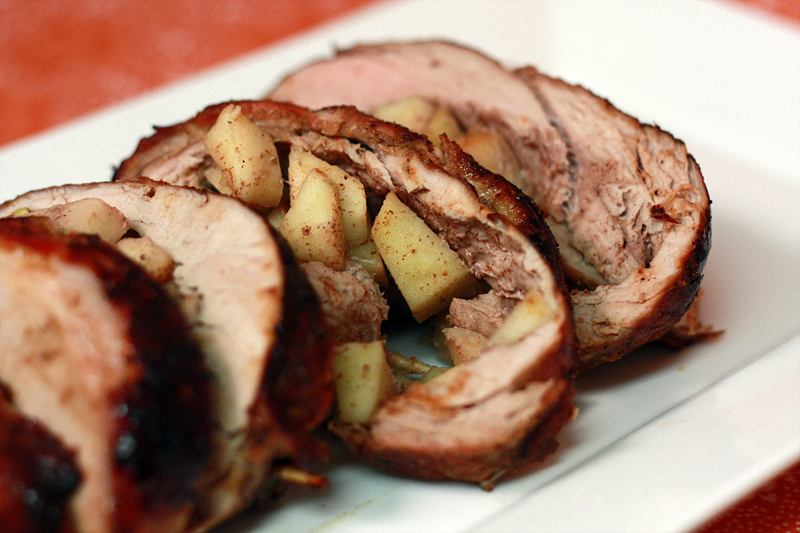
Pork Roulade with Apples


Happy First Day of Fall! Doesn't really feel like, does it? I know many people are still suffering through 90+ degree temps and as for us, well, we get to welcome fall with a great big thunderstorm (with a high of 88). Blah. So far fall is simply teasing, dropping the temperature down into the mid-50s at night, only rising to the 60s maybe low 70s through the morning. Then all of a sudden, it's right back up in the 80s.

Well you know what, fall? I'm going to celebrate you anyways. I'm going to pick your ripening apples and whisk them away for all sorts of fall-type dishes, regardless of what weather you throw at me. I would start diving into pumpkin goodies, except those wonderful cans of pumpkin have yet to start gracing the shelves again this year. You got lucky on that one.

I still had several apples hanging out in my fridge from our earlier apple picking adventure in New Jersey, and a pork tenderloin in the freezer I had picked up on sale. Don't pork and apples go together oh so well? They do. Most recipes I came across containing the two involved pork chops, or the pork cooked on a bed of apples. I didn't want pork and then apples. I wanted pork AND apples. Together and happy. And there's only one way to do that.

Note: Do not yell at me for treating a beautiful pork tenderloin as such in the following recipe. It was what I had and it turned out delicious. So there. :P Feel free to substitute with a pork loin instead.

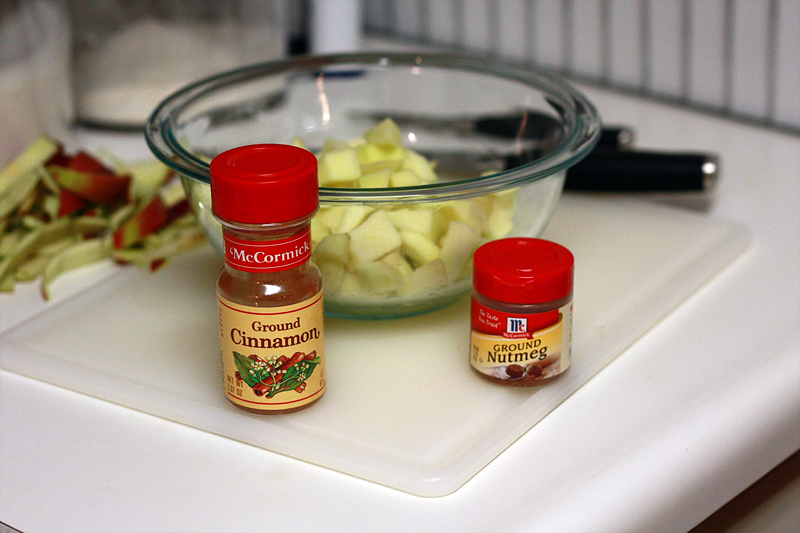
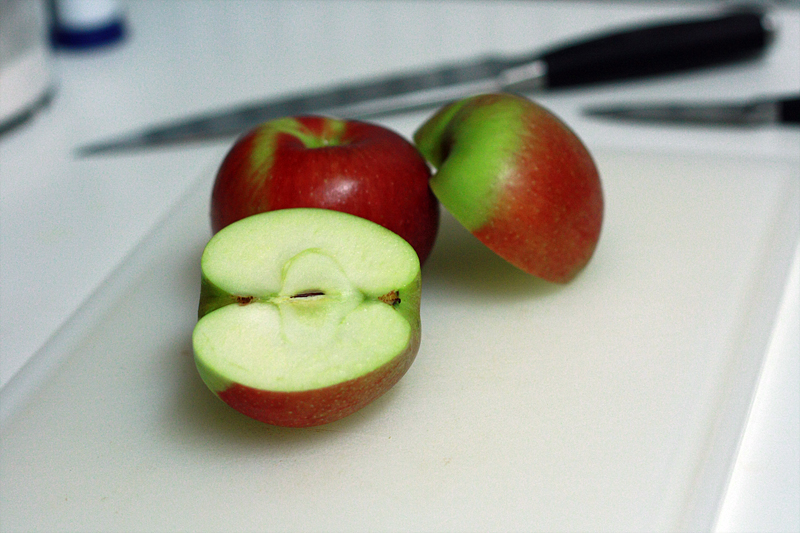
Start by slicing and dicing (and peeling) two apples.


Place the apples in a bowl and get the cinnamon and nutmeg ready to go.


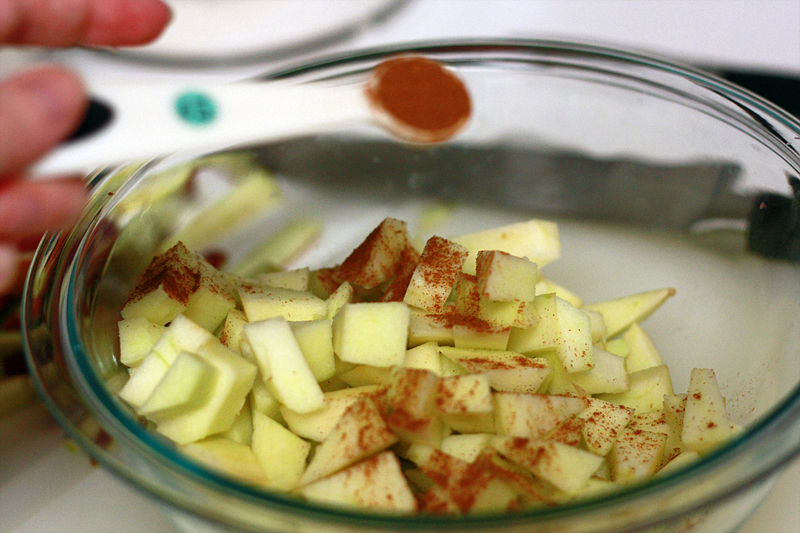
Sprinkle with 1/4 teaspoon cinnamon and 1/8 teaspoon nutmeg.


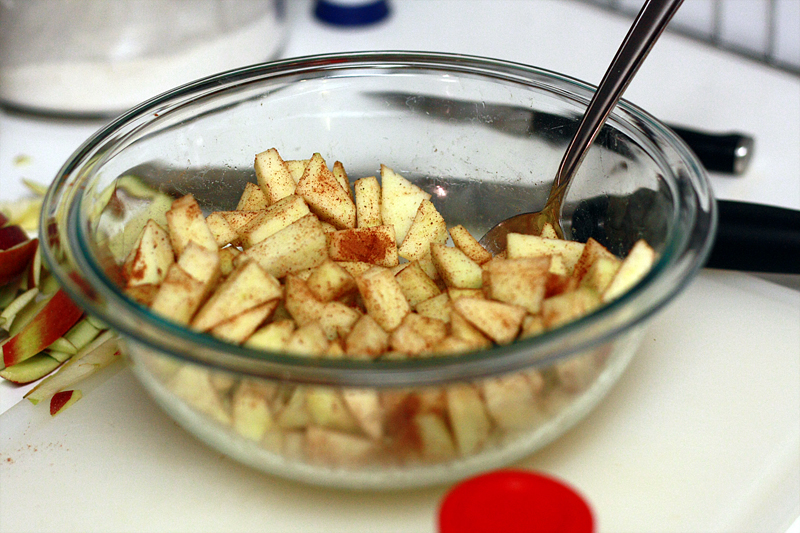
Lightly stir until all the apples are seasoned. Set aside.


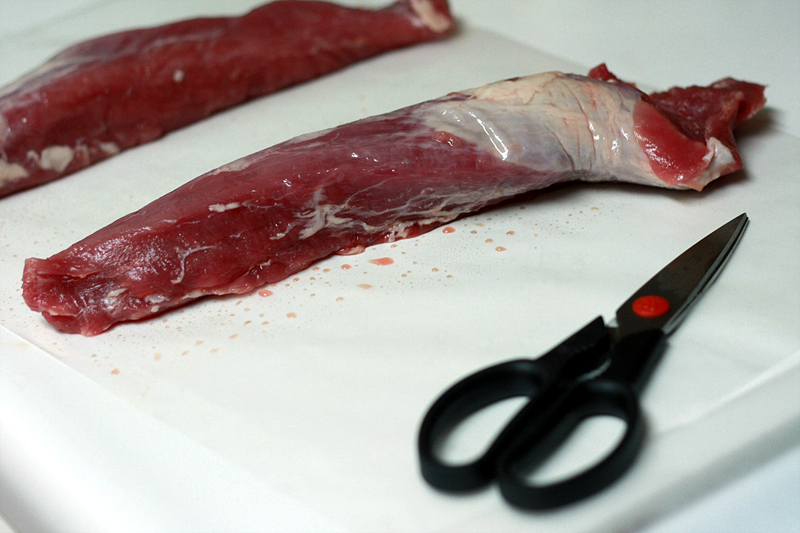
On a parchment-lined counter, get your pork tenderloin ready to go. Mine always comes packaged as 2 1-pound pieces.


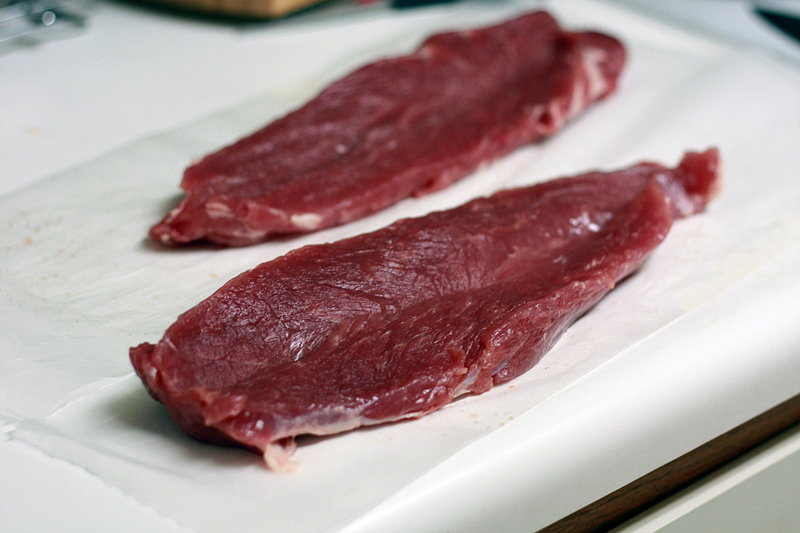
Butterfly each tenderloin by slicing lengthwise from end to end. Do not cut all the way through, just most of the way.


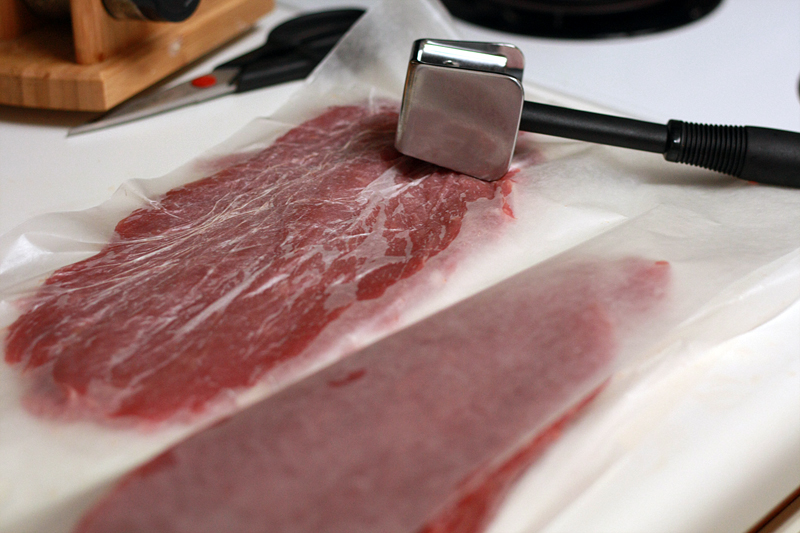
Cover with another sheet of parchment paper (wax paper or cling wrap also works fine) and pound out to an even 1/4" thickness using the flat side of a meat mallet (or other blunt object, I won't judge).


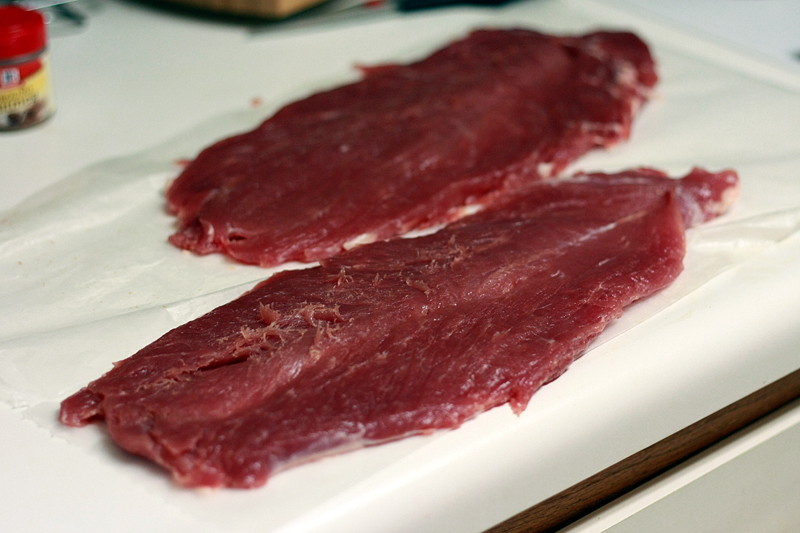
Peel off that paper, and everything looks nice and even.


In a small bowl, combine brown sugar, cumin, salt, ground black pepper, cayenne pepper, and garlic powder. Coat the inside of each tenderloin with about 1/4 of the rub. (Step not included in original dish, but both Adam and I feel like it would add a lot.)

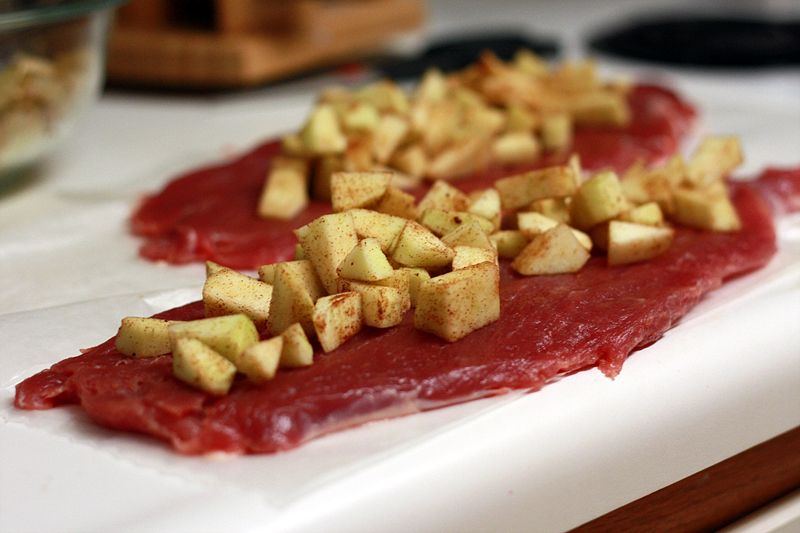
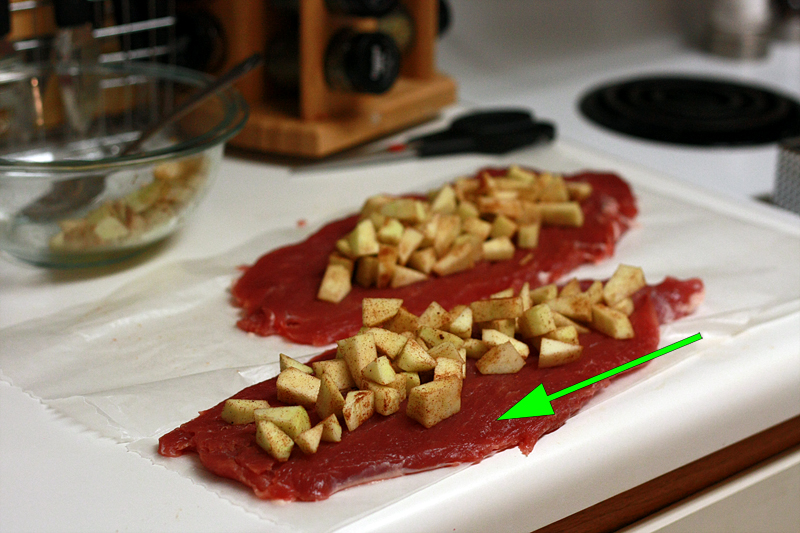
Place about 1/3 of the diced apples along the center line of the tenderloins, leave about 1/2" of free space on each end. Discard or eat remaining apples.


Starting with a short end, roll the tenderloin up until you reach the other side.


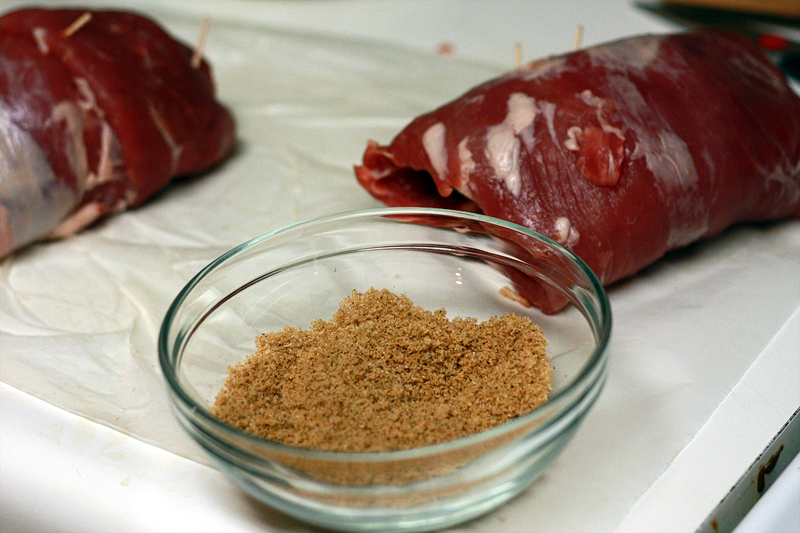
Secure the tenderloins with toothpicks. They may appear to be small porcupines, but we know better, don't we? (Make sure to remove toothpicks prior to eating.) Even if your tenderloins stay as-is, it is important to secure them for future steps.


Get that rub ready!


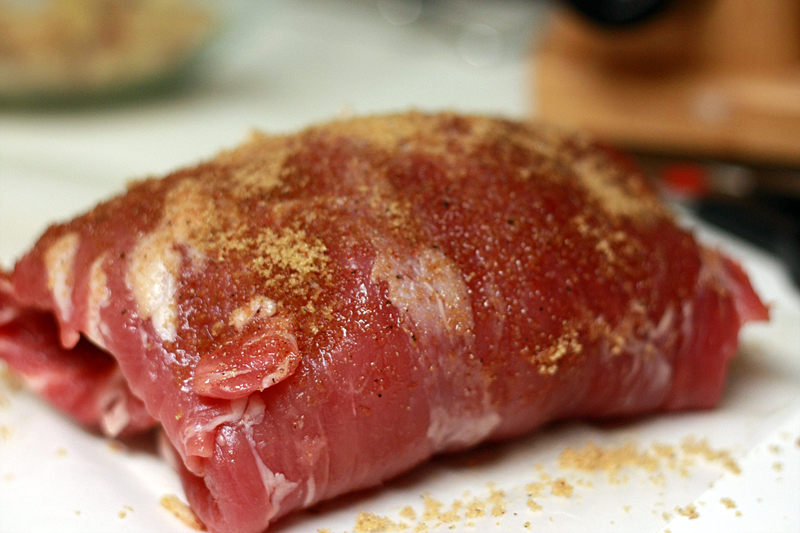
Using about 3/4 of the remaining rub, coat the tops and sides of the tenderloins (1/4 of remaining rub per tenderloin).


Place the tenderloins, rub side down in a large skillet over high heat. Coat the bottoms (now face up) of the tenderloins with the remaining rub. Cook each side for about 1 minute. This helps to lock in the juices as the pork cooks in the oven.


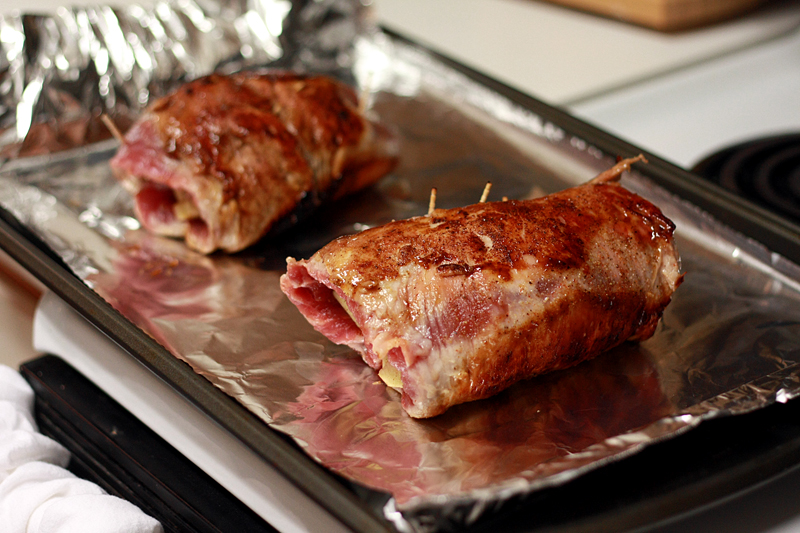
Transfer to a foil-line baking sheet, or a small roasting rack placed inside a baking pan.


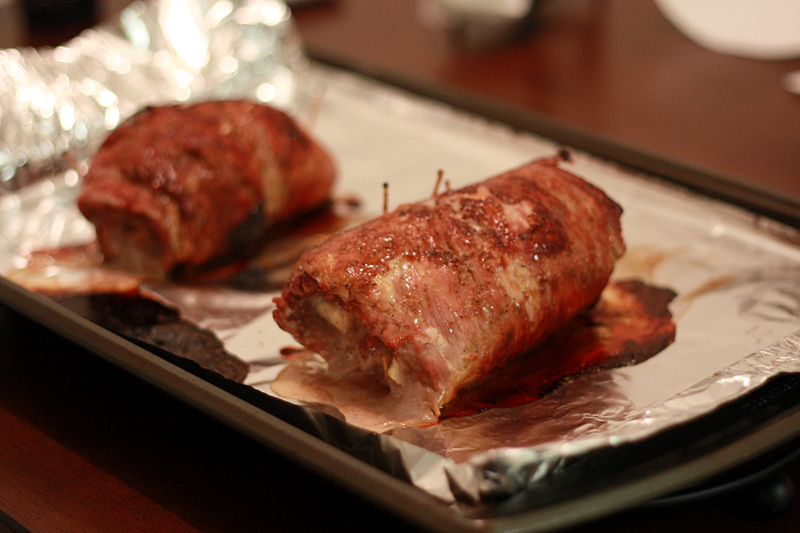
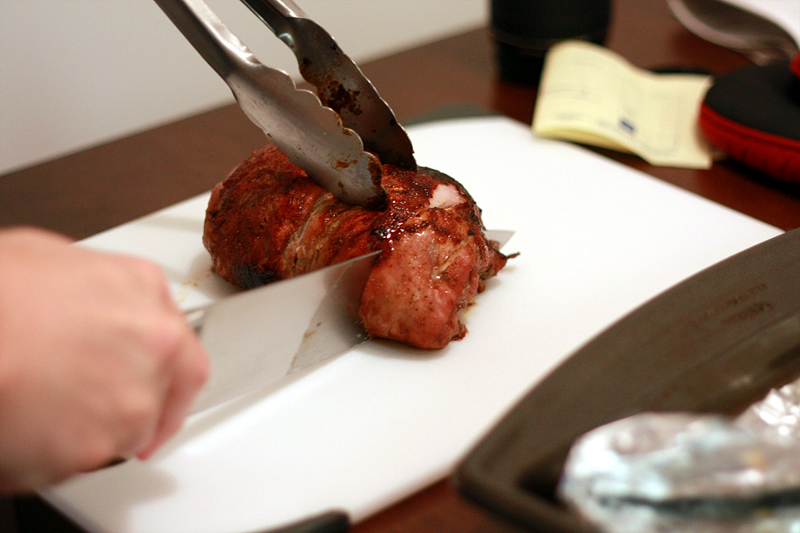
Bake at 350 degrees F for 25-30 minutes, or until the internal temperature reaches 155 degrees. Remove from oven, and allow the tenderloins to rest for 10 minutes.


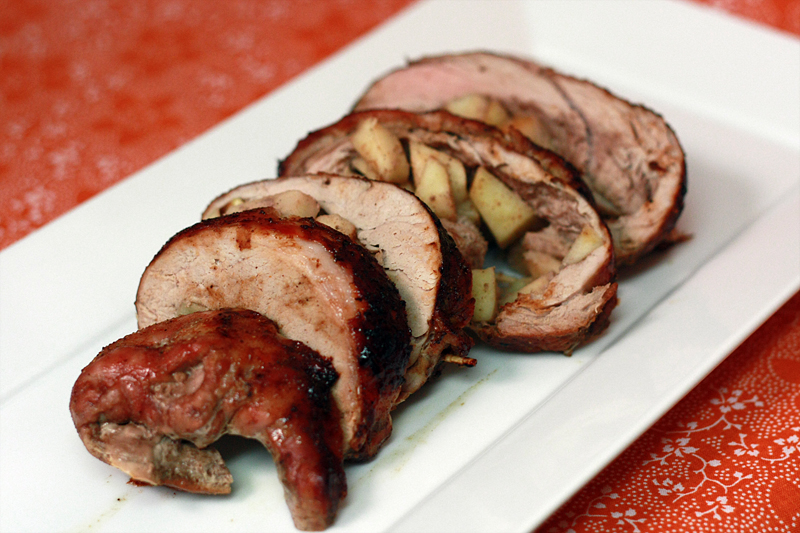
I can hardly wait! It looks so tasty!


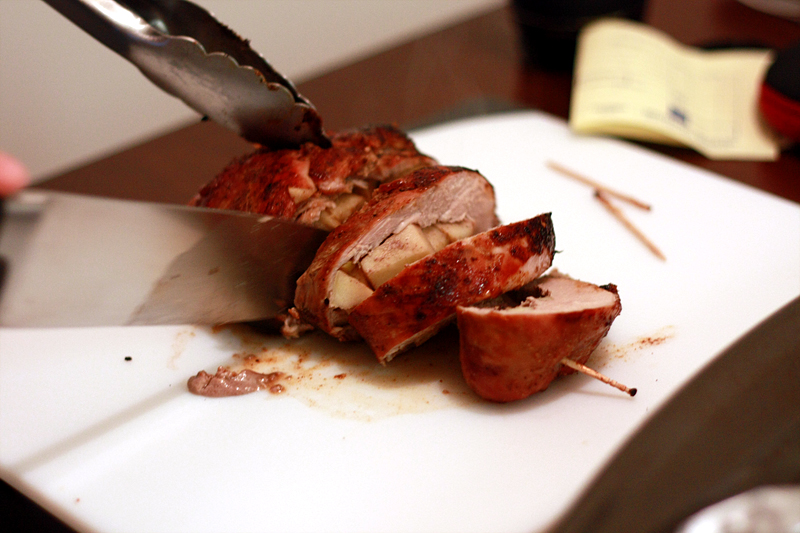
Ah! I see those beautiful apples peaking out at me!


Mmmmm scrumptious.


Pork Roulade with Apples
From: Original Recipe


2 medium apples (I used Empire), peeled and diced
1/4 teaspoon cinnamon
1/8 teaspoon nutmeg

2 pounds pork tenderloins
4 tablespoons brown sugar
1/2 teaspoon cumin
1 teaspoon salt
1/4 teaspoon cayenne pepper
1/2 teaspoon black pepper
1/2 teaspoon garlic powder

Preheat oven to 350 degrees F. Line a baking sheet with aluminum foil and set aside.

In a medium bowl, combine apples, cinnamon, and nutmeg. Stir until apples are lightly coated. Set aside.

On a parchment paper-lined counter, butterfly the pork tenderloin lengthwise. Cover the tenderloin with another piece of parchment paper, wax paper, or cling wrap. Use the flat side of a meat mallet to even the thickness out to 1/4". Remove top sheet of paper.

Coat the inside (side facing up) of the tenderloin with about 1/2 of the rub. Line the center of the tenderloin with a little over 1/3 of the apple mixture. Discard remaining apples. Roll up the tenderloin starting from a short side (end result should be short and wide not long and skinny), and secure with toothpicks. Using 3/4 of the remaining rub, coat the top and sides of the tenderloin.

Heat a large skillet over high heat. Place the tenderloin in the skillet rub-side down. Coat the top (side with no rub) with the remaining rub. Sear each side for 1 minute. Remove to the prepared baking sheet. Bake in the oven at 350 degrees F for 25-30 minutes, or until the internal temperature is 155 degrees. Remove from oven and let rest for 10 minutes. Remove toothpicks and serve.

Serves: 6


This turned out quite tasty and definitely tied the apples and pork together. Adam and I both agreed that adding rub to both the inside and outside would really enhance the flavor of the pork and bring out more of that sweet brown sugar.

Another way I thought about preparing this was in a crockpot seeped in cider. Simply prepare the roulade the same all the way through searing the sides. Then, instead of cooking in the oven, place in a slow-cooker on low for 4 hours with several cups of cider. I really think this method of cooking would make the apples shine. Or you could even do an Oktoberfest beer. Mmmm. So many possibilities!


Nutrition Facts
Amount per serving
Calories 424Calories from fat 134
% Daily Value
Total Fat 14.9g23%
Saturated Fat 5.4g27%
Trans Fat 0.0g
Cholesterol 171mg57%
Sodium 584mg24%
Total Carbs 15.3g5%
Dietary Fiber 1.5g6%
Sugars 12.8g
Protein 54.4g
Vitamin A 2%Vitamin C 8%
Calcium 2%Iron 16%